16 www.selwood.com
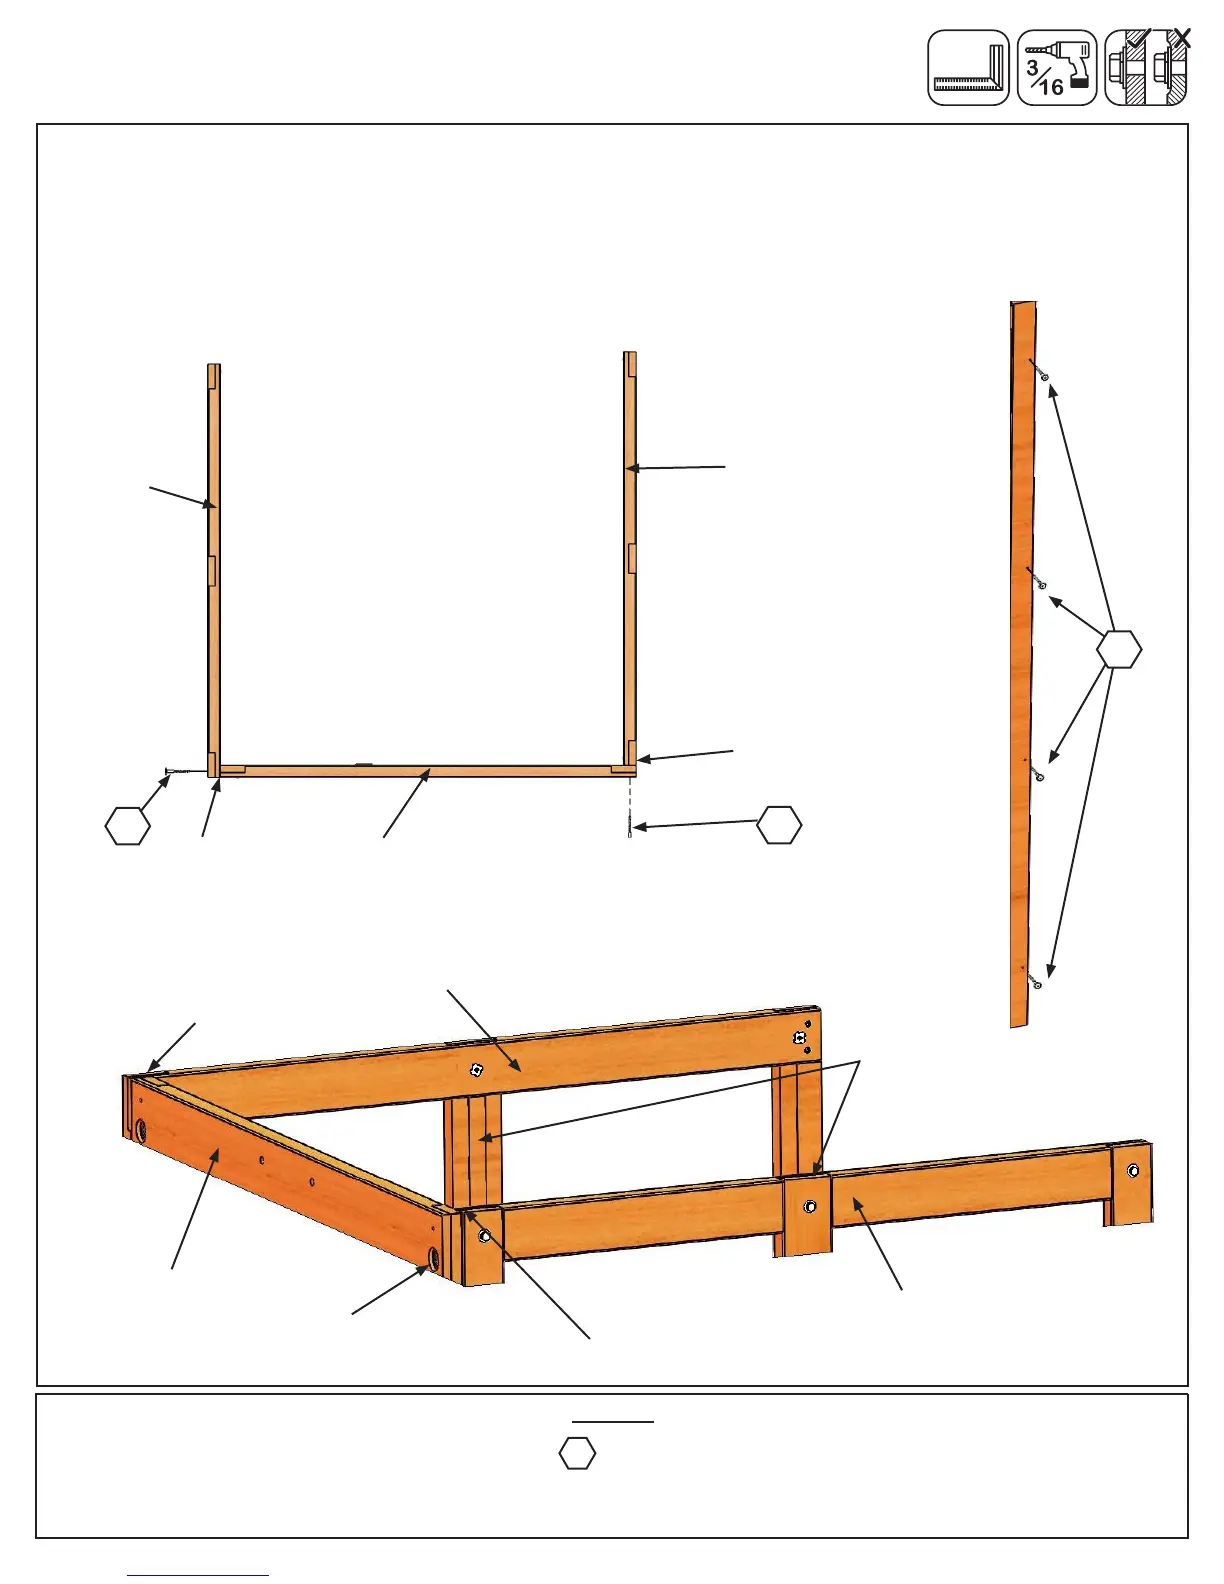
Step 4: Frame Assembly
Part 1
It is important to assemble the frame on a at, smooth surface.
A:PlaceSwingWallfromStep3between2FrontandBackWallsfromStep1,noticingthewallorientations.
Thetopsandbottomsofthewallsshouldbeush.Makesurethewallsaresquarethenusingthepilotholesas
aguidepre-drillwitha3/16”(4.8mm)drillbitandfastentheFrontWalltotheSwingWallandSwingWalltothe
BackWallwith4(WL5)WaferLagsperside.(g.4.1,4.2and4.3)
Fig. 4.2
Fig. 4.1
Flush
Hardware
8 x Wafer Lag
WL5
Flush
Notice Front
Wall overlaps
Swing Wall
WL5
WL5
Notice Swing Wall
overlaps Back Wall
Front Wall
Back Wall
Swing Wall
Back Wall
Swing Wall
Front Wall
Flush
Flush
Top View
WL5
Fig. 4.3
x4per
side
Notice grooves
face inwards
Notice counter sunk
holes on the outside
 Loading...