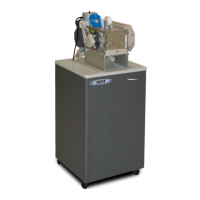
508.366.1488 | www.semshred.com
4.
To remove the bed knives, remove the two bolts on the right and two bolts on the left
of the aluminum deflectors. Remove the three bed knife bolts from each bed knife.
Remove the Bed Knife Holder and finally the bed knife itself.
5.
Take the spare bed knife and insert it exactly the way the dull knife came out. Insert the
bed knife bolts and only hand tighten for the moment. Finally replace the rotor knives
and tighten with a torque wrench to 50 ft./lbs. Remove the tape covering the edges of
all knives and adjust the distance between the rotor knife and bed knife by manually
rotating the rotor in the reverse operating direction. Using the bed knife adjusting
screws will allow you to make slight adjustments to move the bed knife closer to the
rotor knives. The knife gap between the rotor and bed knives should be adjusted to
.001-inch clearance using a feeler gauge. Note: Tool kits are available from SEM.
6.
Before tightening the bed knives securely, determine that the knives are set properly by
manually rotating the rotor in the reversed operating direction to ensure that no rotor
knife touches the bed knives and that the proper gap has been established. Tightening one
bed knife at a time, torque the bed knife bolts to 45 ft./lbs. and re-check the gap of the bed
knife. If the gap is correct, move on to the last bed knife and repeat this step. If the gap is
incorrect loosen the bed knife bolts and readjust the bed knife again until the proper knife
gap is achieved.