2.1 UNPACKING
Set the carton on a rigid flat surface.
Remove everything from carton except generator.
Open carton completely by cutting each corner from top to bottom.
Leave generator on carton to install wheel kit.
2.1.1 PACKING CONTENTS
1-Owner’s Manual 2-Wheels
1-Handle Assembly 2-Wheel Axle
1-Hardware Bag
(including 1-Spark Plug Socket; 1-Extension Housing)
The above contents in this manual are for reference only and do not represent for any specific model.
2.2 ASSEMBLY
The generator requires some assembly prior to using it.
2.2.1 ASSEMBLING THE ACCESSORY KIT
The wheels are designed to the unit to greatly improve the portability of the generator.
NOTE The wheels are Not intended for over-the-road use.
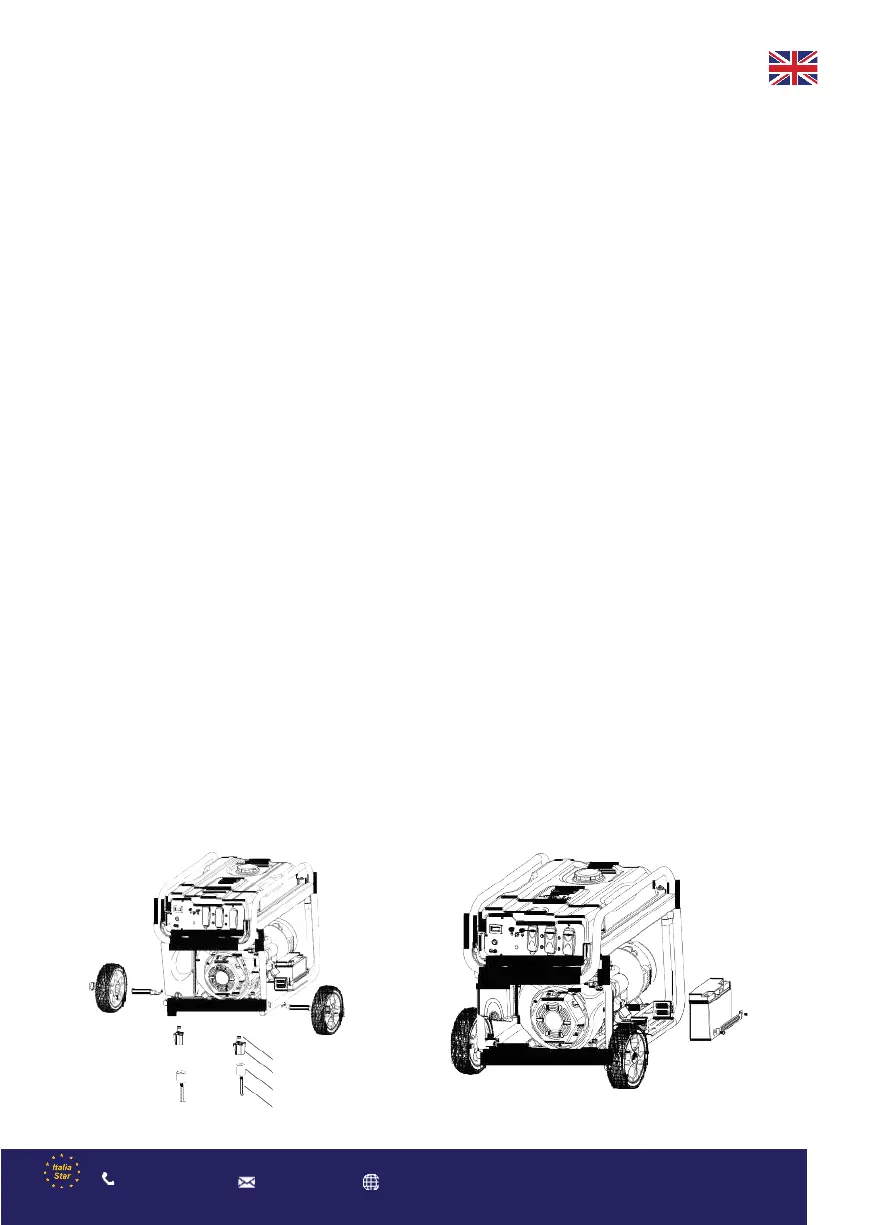
1. Refer to Figures to install wheels as shown.
Slide the axle through the frame brackets.
Slide on the hub,wheel and flat washer,then insert the cotter pin through the wheel axle hole.
Bend the cotter pin tabs outward to lock the pin in place.
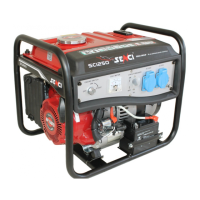
2. The wheel bumpers as shown.
Insert an M6 bolt through the rubber bumper and insert an M8 bolt through the bottom of the bumper bracket. Secure
the bolt with an M8 flange nut.
Install an M8 bolt through the generator frame and through top of the bumper bracket. Secure the bolt with an M8
flange nut.
3. Refer to following Figure to install the handle assembly as shown.
Insert the handle bracket onto the generator frame and secure with two M8 bolts and two M8 flange nuts.
Align the handle assembly holes with the handle bracket holes and secure with one M8 bolt and one M8 flange nut.
SECTION 2 —GENERAL INFORMATION
Italia Star Com Due S.R.L.
www.italiastar.ro
info@italiastar.ro
004/021.433.03.27
80