EN - 16 WWW.SENIXTOOLS.COM
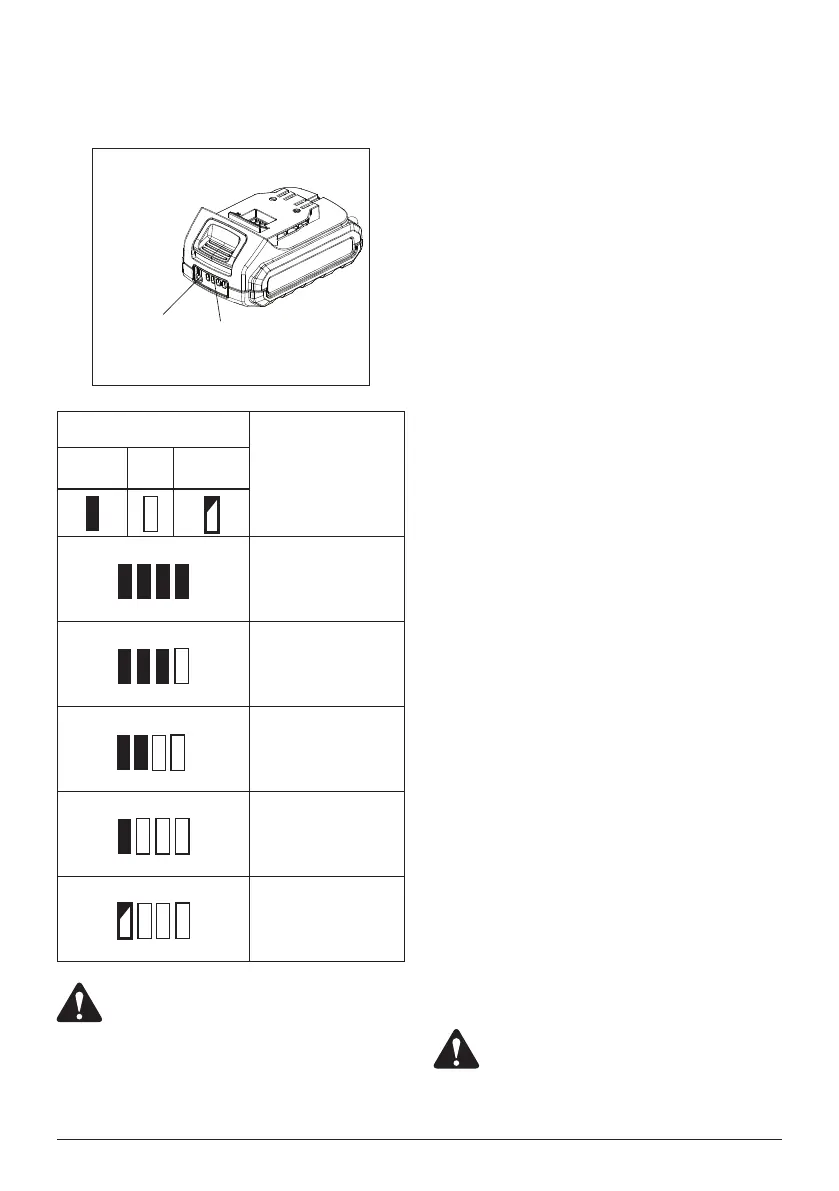
CHARGING INDICATOR
Press the light button on the battery pack to check whether
it needs to charge.
Light Button
Indicator
Lights
Status
Lighted Off Blinking
The battery is at full
capacity.
The battery is at 75%
capacity.
The battery is at 50%
capacity and requires
charging.
The battery is at 25%
capacity and requires
charging soon.
The battery is less than
5% capacity and requires
charging immediately.
WARNING:
Malfunctions may occur when the four lights
blinking in turns.
OVERHEAT PROTECTION
When the tool/battery is overheated, the tool stops
automatically. In this situation, let the power tool/battery cool
before turning the tool on again.
OVERDISCHARGE PROTECTION
When the battery capacity is not enough, the tool stops
automatically. In this case, remove the battery from the tool
and charge the battery.
WORKPIECE AND WORK AREA
SET UP
1. Designate a work area that is clean and well lit. The
work area must not allow access by children or pets to
prevent distraction and injury.
2. Secure loose workpieces using a vise or clamps (not
included) to prevent movement while working.
3. There must not be objects, such as utility lines,nearby
that will present a hazard while working.
PRACTICAL ADVICES
1. Ensure that correct application tool is tted and all
controls are set in correction position.
2. Always hold the product perpendicular to the workpiece.
Holding it at an angle may cause slipping, jamming or
damage of application tool, screw/bolt and workpiece.
3. Always place the application tool in position before
switching the product on.
4. Start with low speed until the screw penetrates
workpiece perpendicularly or bolt is tted along the
thread properly.
5. Before screwing larger, longer screws into hard
materials, it is advisable to pre-drill a pilot hole with the
core diameter of the thread to the entire screw length.
6. Apply proper feeding force to keep the connect of bit/
socket and screw/bolt/nut. Too big feeding force will not
increase working effectiveness but increase the risk of
loss of control and heating of screw/bolt.
7. If the screw/bolt gets stuck in the workpiece, switch
the power tool off, switch to reverse rotation mode and
press the switch trigger slightly to loosen the screw/bolt.
8. Check the application tool regularly during work. Ret or
replace it if necessary.
WARNING:
Do not use the power tool like a hand screw
driver or wrench, this could damage the spindle
lock in the power tool.
 Loading...