© Sensortech Systems, Inc. 2014 Page 3 of 15 Rev.5-2014
Quick Start Guide
To ensure best results, place the PMT-330 on the battery charger cradle and allow to fully charge for
approx. 90 minutes before use or calibration. After the PMT-330 is fully charged perform the following:
1. Remove the PMT-330 from the charger and press the Power key.
2. Hold the PMT-330 upright in the air ensuring there is nothing near the
Sensor Electrode located on the opposite side of the unit below the
display and press the ENTER key <ENTER>. This performs the
Zero/Reference Operation which calibrates the PMT-330 to the air
humidity, temperature, mechanical and electrical conditions and zeros
the moisture display. Do this anytime you wish to use the PMT-330.
3. Simultaneously press the Up
▲
and Down
▼
keys to unlock the
PMT-330 to enable user changes to the configuration and calibration.
The message ‘Unlocked’ will be displayed momentarily to indicate the
user can change the configuration and Standardize the PMT-330.
4. Press the FUNCTION key <FUNCTION> one time. This displays the
current Product Code. There are 10 Product Codes that can be
configured for 10 different calibration settings. Pressing <FUNCTION>
repeatedly cycles thru the various menus and functions used to
configure and Standardize the PMT-330.
5. Press <FUNCTION> until ‘Span’ is displayed. The Span value
specifies the span (slope) value. The initial Span value should be
equal to +01.00 and can be changed by pressing the Up
▲
, Down
▼
, Left
◄
and Right
►
keys.
Press the SEND key <SEND> to save a new Span value.
6. Press <FUNCTION> until ‘Zero’ is displayed. The Zero value specifies the zero (offset) value. The
initial Zero value should be equal to +00.00 and can be changed by pressing the
▲
,
▼
,
◄
and
►
keys. Press <SEND> to save a new Zero value.
7. Press <FUNCTION> until ‘Diagnostics’ is displayed. Press <ENTER> to select the Diagnostics menu
then press <FUNCTION> repeatedly to cycle thru the diagnostic parameters until ‘Std. Factor’ is
displayed.
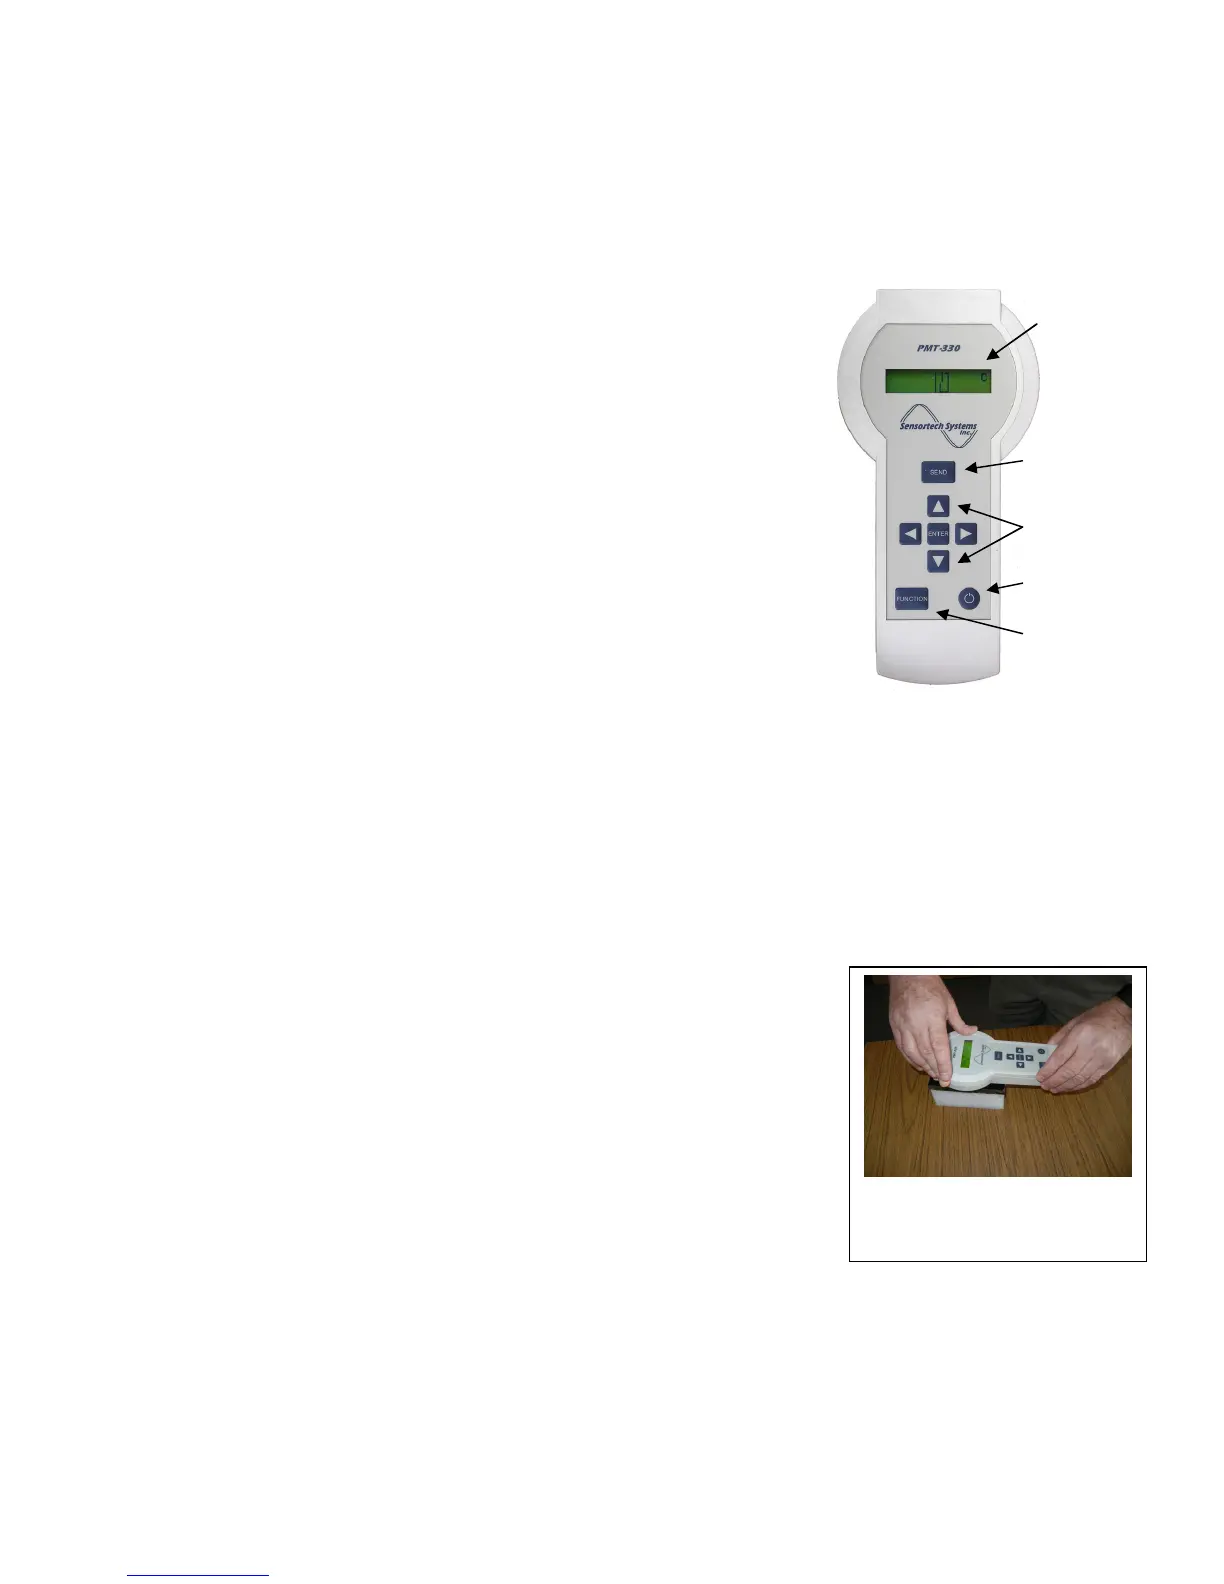
8. Place a clean and dry Standardization Reference Block onto a table and
position the PMT-330 with the Sensor Electrode in the center of the block.
Press down firmly on the PMT-330 and press <ENTER>. Note the new
‘Std. Factor’ value and press <ENTER> several times until the value
displayed is approx. the same for each press of <ENTER>.
9. Press <SEND> to save the new ‘Std. Factor’ value to memory.
10. Verify the Moisture display equals 25. Note that the ‘Moisture’ display =
25 when Span = 1 and Zero = 0. For other Span and Zero values see
page 10.
11. To check the PMT-330 moisture measurement, place the Sensor
Electrode against your hand and verify the Moisture display is greater than
500 and then place the Sensor Electrode on Standardization Block to
verify Moisture display is 25. Repeat steps 1 thru 11 as needed on a
weekly, monthly or quarterly basis.
12. The PMT-330 has been calibrated for Zero and Standardized to the reference target (Standardization
Block) and is now ready for use.
Note: Place the PMT-330 on the charging cradle when not in use.
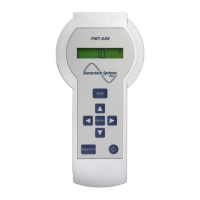
SAVE KEY
POWER KEY
UNLOCK KEYS
SELECT KEY
for Dielectric Value -
Moisture Display
& Configuration
Settings/Values
Press the Sensor Electrode
firmly onto the center of the
Standardization Block
 Loading...