2.4 Wired temperature probe
3. Example use case
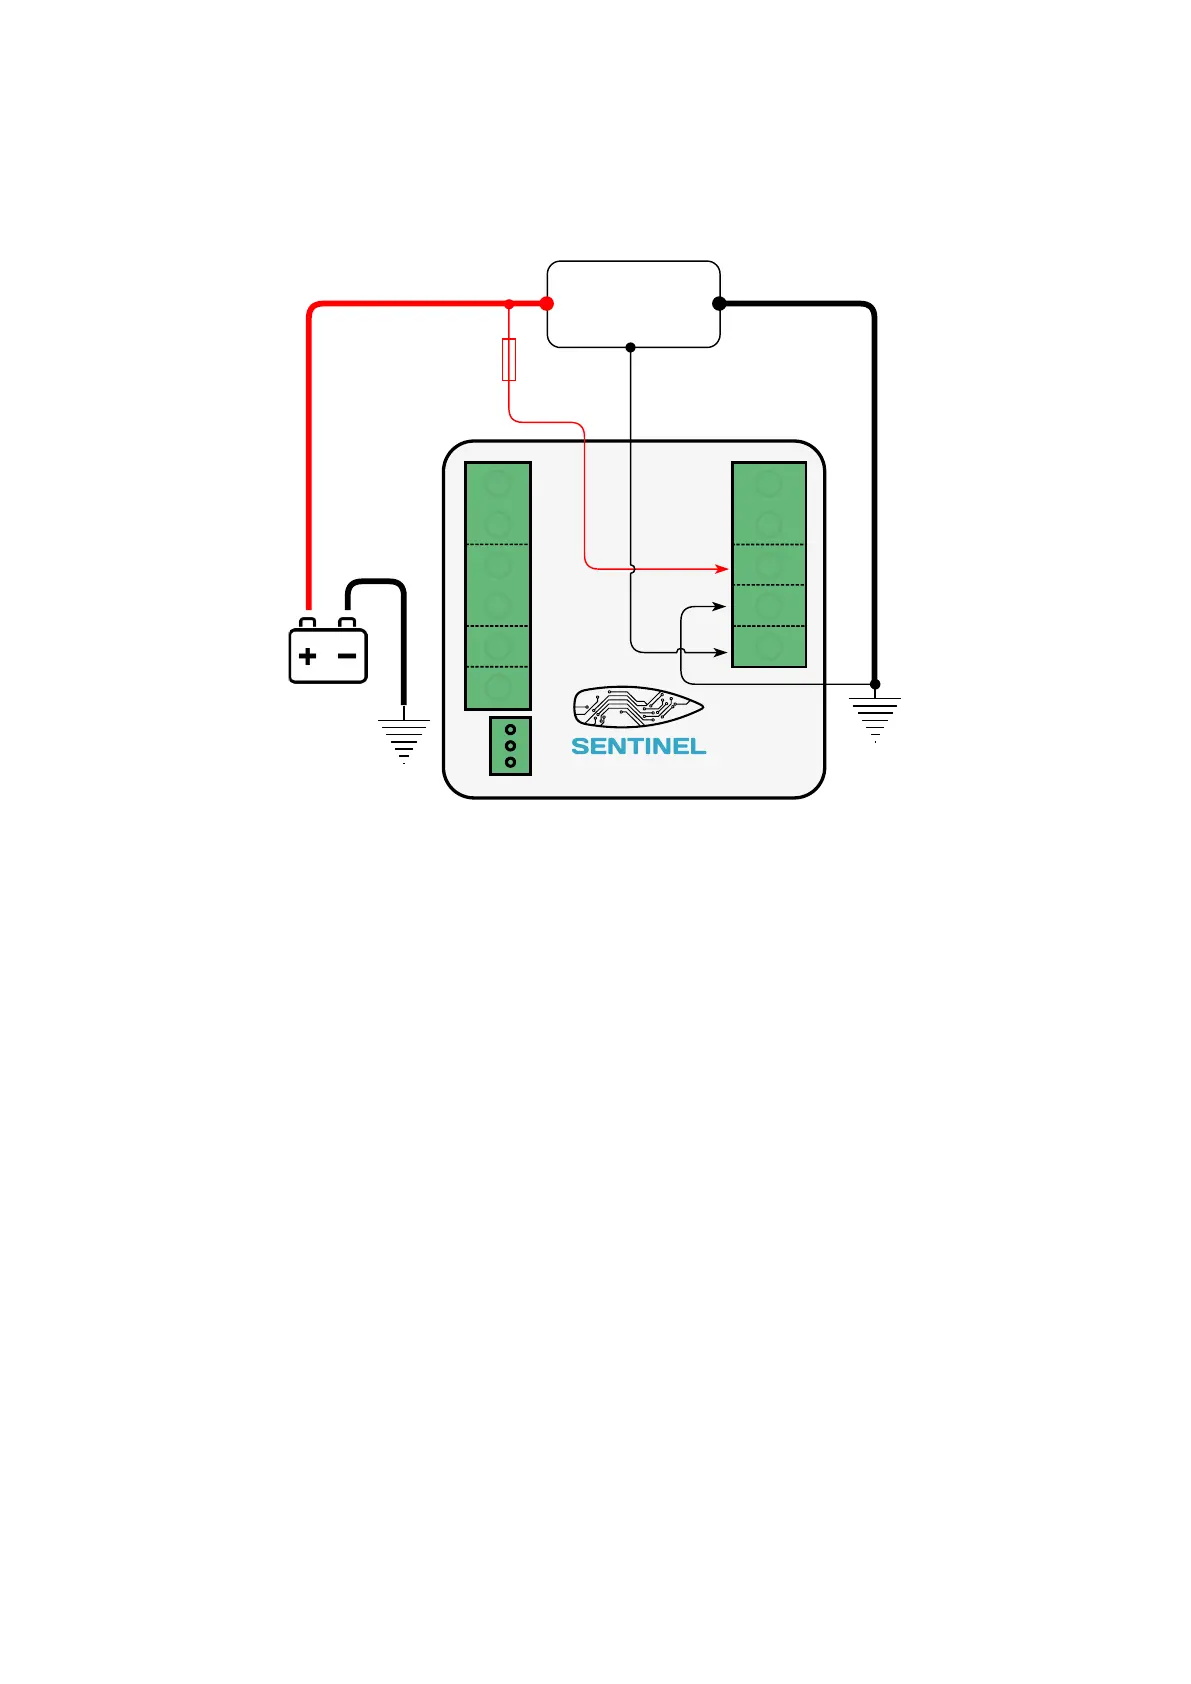
In the following example the Sentinel Hub will be used to monitor one (magnetic) switch, used as a
door sensor and switch one AC load line as shown in fig 3.
1. Connect the wires for magnetic switch to IN 1 and power relay coil to terminal SW 1.
2. Attach the ground wire to the terminal labeled GND.
3. It is recommended to connect the 12/24 V power line to +Vbat input to supply the hub and monitor
the battery supply voltage.
A wired temperature probe can also be used to measure temperature in ducts, on different surfaces,
etc... A probe with 3m cable can be purchased separately.
Connect the wires labled GND, DATA and POWER of the temperature probe into the designated holes
in the Temp. probe connector.
RPM input is designed to work with an alternator's RPM pulse ouptut, most commonly marked "W".
Alternator's pulse ouptut is a scaled representation of actual RPM, which is often called a "pulse code".
Default engine pulse code is set to 10.7. In case your alternator has a different pulse ratio, please con-
tact support.
Engine RPM
2.3
RPM input is also used as an engine hours counter, counting the cumulative time the engine was oper-
ating.
When using the Hub to measure RPM, please connect the +Vbat supply line as well in order to ensure
the correct operation.
Rsh hi
Rsh lo
RPM in
+Vbat
GND
SW1
SW2
IN 1
IN 2
Rsh hi
Rsh lo
RPM in
+Vbat
GND
HUB
Alternator
Engine
Battery
Pulse
output
(W - terminal)
5