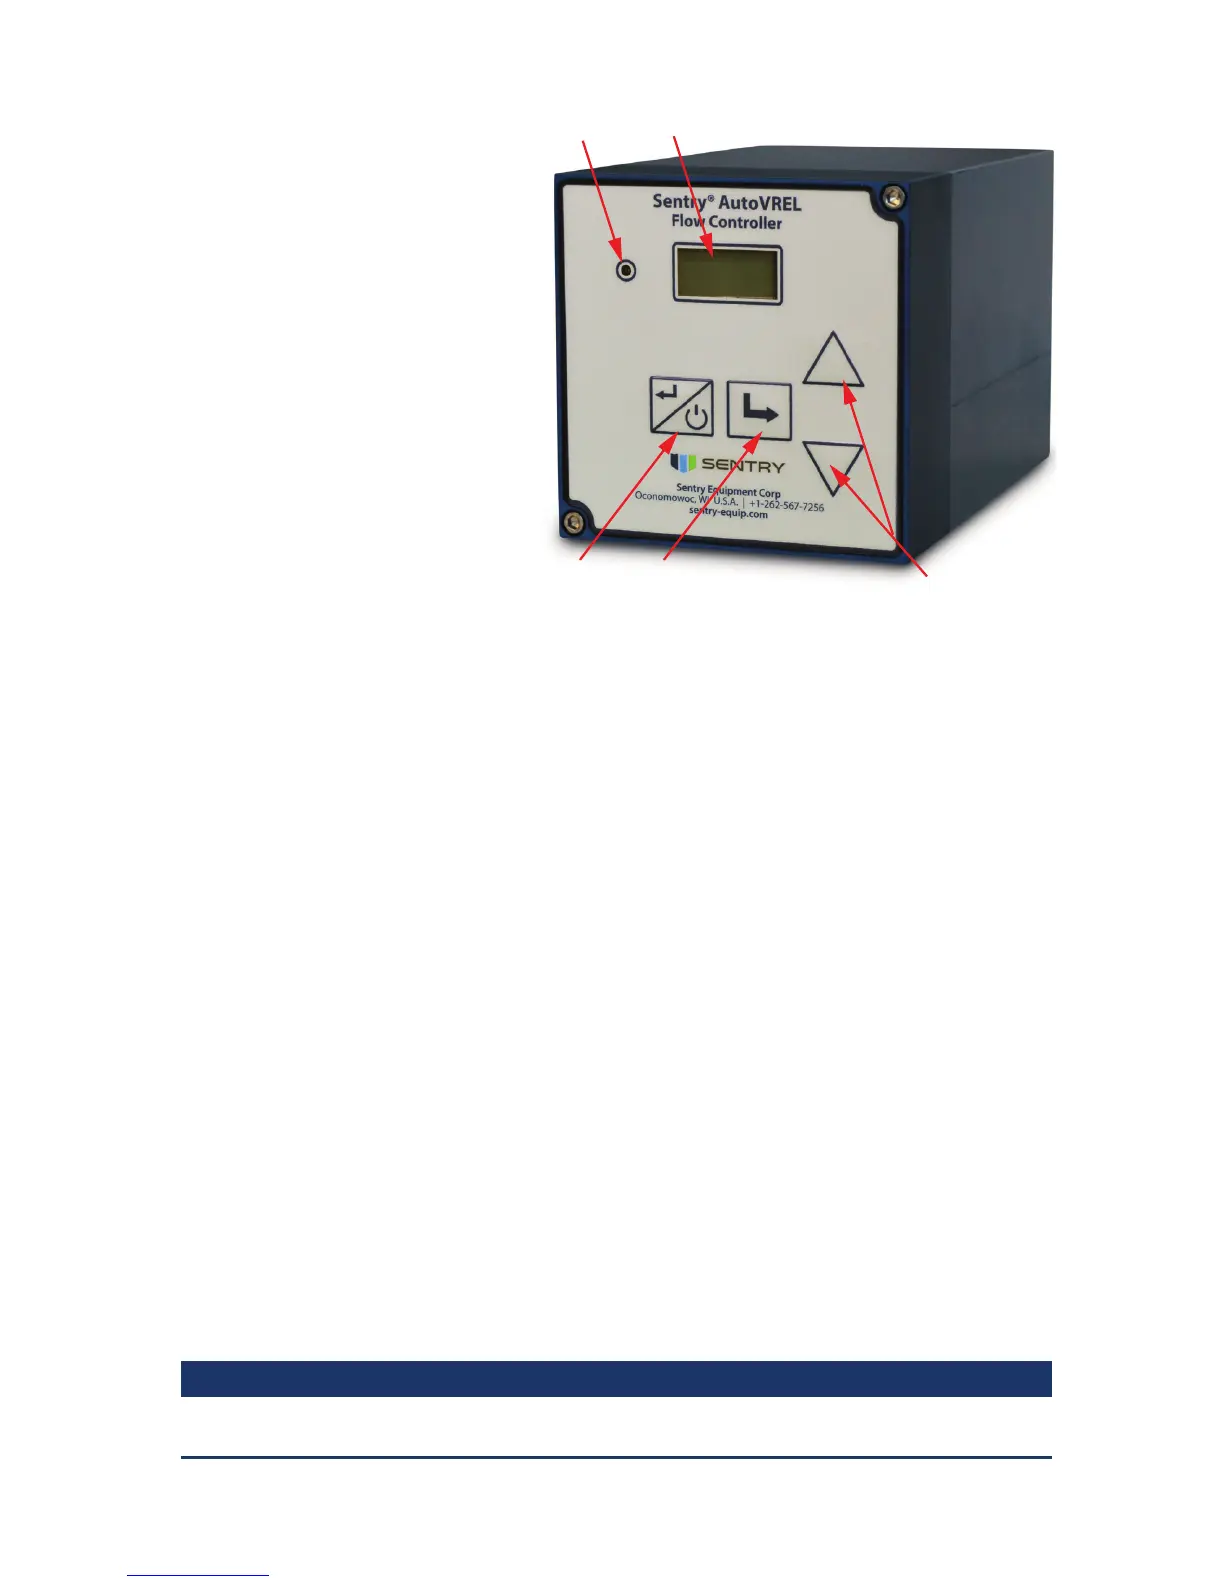
Sentry AutoVREL Flow Controller 15
1. Operation LED
illuminated: ow within
specied limits
o: ow not within
specied limits
2. 2 x 8 LCD display
3. ESCAPE button
4. ENTER button
5. UP and DOWN buttons
Power on Sequence
The following sequence should be
followed during initial power up
of the AutoVREL ow controller or
after power interruption.
1. Ensure the sample inlet
isolation valve is closed so that
sample is not owing.
2. Introduce power to the AutoVREL ow controller. Once powered up, the unit begins
an initialization sequence. During initialization, the display reads “VREL CAL” until
initial calibration is complete.
3. Open the sample inlet isolation valve. When ow is detected, the unit begins
automatic ow management to the preset ow rate.
Setting Flow Rate
1. The AutoVREL ow controller has two screens available during operation. The user
may toggle between these screens by pressing the ENTER button on the keypad.
a. Set point (in cc/min ) VREL % open
b. Flow Rate (actual) and VREL % open
2. Toggle through the display screens until “Set point (in cc/min ) VREL % open” is
displayed. Adjust the ow rate set point by pressing the UP or DOWN button on the
keypad until the desired ow rate is displayed. The AutoVREL ow controller actively
manages ow to the newly set position.
Set Up/Stand By
1. The AutoVREL ow controller requires very little setup, with only the following
features available:
a. Cal VREL – recalibrates VREL valve to ensure accurate ow control
b. AutoCAL Freq - sets the time between auto-calibrations in months. This can be
set from 1 to 6 months with an option to disable. Default frequency is 1 month.
 NOTE
The AutoVREL controller does not include a real time clock so the time between AutoCAL
occurrences assumes a 30-day month.