• Swivel up the FLEX display, and push rmly at the frame just
above and just below the touch screen. The display will snap
into place and seal against the wall surface.
5. Power Up Conguration
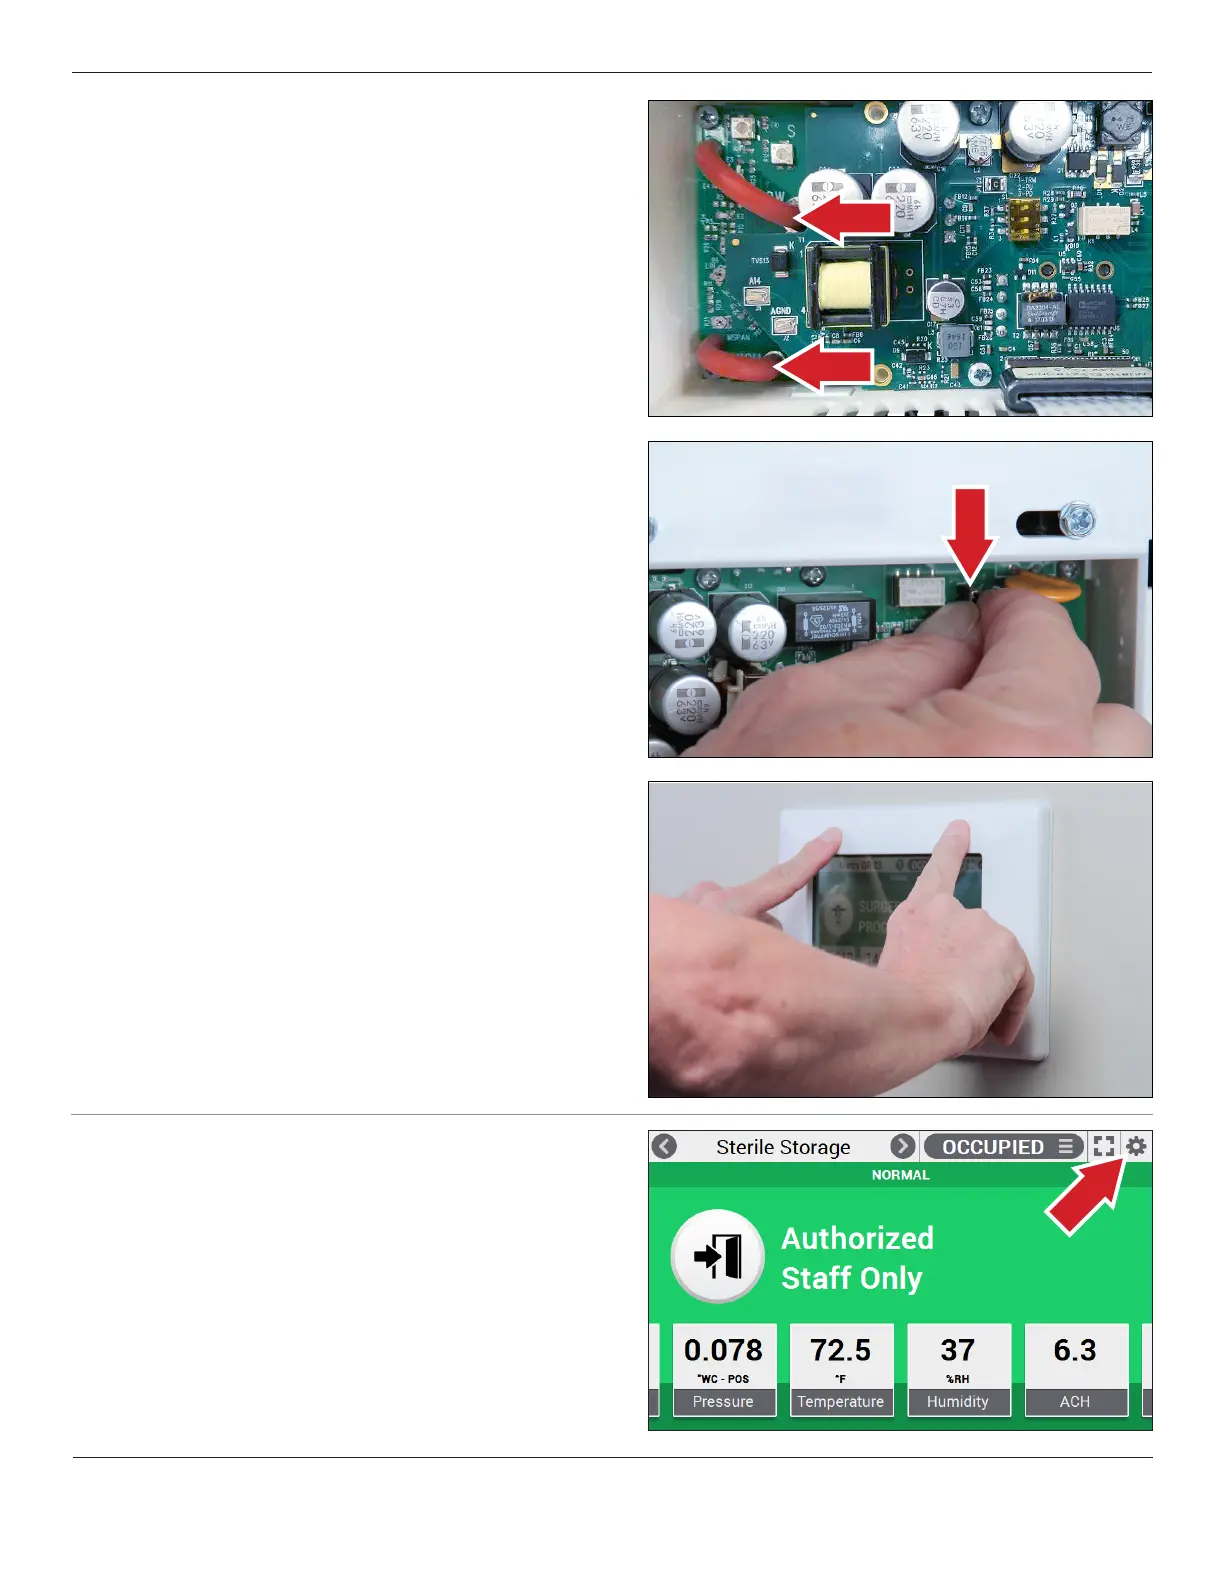
• Access the “cog wheel” on the top-right of the FLEX display to
congure the unit.
Phone: (800) 257-3872 | Fax: (978) 264-0292 | www.setra.com
• With the FLEX display hanging open and unit powered, re-zero
the sensor to ensure accurate operation:
1. Remove one end of each pressure tube (shown here)
2. Access “Settings” > “Maintenance” > “Pressure Calibration”
3. With tubes disconnected, press “Adjust Zero”
4. Reconnect tubes
• The unit is now ready for nal mounting
• If live power is already turning on FLEX, power can be cycled on
FLEX by removing the J6 jumper on the unit. This can be done
by hand, or carefully with non-conductive pliers. Normally,
FLEX is continuously powered and this jumper does not need
to be accessed.