10
EN
3.3 CONNECTING THE WATER SUPPLY
• Connect Maxlite+S to the on-board pressurised water
system using the supplied 3/4"-3/4" solenoid valve.
Use a 19 mm inner diameter pipe for connection.
• Provide a minimum dynamic pressure of 1.7 bar.
DANGER
Ö All vented loops (not supplied with the toilet)
must be installed a minimum of 50 cm above the
waterline.
DANGER
Improper installation, defective condition of
the pipes.
Risk of flooding.
Ö Ensure that the pipes are in good condition.
Ö Check that there are no leaks.
Ö The use of a ventilated loop between the pump
and the bowl is compulsory.
NOTICE
Risk of clogging of the solenoid valve.
Ö Fit a filter upstream of the pressurised water
circuit.
3.4 ELECTRICAL CONNECTION
NOTICE
Ö It is essential to observe the wiring diagram in
the enclosed instructions.
Advice for wiring up the Sanimarin® Maxlite+S:
12 V 24 V
Maximum
recommended voltage
drop (5%)
0.6 V 1.2 V
Electricity consumption
per second
0.007 Ah 0.004 Ah
Current consumption
/ Fuses
300 W / 25 A 360 W / 15 A
Electric diameter wire 1.5 mm
2
= 1 m max
2.5 mm
2
= 2 m max
4 mm
2
= 3 m max
6 mm
2
= 4.3 m max
1.5 mm
2
= 3.5 m max
2.5 mm
2
= 6 m max
4 mm
2
= 9.5 m max
6 mm
2
= 14 m max
• Once the connections have been made, finalise the
installation of the rocker switch:
◇ Screw on the supplied bracket.
◇ Recess the switch.
4. COMMISSIONING
When using for the first time, it may be necessary to
prime the pump by pouring a little water into it.
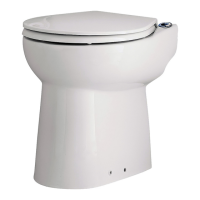
5. USE
Maxlite+S can be used like any normal toilet and will not
require any particular maintenance.
Sequence for the use of the switch keys:
1/ FLUSH: (Add Water) recommended water level:
halfway up the bowl.
2/ DISCHARGE: (Pump out).
3/ FLUSH: (Add Water) to refill the trap in WC pan.
Note : In rough seas, empty the bowl (using the
pump out position) to avoid spillage
IMPORTANT
Only the disposal of toilet paper, faecal matter,
and waste water will be under guarantee. Any damage
due to foreign bodies such as cotton, condoms,
sanitary towels, wet wipes, food, hair, or liquids such
as oils, solvent products,… will not be under guarantee.
6. CLEANING/MAINTENANCE
NOTICE
Ö If away for a long period (holiday,…) or in
the event of a long interruption of electricity,
the water and electricity supplies to the
Sanimarin® Maxlite+S should be switched off (see
procedure in "Wintering").
6.1 CLEANING
• For cleaning, use normal sanitary products.
• Do not use aggressive chemicals (such as acetone,
pure bleach, etc.) that could damage the material of
the bowl.
• Use a suitable standard toilet brush; do not use scouring
or abrasive pads.
6.2 CARE
To care for your appliance, apply a polishing paste (such
as car polish) using a polishing cotton pad. Refer to the
instructions for using the polishing paste.
6.3 WINTERING
In the event of a long period without use, rinse the bowl
and carry out several flushing cycles with the fresh water
and close through-hull valves.
7. FAULT FINDING
DANGER
Ö Before you begin any work on this
product, make sure that:
- all electrical power to the unit has
been switched off
- and that the through-hull valves are in
the CLOSED or STOP position.
In most cases, any inconsistencies in the operation of the
unit will be minor and easily rectified. Please refer to the
chart below. If the problem cannot be easily remedied
thanks to this chart, please call our Saniflo Service
organisation or go to a Saniflo-approved engineer.
FAULT
OBSERVED
PROBABLE
CAUSES
TROUBLESHOOTING
The motor does
not work.
No electricity
supply.
• Check the control switch.
• Check the electrical
connections.
• Check the power source.
The motor works
but there is no
water inlet for
flushing.
The inlet pipe filter
is clogged.
Clean the filter.
The water inlet
pipe is pinched.
Check the pipes.
The through-hull
valve is closed.
Check the through-hull
valve.
The water injection
nozzle /solenoid
valve is clogged.
• Check the water injection
nozzle.
• Check the solenoid valve.
The switch is
incorrectly wired
up.
Check the connection of
the cables.
Insufficient water
pressure in the
system
Check the pump/water
unit.
 Loading...