SECTION 3. BASIC SEWING
Choosing Your Stitch Pattern:
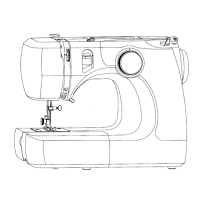
1. Raise the needle above the fabric.
2. Turn the stitch selector dial to the desired stitch pattern.
(Fig. 1)
Note: To avoid damaging the needle or your fabric, make
sure that the needle is up and out of the fabric before
selecting a stitch.
Reverse Stitch Sewing:
Reverse sewing is used for locking the end of seams and
where reinforcement is needed.
- At the end of a seam, press down on the reverse sewing
lever and step on the foot control lightly. (Fig. 2)
- Sew a few reverse stitches.
- Release the reverse sewing lever and the machine will
start sewing forward again.
SECCIÓN 3. COSTURA BÁSICA
Escogiendo su patrón de puntada:
1. Levante la aguja por encima de la tela.
2. Gire la perilla selectora de patrón de puntada hasta el
patrón deseado. (Fig. 1)
Nota: Para evitar daños a la aguja o a la tela, verifique que
la aguja esté levantada por encima de la tela antes de
seleccionar el tipo de puntada.
Costura en reversa:
La costura en reversa se utiliza para trabar el final de la
costura y para reforzar algunas zonas.
- Al final de una costura, presione la palanca de costura
en reversa y presione levemente el pedal de control.
(Fig. 2)
- Haga algunas puntadas en reversa.
- Suelte la palanca de postura en reversa y la máquina
volverá a coser hacia adelante.
SECTION 3. COUTURE DE BASE
Choisir votre point décoratif:
1. Relevez l'aiguille au-dessus du tissu.
2. Tournez le point de liage jusqu’au point décoratif désiré.
(Fig. 1)
AVERTISSEMENT: Pour éviter d’endommager l’aiguille ou
votre tissu, assurez-vous que l’aiguille est relevée et ne
touche pas au tissu avant de choisir un point décoratif.
Couture point arrière:
On utilise le point arrière pour verrouiller le point du joint de
la couture ou pour renforcer si nécessaire.
- Pressez vers le bas le levier de couture arrière au point
du joint et pressez doucement la commande de pied.
(Fig. 2)
- Cousez quelques points de joints.
- Relâchez le levier de couture arrière et la machine
recommencera à avancer.
21
Fig. 2
Fig. 1