sharkclean.comsharkclean.com
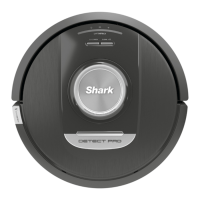
LIDAR MODULE
Check the navigation module on top of the robot
and gently remove any hair or debris. For a more
complete clean, place the robot on a level surface
and turn o the power. Use compressed air to blow
away any dirt or debris from the gap around the
rotating LiDAR module. Do not insert cotton swabs
into the module.
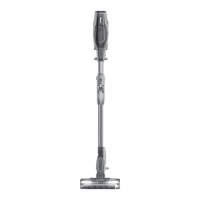
BRUSHROLL
MAINTENANCE
To access the brushroll, push up on the tabs on the
brushroll door, then lift o the door.
Take out the brushroll and remove the cap on the
end. Clean o any hair or debris then replace the
cap. Reinstall the brushroll, inserting the flat end
first. Close the brushroll access door and press down
until both sides click into place.
NOTE: Replace brushroll every 6 to 12 months, or when visibly worn. See sharkaccessories.com for replacement parts.
MAINTENANCE
TROUBLESHOOTING
If any error lights are illuminated or flashing on your robot, see the error code chart below:
For all other issues, please call Customer Service at 1-888-228-5531
ERROR CODE
ERROR
NUMBER
SOLUTION
BATTERY LED (RED) + WIFI LED (RED)
flashing
2
Side brush is stuck. Remove any debris from around the
side brush so it moves freely.
NOTIFICATION LED (RED) + RIGHT LED
(YELLOW) flashing
4
Blockage in brushroll. Remove any debris from around and
inside the brushroll so that it can spin freely.
BATTERY LED (RED) + WIFI LED (RED) +
RIGHT LED (YELLOW) flashing
5
A drive wheel is stuck. Clean the wheels and remove any
debris wrapped around the axles so they can move freely
LEFT LED (YELLOW) + NOTIFICATION LED
(RED) + BATTERY LED (RED) + WIFI LED
(RED) + RIGHT LED (YELLOW) flashing
18
Wheel motor encoder failure. Please contact Shark
Customer Service at 1-888-228-5531.
NOTIFICATION LED (RED) + WIFI LED (RED) +
RIGHT LED (YELLOW) flashing
3
Suction motor failure. Remove and empty the dust bin,
clean the filters, remove the brushroll and brushroll door,
and remove blockages.
WIFI LED (RED) + RIGHT LED (YELLOW)
flashing
6
Front bumper may be jammed. Clean the bumper and
make sure it moves in and out freely.
NOTIFICATION LED (RED) + WIFI LED (RED)
flashing
7
Cli sensor error. Move your robot to a new location and
clean its cli sensors.
BATTERY LED (RED) + RIGHT LED (YELLOW)
flashing
9
Robot dust bin needs to be reinstalled. Insert the dust bin
until it clicks in place.
WIFI LED (RED) + RIGHT LED (YELLOW)
flashing
10
Robot may be stuck on an obstacle. Move robot to a new
location on a level surface.
WIFI LED (RED) + RIGHT LED (YELLOW)
flashing
16
Robot is stuck. Move your robot to a new location and
make sure the front bumper moves in and out freely.
NOTIFICATION LED (RED) + BATTERY LED
(RED) + WIFI LED (RED) flashing
23
Robot cannot find the Self-Empty Base. Please make sure
the Self-Empty Base is ON and is free of all obstacles.
LEFT LED (RED) flashing
24
Battery is critically low and needs recharging. Please
pick up your robot and place it on the Self-Empty Base.
Make sure the Self-Empty Base indicator light turns blue
to confirm your robot is placed on the base correctly.
NOTIFICATION LED (RED) + BATTERY
LED (RED) + WIFI LED (RED) + RIGHT LED
(YELLOW) flashing
26
Blockage in dust bin. Check the Self-Empty Base and the
robot dust bin for clogs. Clear any debris and reinstall the
dust bin, ensuring that it clicks into place.
LEFT LED (YELLOW) + NOTIFICATION LED
(RED) + BATTERY LED (RED) + WIFI LED (RED)
30
There may be a blockage with ActiveLift. Turn o the
robot, and ensure that there is nothing blocking the wheel
suspension from moving up and down.
 Loading...