Do you have a question about the Shark Navigator DLX and is the answer not in the manual?
Essential safety precautions, general warnings, and specific use guidelines for the vacuum cleaner.
Details what not to vacuum and which areas or conditions to avoid for safe operation.
Provides sequential instructions for assembling the vacuum cleaner components.
Explains surface selection, power settings, and different cleaning modes.
Details suction adjustment and interpretation of brushroll indicator lights.
Instructions for removing, emptying, and reinstalling the dust cup and lint screen.
Guide on cleaning and replacing pre-motor and post-motor filters for optimal performance.
How to clean the brushroll and check for obstructions in the vacuum's airways.
Lists and describes optional tools to enhance cleaning capabilities.
Solutions for frequent problems like loss of suction or brushroll malfunction.
Details the one-year limited warranty, coverage, and claim procedures.
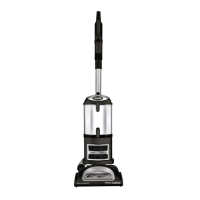
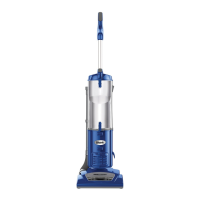
This document is an owner's guide for the Shark Navigator® DLX Upright Vacuum, NV70 Series. It provides comprehensive instructions for assembly, operation, maintenance, and troubleshooting, ensuring users can effectively utilize and care for their vacuum cleaner.
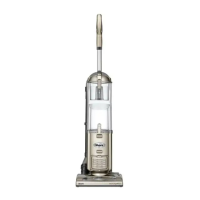
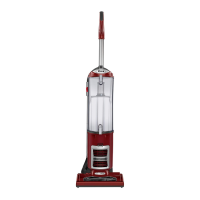
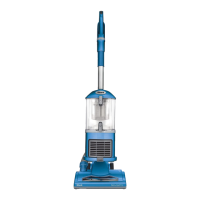
The Shark Navigator DLX is designed for whole-home cleaning, offering versatility for both bare floors and carpets, as well as above-floor cleaning with various attachments. Its primary function is to efficiently remove dirt, dust, and debris from various surfaces in a household setting.
The assembly process is straightforward, beginning with placing the vacuum pod onto the floor nozzle post until it clicks into place. The nozzle hose from the pod then connects to the floor nozzle with a slight turning motion for a snug fit. The handle slides into the top of the pod, aligning its hose holder with the cord hooks on the back, and is secured with an included bolt. An extension wand is inserted through a ring and into the top of the nozzle hose. Finally, the flexible hose is attached to the swivel connector until it clicks, routed through an anti-tip hook to prevent tipping, run over the upper holder, and securely inserted into the top of the extension wand. Cleaning tools can be conveniently stored on the accessory post on the back of the pod. It's crucial to ensure all parts are firmly clicked into place for proper operation, and the hose must be securely attached to the wand for suction to reach the floor nozzle.
The vacuum offers flexible cleaning modes and controls. The power/surface switch, located at the top of the pod, allows users to select between "O Power Off," "I Bare Floor" for bare floors and small area rugs, and "II Carpet" for carpets. To engage the brushroll, users simply turn on the power, place a foot on the floor nozzle, and tilt the handle back.
For increased maneuverability on carpets, a suction control button on the end of the hose can be slid forward to reduce suction. Conversely, sliding the button back increases suction for cleaning bare floors. The brushroll indicator light provides visual feedback on the vacuum's status: solid green indicates the brushroll is spinning correctly, solid red signifies a jam, no light means the vacuum is off, and flashing red indicates the motorized floor nozzle is overheating. In case of overheating, the vacuum should be turned off, unplugged, and allowed to cool for at least 60 minutes after removing any blockages.
The vacuum supports various cleaning configurations:
Regular maintenance is essential to ensure the vacuum's optimal performance.
To empty the dust cup, the Dust Cup Release button next to the handle is pressed, allowing the cup to be tilted and lifted off. Debris is emptied into the trash by pressing the Lower Release button, which opens the bottom of the dust cup. For collected debris on the lint screen, the Top Release button is pressed, the handle is lifted to open, and the lint screen is gently brushed clean. To reinstall, the dust cup's bottom is placed into the pod and tilted until it clicks into place. It's important to unplug the power cord before performing any maintenance.
Filters should be regularly rinsed and replaced to maintain suction power. Only cold water should be used for rinsing, and filters must air-dry completely for at least 24 hours before reinstallation to prevent liquid from entering electrical parts. Soap should NOT be used when cleaning filters.
The vacuum pod should be detached from the floor nozzle. Any blockages or buildup in the airways of the nozzle should be removed. With scissors, users can carefully cut away any fibers, hair, or string wrapped around the brushroll, taking care not to damage the bristles.
Regular checks for blockages are crucial for maintaining airflow and suction.
The guide also includes a troubleshooting section for common issues like loss of suction, brushroll jams, and the vacuum turning off due to overheating. It advises users to check filters, empty the dust cup, clear blockages, and allow the unit to cool if it overheats.
A variety of available accessories enhance the vacuum's functionality:
The owner's guide emphasizes safety instructions, including warnings about electrical hazards, proper handling of the power cord, and avoiding the pickup of liquids, large, hard, or sharp objects, and flammable materials. It also highlights the importance of not using the vacuum without filters and ensuring all parts are in place after maintenance. The polarized plug design is noted as a safety feature to reduce the risk of electric shock.
| Type | Upright |
|---|---|
| Cord Length | 25 feet |
| Swivel Steering | Yes |
| Bagless | Yes |
| Power Source | Corded electric |
| Filtration | HEPA filter |
| Attachments | Crevice Tool, Dusting Brush |
| Special Features | Lift-Away technology |
| Weight | 15.2 lbs |