22
Fig. 35a
Fig. 35b
Fig. 36
Fig. 37a
Fig. 37b
ENGLISH
S E N A F O R S H A R K ( B L U E T O O T H O R M E S H )
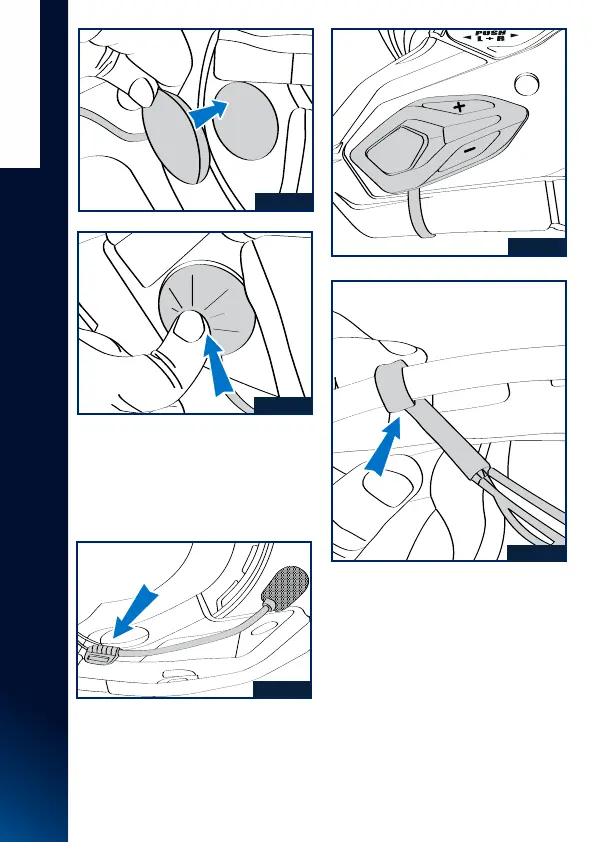
7. Position the microphone and attach
it with the supplied Velcro piece to the
polystyrene on the left cheek as shown
in Fig. 36.
6. Insert the left and right speakers of
Sena FOR SHARK (Bluetooth or Mesh)
into the ear housings and attach them
by the Velcro present on the back of the
speakers and the Velcro present on the
foam plugs present in the ear housings.
Fig. 35 a/b.
8. Affix the main keypad to the defined
location (Fig. 37a), using the double-
sided tape provided on the keypad, insert
the flat cable between the shell and the
polystyrene cheek piece to the left of the
clip lining (red part) as shown in Fig. 37b.