23
Fig. 38
Fig. 39
Fig. 40bFig. 40a
ENGLISH
S E N A F O R S H A R K ( B L U E T O O T H O R M E S H )
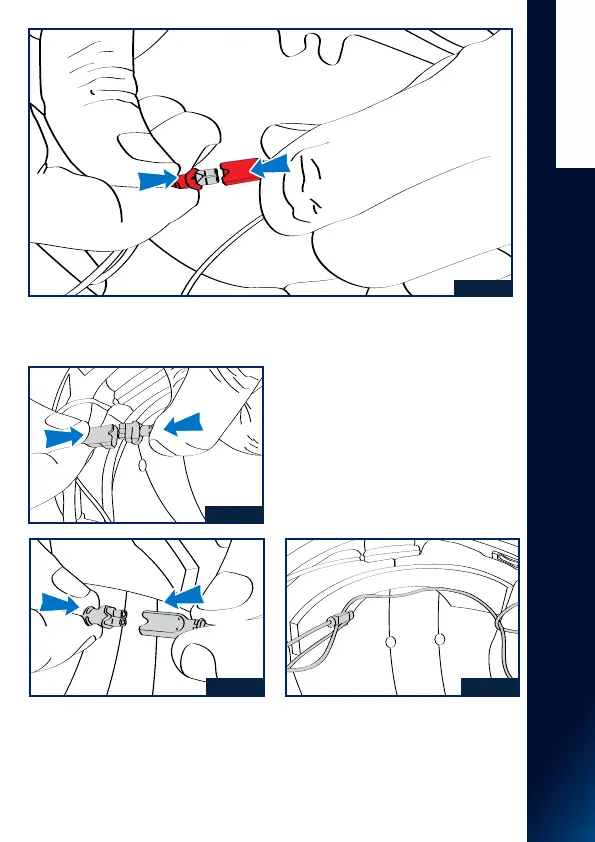
9. Connect the microphone (red connector), and the keypad as shown in Fig. 38
10. Make the battery connection (black
3-branch connector), and the keypad as
shown in Fig. 39
11. Make the connections to the speakers
(black 2-branch connector), and the
keyboard as shown in Fig. 40a, then pass
the right speaker cable as shown in Fig.
40b.
12. Replace the textile foams (cheek
pads and liner) according to the textile
assembly description (page 21-22),
ensuring that all SENA FOR SHARK
system cables are positioned inside the
textile parts, and do not protrude from
the helmet once reassembled.