To reduce the risk of electric shock, unplug the unit before assembling, adding or removing attachments or
converting modes.
WARNING: The On/Off switch is on the top of the Lift-Away
™
canister. Always ensure the power is OFF
(“O” position) before plugging and unplugging.
TO ASSEMBLE:
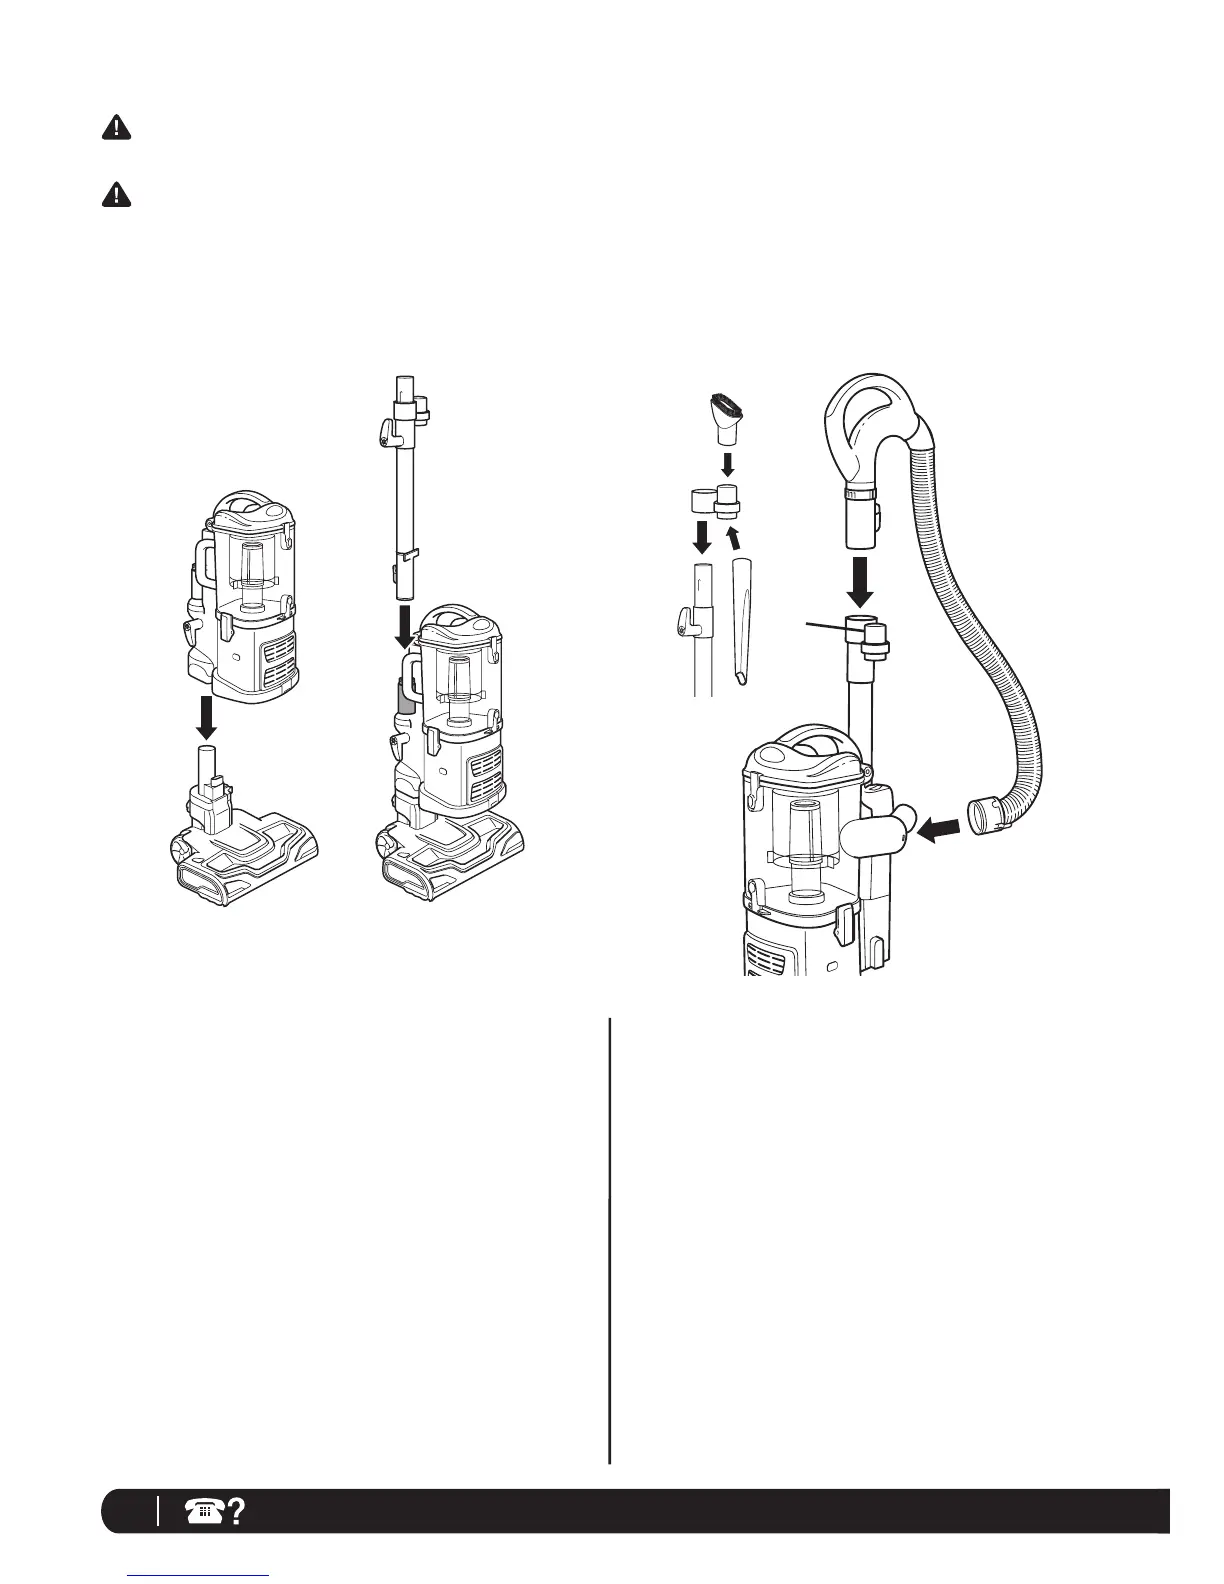
1 Place the floor nozzle on a level surface.
2 Align the tube of the floor nozzle with the tube on the
Lift-Away canister and lower until you hear the two pieces
click into place. (Fig. 8)
When attaching the motorized floor brush, ensure that
the latching mechanism is fully locked in place to ensure
electrical connection has been made.
3 Attach the end of the extension wand to the tube on the
back of the Lift-Away canister until it clicks into place.
(Fig. 9)
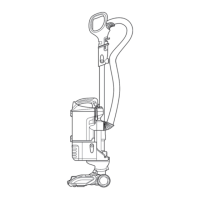
4 Slide the accessory holder (a) positioned opposite the
upper cord wrap, over the extension wand. Align the tab
with the groove and push down. (Fig. 10)
5 Push the handle (b) onto the top of the extension wand
until you hear it click into place. (Fig. 10)
6 Insert the end of the stretch hose (c) into the connector on
the back of the Lift-Away canister. (Fig. 10)
7 Store the dusting brush (d) and the crevice tool (e) on the
mounts of the accessory holder. (Fig. 10)
Fig. 8 Fig. 9
Fig. 10
Mode 1: Upright Vac
c
a
d
e
b




 To Next Page