This document is the owner's guide for the Shark DuoClean PowerFins HairPro Lift-Away Upright Vacuum, UV900 Series, which features a self-cleaning brushroll and Odor Neutralizer Technology. It provides comprehensive instructions for assembly, operation, maintenance, and troubleshooting, ensuring users can effectively utilize the vacuum for whole-home cleaning.
Function Description
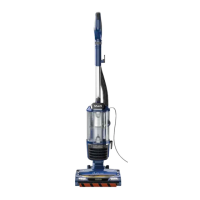
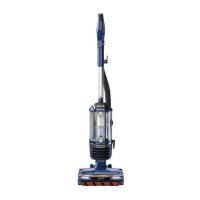
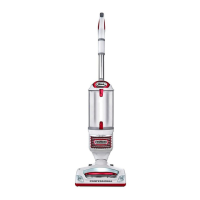
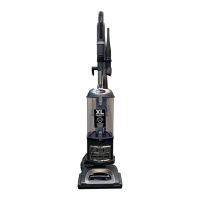
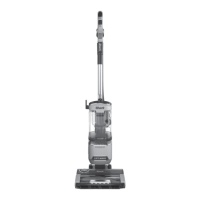
The Shark DuoClean PowerFins HairPro Lift-Away Upright Vacuum is designed for versatile whole-home cleaning, tackling various floor types and above-floor areas. Its primary function is to provide powerful suction and efficient debris pickup, including pet hair, with advanced features to enhance the cleaning experience. The "DuoClean" technology implies the presence of multiple brushrolls working in tandem to engage both hard floors and carpets effectively. The "PowerFins" likely refers to a specialized brushroll design that continuously cleans surfaces and prevents hair wrap. The "HairPro" designation emphasizes its capability to handle pet hair effectively, while the "Self-Cleaning Brushroll" minimizes maintenance by automatically removing hair wrap during operation. The "Lift-Away" feature allows the user to detach the canister from the floor nozzle, transforming the upright vacuum into a portable unit for cleaning stairs, upholstery, and other hard-to-reach areas. A key innovation is the "Odor Neutralizer Technology," which actively deodorizes while vacuuming, addressing odors from inanimate sources and leaving a fresher scent.
Usage Features
The vacuum offers several features designed to optimize its use across different cleaning scenarios:
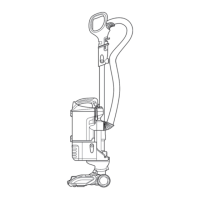
- Assembly: The guide provides a step-by-step assembly process, starting with placing the pod onto the nozzle, inserting the wand into the pod, attaching the handle to the wand, and connecting the hose to the back of the pod. A unique step involves installing the Odor Neutralizer Technology Dial into the nozzle, which is then rotated to lock and engage, allowing for adjustment of odor intensity. All connections are designed to securely click into place for proper operation.
- Power/Surface Switch: Users can select from three settings: "O Power Off," "I Hard Floor" for hard floors and small area rugs, and "II Carpet" for carpets. For deep carpet cleaning, setting "II Carpet" with MAX suction is recommended.
- Suction Control Slider: Located on the handle, this slider allows users to adjust suction power based on the floor type. "MIN" reduces suction for increased maneuverability on carpets, while "MAX" increases suction for hard floors. The brushrolls spin in all modes, regardless of the suction setting.
- Upright Mode: To engage the brushrolls, users select a surface setting, step on the floor nozzle, and tilt the handle back firmly.
- Lift-Away Mode: This mode is activated by stepping on the pedal on the floor nozzle to lift off the pod, enabling portable cleaning.
- Above-Floor Cleaning: The vacuum supports above-floor cleaning in two ways:
- Handle Release: Pressing the Handle Release button detaches the handle from the wand, allowing accessories to be attached for cleaning.
- Wand Release: Pressing the Wand Release button detaches the wand from the pod, providing extended reach for above-floor tasks.
- Accessory Compatibility: All included accessories are compatible with both the wand and the handle, offering flexibility for various cleaning needs. The guide illustrates attaching accessories to both the handle and the wand.
- Headlight Indicator Lights: These lights provide visual feedback on the vacuum's status. Solid white lights indicate normal operation with spinning brushrolls. Solid red lights signal a jam in the brushroll area, requiring the user to turn off, unplug, and clear blockages. Flashing red lights indicate the motorized floor nozzle is overheating, prompting the user to turn off, unplug, clear blockages, and allow the vacuum to cool for at least 60 minutes. Flashing white lights indicate the vacuum is operating outside its optimal temperature range (32°F/0°C to 104°F/40°C), requiring the user to turn off the vacuum and adjust the room temperature.
- Odor Neutralizer Technology Dial: This dial allows users to adjust the intensity of the odor neutralizer or unlock it for cartridge access. Rotating the dial toward "Low" decreases intensity, while rotating toward "High" provides the highest intensity for optimal performance. The dial must be installed for the vacuum to function properly, even without an odor cartridge.
- Cord Management: The upper cord hook can be rotated down to release the power cord. A cord holder on the side of the wand keeps the cord in place during vacuuming.
Maintenance Features
Regular maintenance is crucial for optimal performance and longevity of the vacuum, especially for maintaining suction power and the effectiveness of the odor neutralizer technology.
- Emptying the Dust Cup:
- Frequency: The dust cup should be emptied each time the vacuum is used and periodically during cleaning, especially when debris reaches the MAX fill line.
- Process: To remove the dust cup, slide up the release button on the side of the handle, tilt the cup forward, and lift. To empty debris, press the lower release button to open the bottom of the dust cup.
- Lint Screen Cleaning: To clear debris from the lint screen, lift the upper release tab at the top of the dust cup, open the lid, and gently brush the lint screen.
- Reinstallation: Place the bottom of the dust cup onto the pod and tilt it until it clicks into place.
- Cleaning the Filters:
- General Instructions: Filters should be rinsed with cold water only and allowed to air-dry completely for at least 24 hours before reinstallation to prevent liquid from entering electronic parts. Soap should NOT be used.
- Pre-Motor Filters (Foam and Felt): These should be rinsed EVERY MONTH. Remove the dust cup, then lift out the filters.
- HEPA Filter (Post-Motor): This filter should be rinsed EVERY YEAR. To remove, pull the tab on the bottom of the filter door, lift off the door, press the tab on the side of the HEPA filter, and pull it out. To reinstall the door, align the top first, then press the bottom until it clicks into place.
- Nozzle Maintenance (Self-Cleaning Brushroll):
- Hair Wrap Removal: If hair wraps around the brushroll, users should continue vacuuming on a bare floor, low-pile carpet, or small area rug in Carpet/Low Pile mode. This action allows the self-cleaning brushroll to remove the hair wrap and send it to the dust cup.
- Blockage Check: If a hard or sharp object is run over, or if a noise change is noticed, the brushroll area should be checked for blockages. Any remaining fibers after continued use should be carefully removed.
- Cleaning the Soft Roller:
- Removal: Slide the Soft Roller access button forward to release the Soft Roller.
- Cleaning: Hand wash the Soft Roller with water only and allow it to air-dry completely for at least 24 hours.
- Reinstallation: Reinsert the Soft Roller into the front of the nozzle until it clicks into place.
- Checking for Blockages:
- Dust Cup Blockages: Detach the dust cup, empty it, and remove debris from the lint screen.
- Wand Blockages: Detach the wand from the pod and handle, and check both ends.
- Hose Blockages: Detach the hose from the handle (by pressing the release button) and from the pod, then check openings.
- Handle/Hose Blockage: Detach the handle from the wand and the hose from the vacuum pod, then check openings.
- Nozzle Blockage: Detach the wand from the floor nozzle, tilt the nozzle neck back, and check the opening.
- Nozzle Hose Blockage: To access the nozzle hose, pinch the release touchpoints on the bottom of the nozzle, then lift the cover and clear any blockages.
- Odor Cartridge Replacement:
- Frequency: Odor cartridges should be replaced every 6 months for optimal performance.
- Removal of Odor Dial: Flip up the handle and rotate the dial clockwise until the two teal arrows align, then pull the handle to remove the dial from the nozzle.
- Removal of Old Cartridge: Rotate the cartridge counterclockwise in the dial housing and pull it out.
- Installation of New Cartridge: Remove the new cartridge from its sealed packaging. Align the yellow arrow on the side of the cartridge with the yellow arrow on the side of the dial cover, then insert the cartridge and rotate it clockwise to lock.
- Installation of Dial: Align the teal arrow on the dial cover with the teal arrow on the nozzle, reinsert the dial, and rotate it counterclockwise until it clicks into an intensity setting.
- Disposal: Dispose of the old cartridge in the trash.
- Power Cord Maintenance: To minimize damage, avoid pulling or carrying the vacuum by the cord, unplugging by pulling the cord, closing doors on the cord, pulling the cord around sharp corners, or leaving it near heated surfaces. Do not run the vacuum over the power cord.