8
32JW-74E
The following geometry adjustments can be carried out. Detailed instructions on how to execute these are given on the
following pages:
Horizontal
• Horizontal Shift
• East West Width
• Pin Phase
• Pin Amp
• Vertical angle
• Vertical bow
• Upper Corner Amplitude
• Lower Corner Symmetry
• Extreme Corner Symmetry
Vertical
• Vertical Amplitude
• S Correction
• Vertical Shift
• Vertical Linearity
Just in case the TV set requires a full geometry adjustment, please proceed first with Verti-
cal according to the above order, and after that, adjust Horizontal according to the above
order.
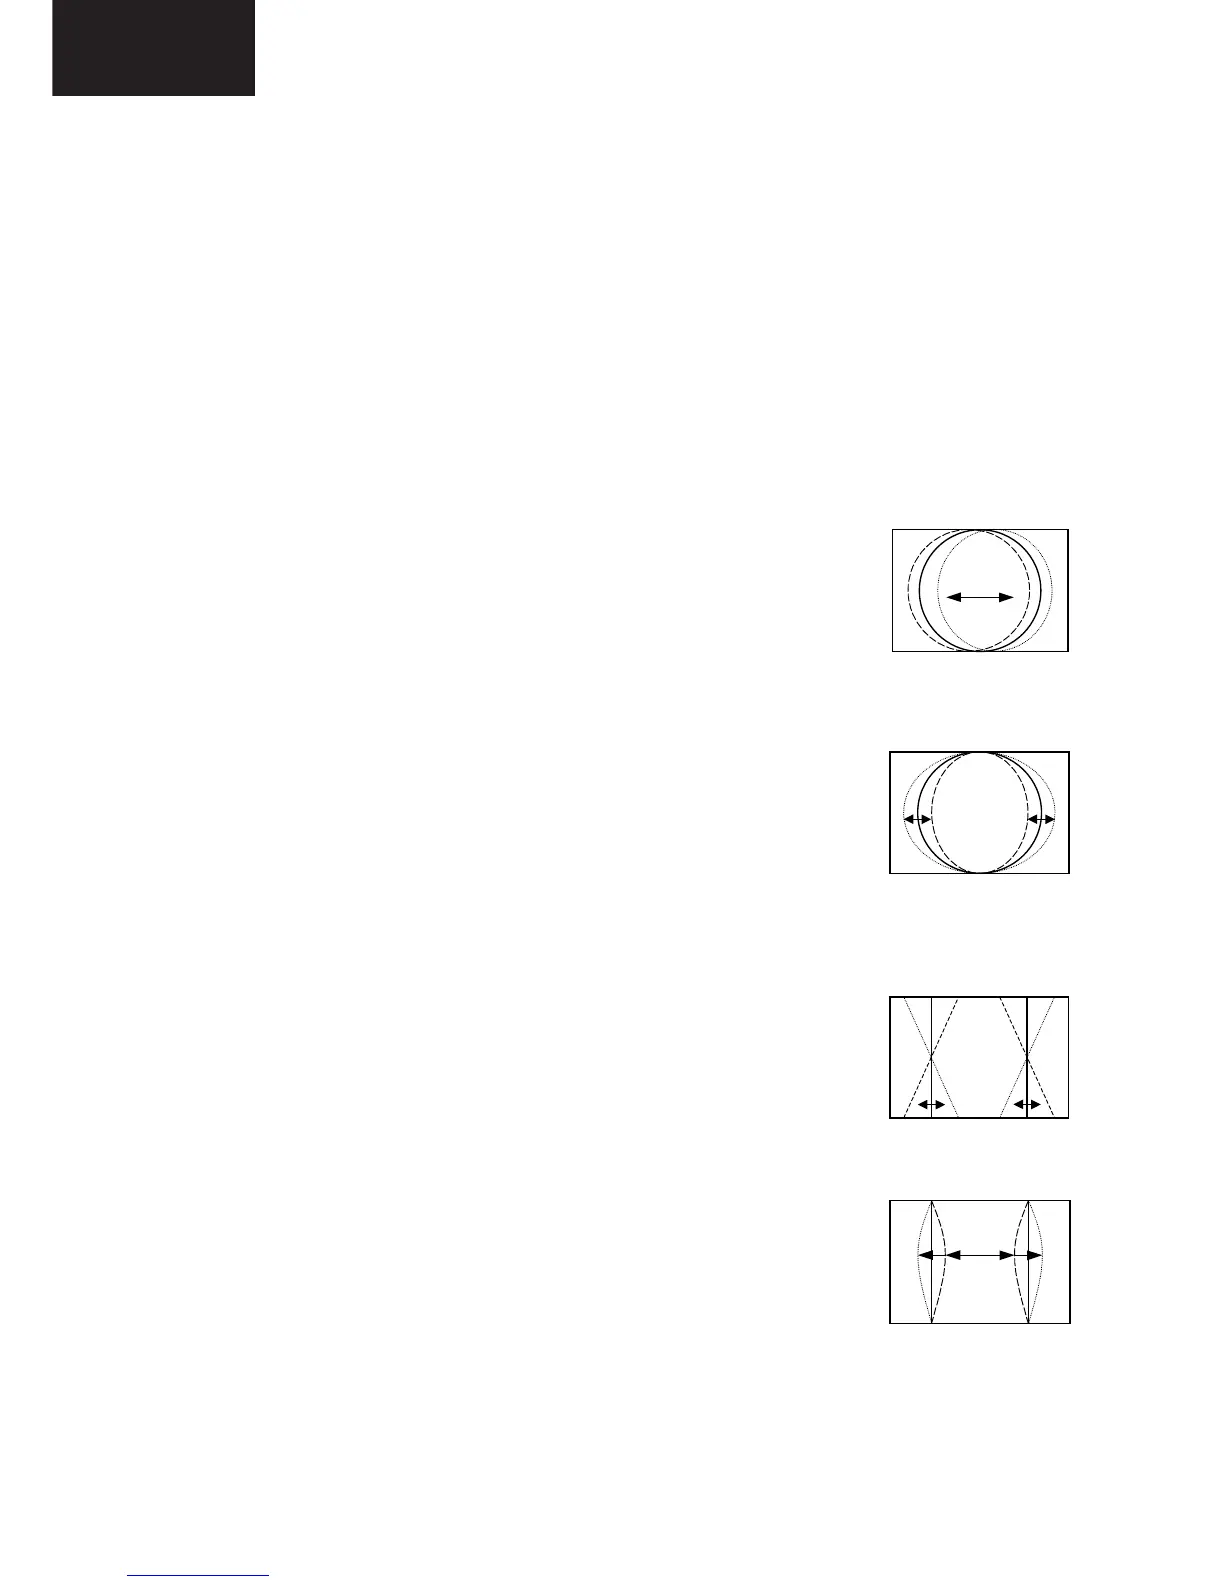
Horizontal Shift
Adjust the horizontal shift so that the picture is centred.
The effect of this adjustment is shown in figure 2.
• When the volume up button is pressed, the picture moves to the left.
• When the volume down button is pressed, the picture moves to the right.
• Press the stand-by button on the remote control to store.
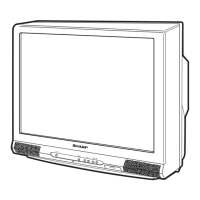
East West Width
Adjust the East West Width so that 8% over-scan is achieved.
The effect of this adjustment is shown in figure 3.
• When the volume up button is pressed, horizontal scanning increases.
• When the volume down button is pressed, horizontal scanning decreases.
• Press the stand-by button on the remote control to store.
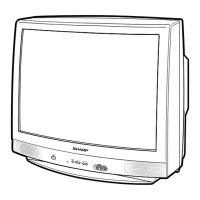
Pin Phase
Adjust the Pin Phase so that the picture is symmetrical top and bottom.
The effect of this adjustment is shown in figure 4.
• When the volume up button is pressed, side pincushion changes.
• When the volume down button is pressed, side pincushion changes.
• Press the stand-by button on the remote control to store.
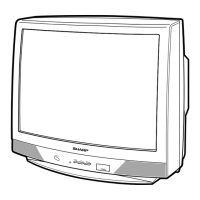
Pin Amp
Adjust the Pin Amplitude so that the picture is centred.
The effect of this adjustment is shown in figure 5.
• When the volume up button is pressed, side pincushion changes from pincushion to
barrel shape.
• When the volume down button is pressed, side pincushion changes from barrel
shape to pincushion.
• Press the stand-by button on the remote control to store.
Figure 2
Figure 3
Figure 4
Figure 5