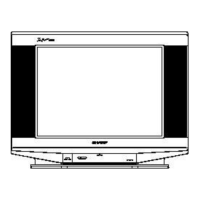
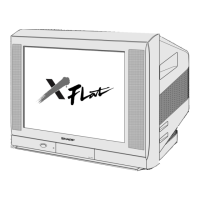
29Q-FG1A/1F/1N/1S/1U
3 – 11
[2] ADJUSTMENT
NO ADJUSTMENT POINT ADJUSTMENT CONDITION / PROCEDURE WAVEFORM OR REMARKS
1 RF-AGC (1) Receive "PAL COLOR BAR" signal.
TAKE OVER POINT Signal Strength: 1) 57 ± 1dBµV (75 ohm termination) - VTUVT1Y5ED202 (Wuxi Sharp Tuner)
3.6 ± 0.4 VDC
2) 60 ± 1dBµV (75 ohm termination) - RTUNQA022WJZZ (Thomson Tuner)
ADJUSTMENT
TP253
(I2C BUS CONTROL)
(2) Select "RF-AGC" item in the Adjustment (2) Connect the oscilloscope to TP53 .
Item. Push the RF-AGC button, blue display
(Tuner's AGC Terminal) as shown in figure 3-1.
with OK sign indicates the adjustment is
working properly. OSCILLOSCOPE
BIAS BOX
TV SET
Bias Box : about 4.5V
Fig. 3-1
(3) Select "RF-AGC" item in the Adjustment
Mode. Adjust the "RF-AGC" bus data to
obtain the Tuner output pin drop
0.1V
1.0V
below maximum voltage.
(4) Change the antenna input signal to 63 ~ 67dBµV, and make sure there is no noise.
(5)Turn up the input signal to 90 ~ 95 dBµB to be sure that there is no cross modulation beat.
NO ADJUSTMENT POINT ADJUSTMENT CONDITION / PROCEDURE WAVEFORM OR REMARKS
1 FOCUS 1. Receive E-5CH (Monoscop pattern).
ADJUSTMENT 2. With the remote controller, make the image normal.
3. Adjust the focus VR to make the character"575" on left bottom of monoscope
as fine as possible.
CUT OFF, BKGD, SUB-CONT ADJUSTMENT
NO ADJUSTMENT POINT ADJUSTMENT CONDITION / PROCEDURE WAVEFORM OR REMARKS
1CRTCUTOFF
ADJUSTMENT 1. Make sure following items are in INTIAL DATA before adjust CRT cutoff.
(I2C BUS CONTROL)
2. Switch TV to video mode, blue back off, with no signal and press R/C to set picture
into normal condition.
3. Go to service mode at adjustment mode item A057 VSD and press Volume Up at R/C.
4. Adjust screen voltage until retrace line just become visible.
NO ADJUSTMENT POINT ADJUSTMENT CONDITION / PROCEDURE WAVEFORM OR REMARKS
1 SUB COLOUR 1. Receive the "PAL Color Bar" signal.
(I2C BUS CONTROL) 2. Make the image normal with the remote controller. Cy G B
3. Connect the oscilloscope to TP47R (IC851 #9
( Use Probe 10:1)
Range : 2V / Div Sweep time: 20m sec / Div
4. Set the sub color adjustment mode with the remote controller, and vary the sub
color data to make 100% W of the color bar and RED at the same level for
adjustment shown in Fig. 1-1. 75 % W Y 100%
NOTE : Due to different signal between SEM & SREC, please add 2 step
Fig. 1-1
after adjust sub color. This instruction effective for SREC production
NO ADJUSTMENT POINT ADJUSTMENT CONDITION / PROCEDURE WAVEFORM OR REMARKS
1 SUB-TINT (1) Receive the "NTSC 3.58 Colour Bar" signal through AV IN
Same Level
(I2C BUS CONTROL) (2) Connect the oscilloscope to TP47B (P860 Pin4) BLUE-OUT
Range : 100mV/Div (AC) (Use Probe 10:1)
Sweep time
(3) Select the "SUB-TINT" item in the ADJUSTMENT MODE.. Adjust the "SUB-TINT"
data to obtain the waveform shown as Figure 1.1 (W and Mg same level)
(4) Minus 2 steps of adjustment value from item (3).
NOTE : Gnd for oscilloscope must be connected to small signal gnd in CRT
board. If others location gnd is used, please offset the sub tint