Do you have a question about the Sharp ER-A550S and is the answer not in the manual?
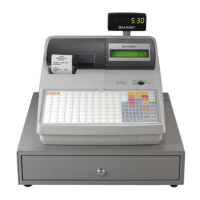
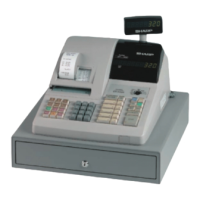
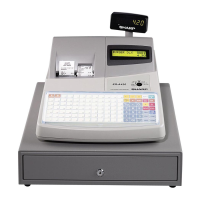
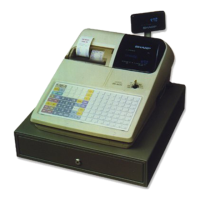
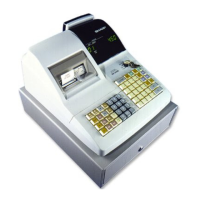
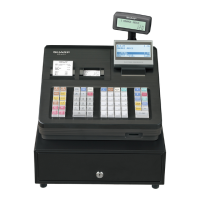
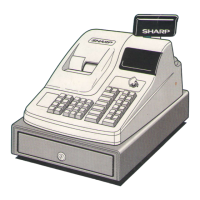
Illustrates the standard keyboard layout and describes its keys.
Describes the main display screen visible to the operator.
Details the customer-facing display, often a pop-up type.
Enter month (or two digits), day (two digits), and year (two digits) in this sequence.
When your store has two or more registers, it is practical to set separate register numbers for their identification.
The consecutive number is increased by one each time a receipt is published.
Enter month (or two digits), day (two digits), and year (two digits) in this sequence.
When your store has two or more registers, it is practical to set separate register numbers for their identification.
The consecutive number is increased by one each time a receipt is published.
Your machine is equipped with 20 standard departments (and can additionally be equipped with up to 99 optional departments).
You can set each department for 1: Compulsory item validation print, 2: Tare table number, 3: Scale entry allowed/prohibited, 4: Abatements characters, 5: Unit price, 6: Group number, 7: Link number assignments for departments.
• Sign (plus/minus), • Food stamp status, • Tax status.
You can set upper limit amounts (HALO: High Amount Lockout) for each department.
You can program a maximum of sixteen characters (item label) for each department.
You can program unit prices up to a maximum of six digits ($9999.99).
You can assign departments to a maximum of 9 groups (1 thru 9).
You can assign a department number to each key position that can be used as a department link and freely select the number of department links and their positions.
Entries can be made by entering the appropriate mode selected for individual PLU entries.
When a PLU is associated with a department, the following functions of the PLU depend on the programming for that department.
Program a base quantity for each PLU/subdepartment dedicated to split-pricing entries.
The function of each PLU/subdepartment varies according to the combination of its sign and its associate department's sign as follows.
Indicates whether items are eligible for food stamps or not, and their tax status.
Allows programming of item labels with up to 8 characters, with an option for 16.
You can link a maximum of 10 PLUs to a particular PLU. Only the quantity is totalized for the linked PLUs.
PLU is able to link with any other one (e.g., to link bottle deposit). However, the link level has a maximum of 5 levels.
Defines the starting number for PLU levels.
Sets the positioning for direct PLU keys.
Configures tare table numbers and scale status for PLUs.
Sets the PLU number from 1 to 9999.
Specifies the associate department number for PLUs/subdepartments.
Sets the mode parameter for PLUs/subdepartments.
Disables the PLU/subdepartment mode.
Enables the PLU mode.
Enables the PLU/subdepartment mode.
Enables the delete mode for PLUs/subdepartments.
Sets the unit price for PLUs, up to six digits.
Sets the base quantity for PLUs, up to a maximum of 5 digits.
Assigns a plus or minus sign to PLUs for premium or discount functions.
Assigns food stamp status (eligible or ineligible) to each department.
Assigns tax status (taxable or non-taxable) to each department.
Programs alphanumeric characters for PLU or subdepartment labels.
Links PLUs together for promotional sales, printing labels automatically.
Links PLUs to other PLUs, allowing shared data and pricing.
Sets the PLU level number (1, 2, or 3) for different pricing tiers.
Defines the starting PLU number for a given level.
Defines the ending PLU number for a given level.
Assigns link numbers to PLUs, specifying the number of direct PLU links.
Specifies the PLU number to be linked.
Assigns a tare table number (1-9) to a PLU for scale entries.
Sets the scale status (inhibited, allowed, compulsory).
Programs currency rates, conversion rates, and discount amounts.
Specifies the function number for HALO entry, such as tax, RA, or PO keys.
Sets the significant digit for HALO entry, from 1 to 9.
Programs the +/- sign to assign premium or discount functions.
Determines if a premium or discount should be dealt with as a food stamp-eligible item.
Determines whether a premium or discount should be dealt with as taxable or non-taxable.
Selects this when a percent calculation is to be made for department and PLU.
Selects this when a percent calculation is to be made for merchandise subtotals.
Specifies the function number for percent rate limitation.
Sets the rate limitation for percent entries, from 0.00 to 99.99%.
Selects the function number for coupon selection (1-4).
Allows setting up functions for CA, CA2, CHK, and CH1-CH8 keys.
Assigns alphanumeric characters to function keys.
Assigns a cashier code (0-99) to each of the 4 cashier keys (A, B, D, E).
Programs a cashier name (max. 8 characters) for each of the 4 cashiers.
Assigns cashiers to specific drawers (1 to 4).
Determines if the OP X/Z mode is available for cashiers.
Controls availability of the REG-mode PO (Paid-Out) operation.
Indicates that the 'P' option is not used, and specifies the range for ABCDEFGH.
Sets the counter for validation printing from 1 to 9 times.
Sets the number of feed lines after printing a tray subtotal, from 0 to 9.
Sets the time limit for the TILL TIMER™ from 1 to 255 seconds.
Sets the line number for printing messages, from 1 to 6.
Programs character keys for print messages, up to 21 digits.
Selects job numbers for various reports to be printed in sequence.
Specifies the type of report to be included in the stacked sequence.
Sets a secret code for controlling access to PGM1 and reports.
Assigns print information to selected printer locations for departments.
Assigns print information to selected printer locations for PLUs.
Specifies the PLU range for print station assignment.
Assigns a tare table number (1-9) for scale programming.
Sets the tare value for scale entries.
Sets the time range for hourly reports in 24-hour or 12-hour system.
Sets the starting time for hourly reports, from 00 to 23 hours.
Procedure for activating the TRAINING mode.
Details how practice entries are allowed only when the mode switch is in REG or MGR position.
Allows setting up transactions for the AUTO key.
Provides details and procedures for reading stored programs in PGM1 and PGM2 modes.
Lists the job code numbers used for various reading procedures.
Shows sample printouts of programmed department data.
Displays sample printouts of programmed PLU and subdepartment data.
Shows sample printouts of programmed link numbers for departments and PLUs.
Displays sample printouts of programmed items for linked PLUs.
Shows sample printouts of programmed promotional PLUs.
Displays sample printouts of programmed PLU level ranges.
Shows sample printouts of programmed items for cashiers.
Displays sample printouts of programmed items for functions (part 1).
Shows sample printouts of programmed items for functions (part 2).
Displays sample printouts of programmed tax tables and rates.
Shows sample printouts of programmed items for auto keys.
Explains how to read and reset sales totals for individual cashiers or all cashiers.
Details how to read and reset X and Z reports for individual cashiers or all cashiers.
Explains how to obtain X and Z reports for hourly sales totals and transaction counters.
Provides a report of sales totals for all departments.
Displays sales totals for individual groups.
Shows sales totals for all assigned groups.
Provides sample X report for sales information within a specified PLU/subdepartment range.
Provides sample Z report for sales information within a specified PLU/subdepartment range.
Displays sales information for PLUs associated with a specific department.
Explains that periodic reading/resetting reports are same as X/Z reports for daily totals.
Details how to read and reset daily net totals.
Details how to enter items, including single item, PLU, and subdepartment entries.
Explains how to enter a unit price and press a department key for single item sales.
Details how to enter PLU numbers using the PLU/SUB key.
Procedure for entering subdepartments using the PLU/SUB key.
Details how to enter PLUs directly using the PLU/SUB key.
Useful when a sale is for only one item and is for cash.
Finalizes the sale for SIF, the transaction is finalized immediately as a cash sale.
Details auto scale entries using tare numbers and programmed weights.
Shows the net sale subtotal before tax.
Displays subtotals for taxable items, showing tax lamps that light up.
Explains how to enter the amount tendered by the customer for cash or check transactions.
Details processing mixed payments using check and cash.
Describes cash or check sales where no tender entry is required.
Explains how to process charge sales using CH1 through CH8 keys.
Details processing mixed tender sales involving cash, check, and charge.
Explains how to handle food stamp payments or tendering.
Calculates percent premium or discount on merchandise subtotals.
Calculates percent premium or discount for individual item entries.
Voids the last entry made, such as department, PLU, or tax.
Voids incorrect entries made during a transaction before finalization.
Voids an entire transaction after the subtotal is executed.
Procedures for handling errors not covered by direct or indirect void.
Explains how to set up and print validation slips on checks, coupons, etc.
Lists entries and key operations that trigger validation printing.
Details validation printing for various item entry types.
Explains validation printing after transaction finalization.
Provides guidance on register operation after a power failure.
Explains troubleshooting steps if the printer motor locks.
Step-by-step instructions for installing and removing paper rolls.
Instructions for installing the ink ribbon cassette.
Details how to refill the ink for the logo.
Instructions for detaching the till and removing the cash drawer.
Explains how to open the cash drawer manually.
Lists common faults and their checking procedures before contacting service.
Lists the model name of the cash register.
Provides the external dimensions of the cash register.
Specifies the weight of the cash register.
Details the power source requirements for the cash register.
Specifies the recommended working temperature range.
Details the electronic components used in the cash register.
Information about the built-in battery for memory holding.
Details the display type and number of positions.
Details printer type, speed, and capacity.
Specifies the color and dimensions of the ink ribbon cassette.
Provides dimensions for the logo printing.
Specifies paper roll width, diameter, weight, and quality.
Details the cash drawer configuration and capacity.
Lists included accessories like manager keys, submanager keys, etc.
Illustrates the physical characteristics of the ER-02RP kitchen printer.
Describes system configurations for connecting the ER-A550S and ER-02RP.
Covers programming to enable/disable data transmission to the kitchen printer.
| Type | Electronic Cash Register |
|---|---|
| Display | LCD |
| Operator Display | 2-line LCD |
| Number of Departments | 99 |
| Printer | Thermal Printer |
| Paper Width | 58mm |
| Connectivity | RS-232C |
| Cash Drawer | 1 |
| PLUs | 2000 |
| Power Supply | AC 100-240V |