Listening with Headphones
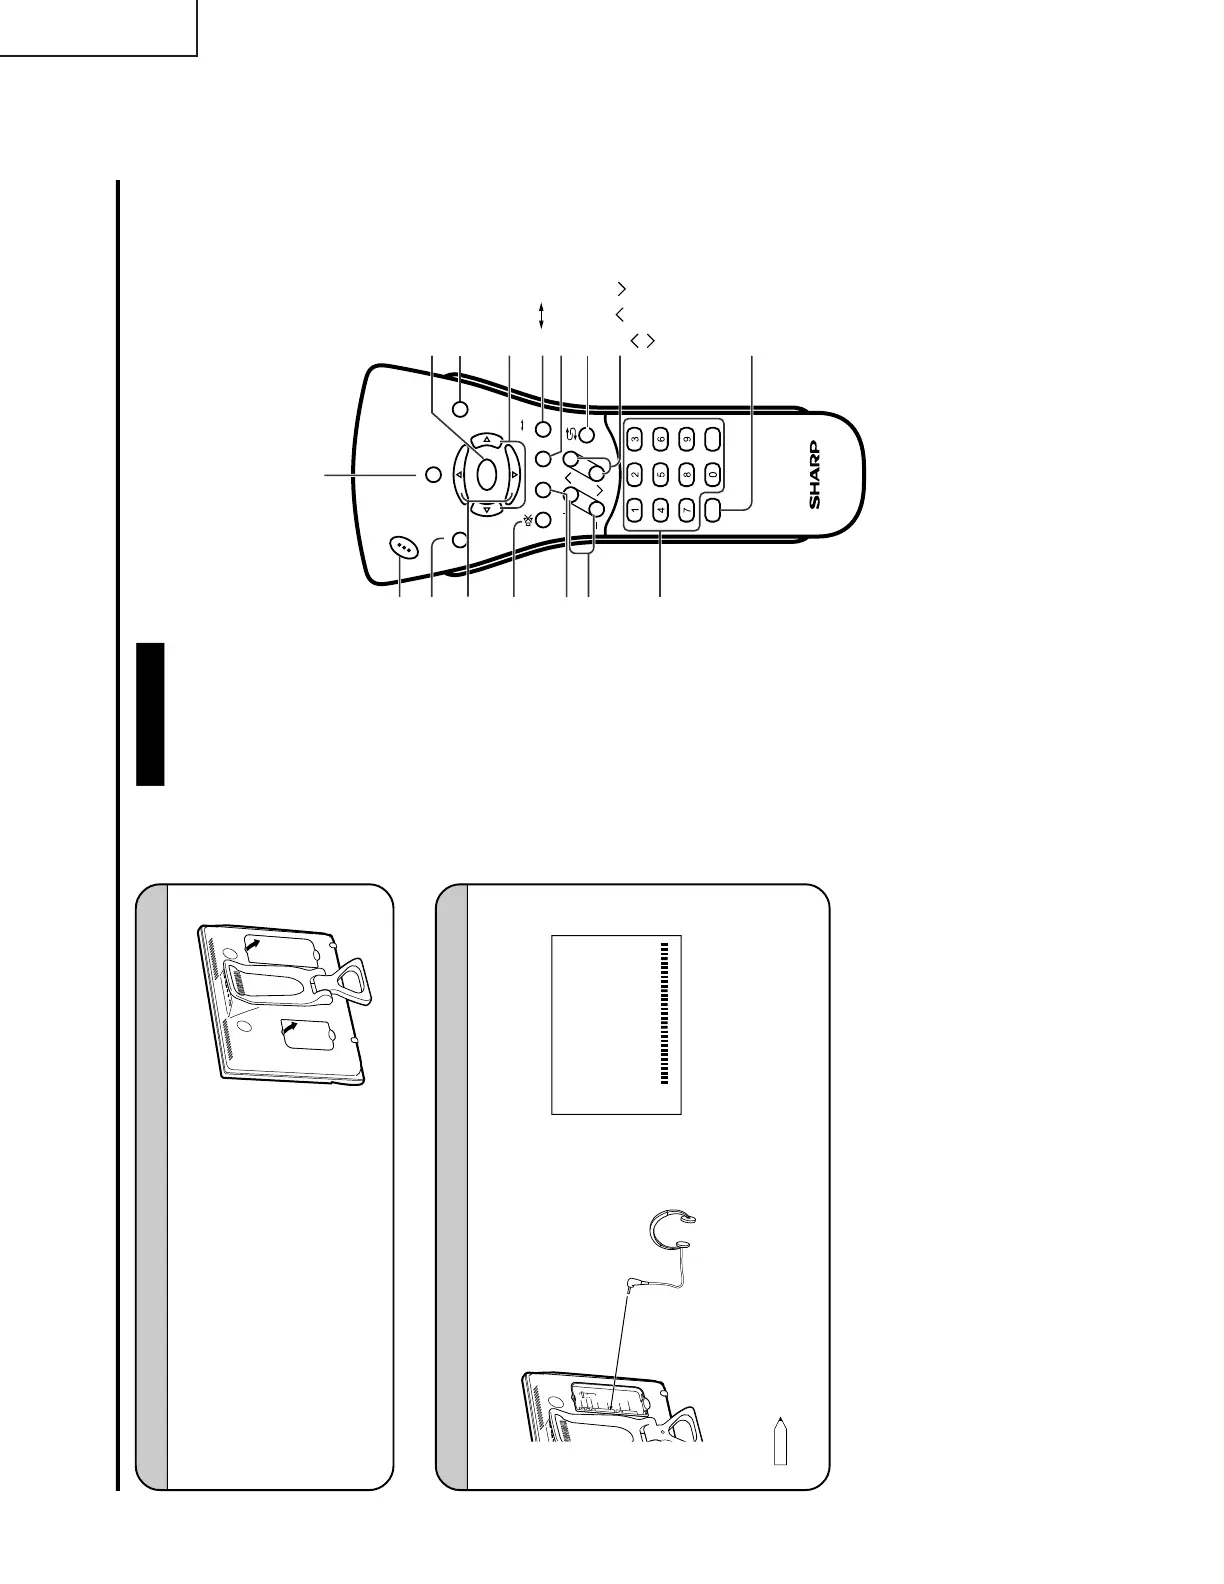
LOCATION OF USERS CONTROL (Continued)
Ë Before connecting a connection cord into the rear terminal, remove the
back cover. Push in the tab and pull out the back cover carefully.
Ë To mount the cover, insert the 2 hooks on the bottom of the cover
into the cabinet and press on the upper part of the back cover until
the tab locks in place with a click.
Removing the Back Cover
Ë
Plug the headphone mini-plug into the HEADPHONE jack located on the rear of the TV set.
Headphones
Note:
• Headphones are not included in the supplied accessories.
• No sound will be heard from the main unit speakers when a headphone mini-plug is connected into the
HEADPHONE jack.
" On-screen display
\
Rear terminal
A
V
-
I
N
1
L
R
A
U
D
I
O
S
-
V
I
D
E
O
A
N
T
.
V
I
D
E
O
P
O
W
E
R
I
N
P
U
T
D
C
1
2
V
H
E
A
D
P
H
O
N
E
Y
P
B
C
OM
P
O
N
E
N
T
P
R
L
L
R
A
V
-
IN
2
/
OU
T
V
I
D
E
O
A
U
D
I
O
R
A
U
D
IO
60
VOLUME
A
V
-
I
N
1
L
R
AU
D
I
O
S
-
V
I
D
E
O
A
NT
.
V
I
D
E
O
P
O
W
E
R
I
NP
UT
D
C
1
3
V
H
E
A
D
P
H
O
N
E
Remote control
CH
VOL
LANGUAGE DIS.MODE
DISPLAY
BRIGHTSLEEP
MENU
POWER
MPX
-/--
TV
VIDEO
MENU SLEEP
MENU cursor
(Right/Left Selection)
VOL (+)/(–)
LANGUAGE
POWER
TV VIDEO
DIS.MODE
MENU cursor
(Upward/Downward Selection)
CHANNEL SELECT
CH ( )/( )
Selects next higher channel.
Selects next lower channel.
FLASHBACK
Returns to previous channel.
DISPLAY
Press....Displays receiving channel for 10 seconds.
Channel indication reduces in size after
about 10 seconds.
Press again...Removes display.
Press....Stops sound.
Press again...Returns
sound to previous level.
MPX
Switches Audio mode.
BRIGHT
The brightness can be
switched between 3 levels.
MUTE