23
HH
HH
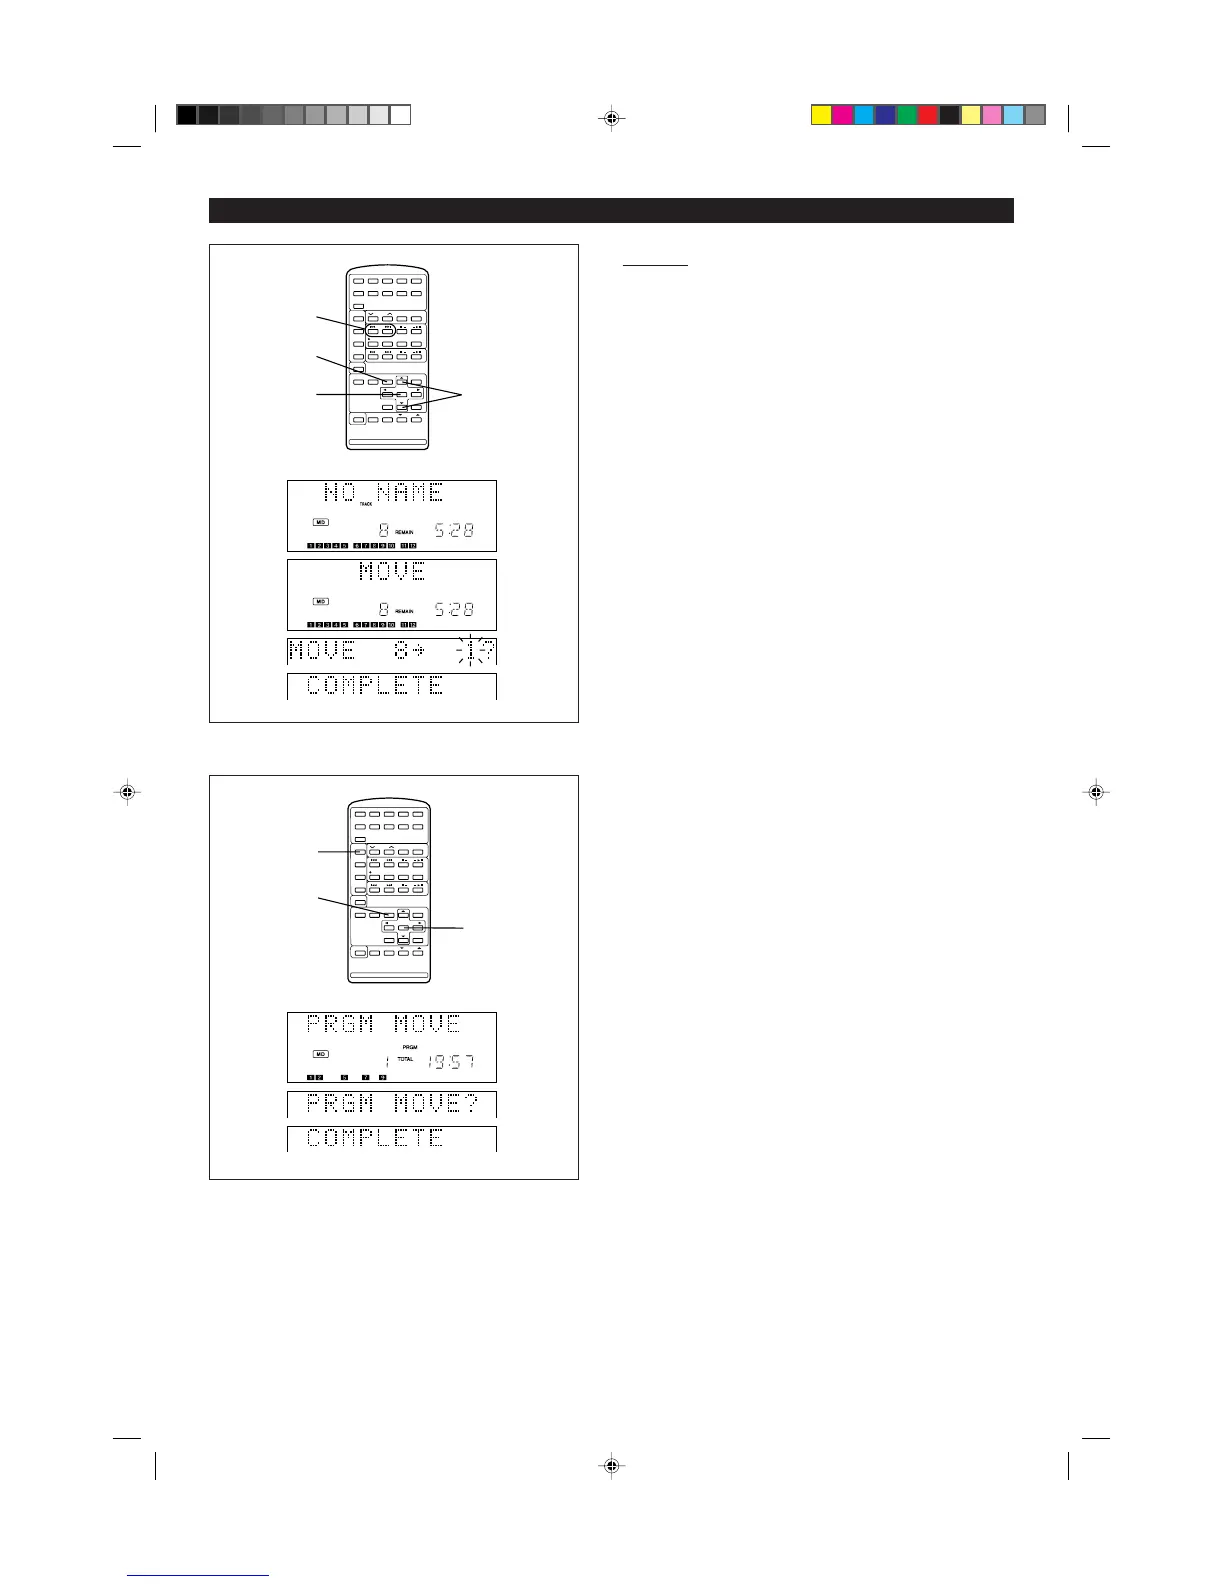
H Move
1 While in the stop mode, select the track you wish to move using the 5
or 4 button.
I Start playing the track to be moved, and then press the MD 06 button.
2 Press the NAME/TOC EDIT button, and then select “MOVE” using the
▲ or ▼ button.
3 Within 10 seconds, press the ENTER button.
4 Select the direction to move the track using the 5 or 4 button.
I To increase the track number ... 4
I To decrease the track number ... 5
I To cancel the operation, press the MD H button.
5 Press the ENTER button again.
I The track is moved, and the unit is stopped at the beginning of the track.
Note:
I When a track has been moved, the other tracks which are affected will
be assigned new track numbers automatically.
Programmed move:
1 Select the tracks you want to move and enter them into a program.
(Page 14)
2 Make sure that the “PRGM” indicator is lit, and then press the NAME/
TOC EDIT button.
3 Within 10 seconds, press the ENTER button.
I To cancel the operation, press the MD H button.
4 Press the ENTER button again.
I The tracks will be moved, and the programmed move mode will end.
Notes:
I The track numbers that are not included in the programmed selections
will be put at the end of the new sequence.
I When the same track has been entered into the program twice or more,
the last programmed position will have priority.
(Continued)
2
1,4
2
3,5
1
2
3
5
1
2
3,4
2
3
4
*22-34 98.6.23, 10:10 AM23