MD-X5H/CP-X5H
– 26 –
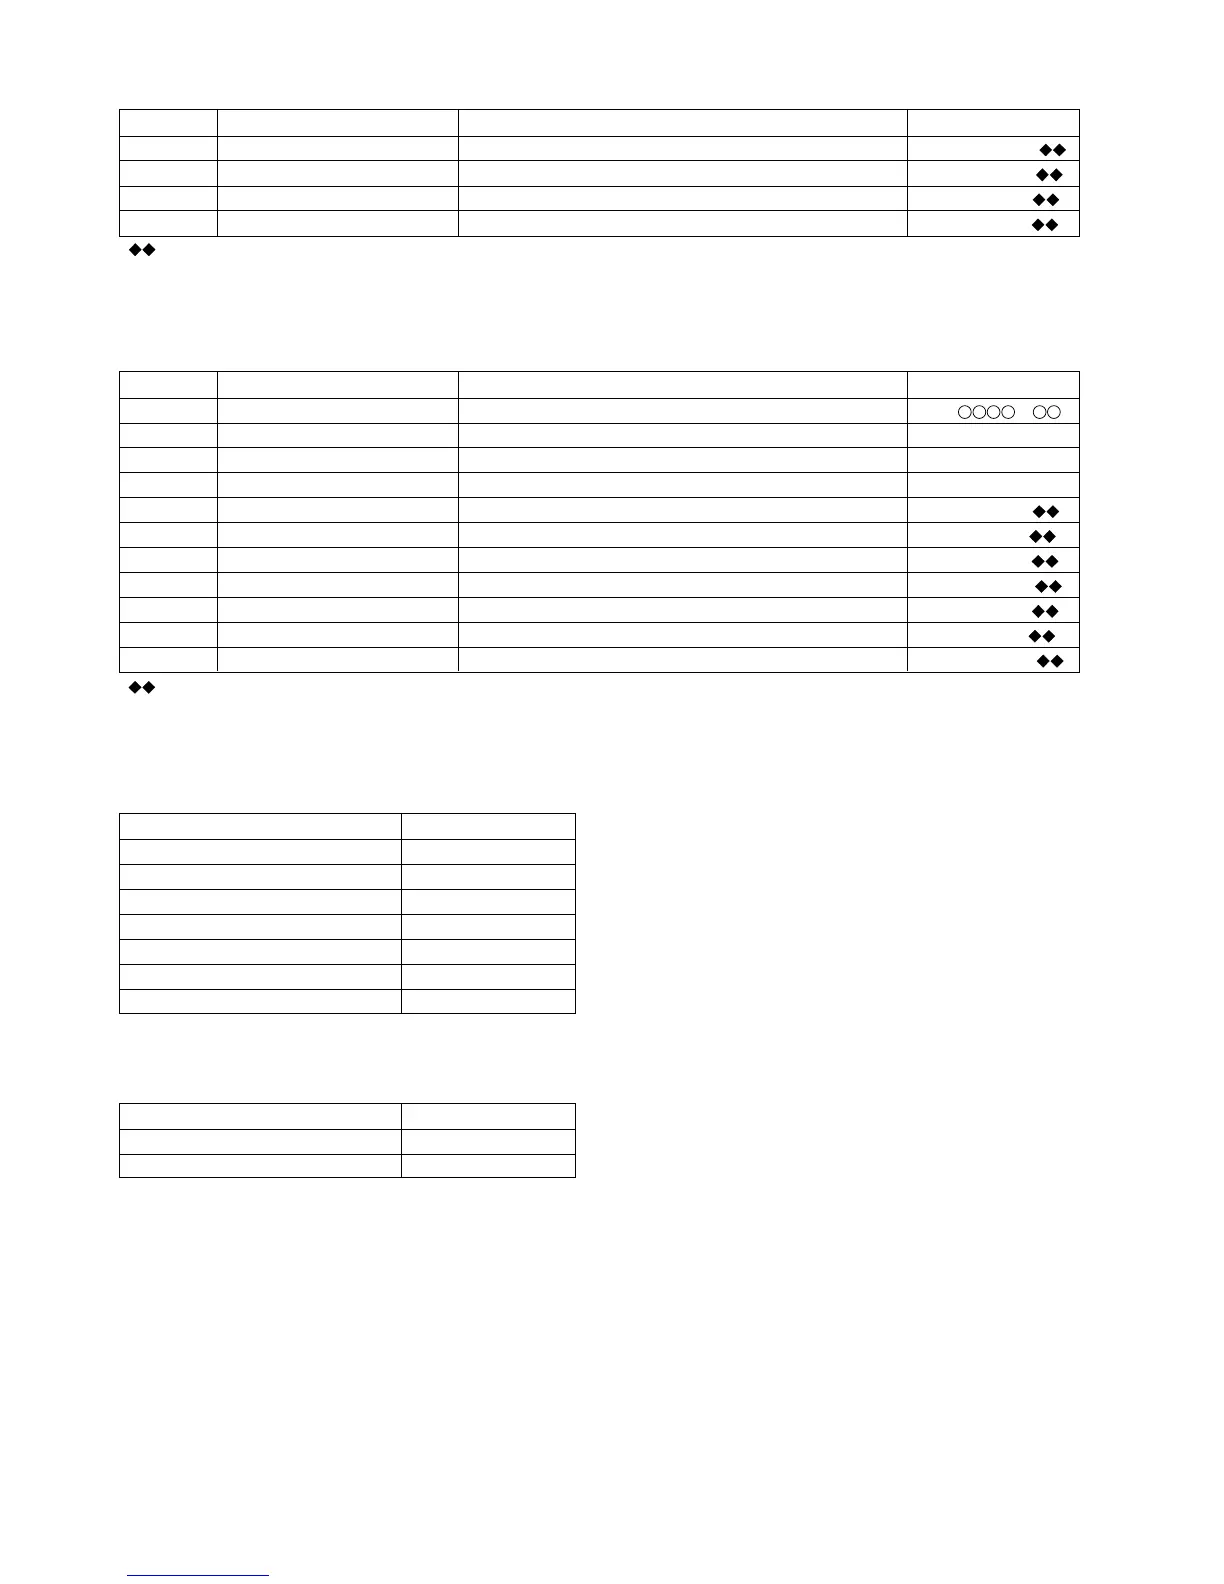
Step 18 Press once the CD PLAY button. TCRS comparison level 1 for high reflection [ T C R S C 1 P _ ]
Step 19 Press once the CD PLAY button. Comparison level in case of COUT generation (playback) [ C O T L V p _ _ ]
Step 20 Press once the CD PLAY button. Comparison level in case of COUT generation (pecord) [ C O T L V r _ _ ]
Step 21 Press once the CD PLAY button. Auto-move waiting time setting [ W A I T m_ _ _ ]
Step No.
Setting Method
Remarks Display
d) Slide setting
Step 1 Testmode STOP state [ t s m e ]
Step 2
Press the CD PLAY button seven times.
EEPROM setting menu [E E P R O M _ S E T]
Step 3 Press once the MD PLAY button. Focus setting menu [ _ _ F o c u s _ _ _ ]
Step 4
Press the CD PLAY button three times.
Slide setting menu [ _ _ _ S l e d _ _ _ ]
Step 5 Press once the MD PLAY button. Slide system loop filter gain constant setting [ S L G _ _ _ _ _ ]
Step 6 Press once the CD PLAY button. Slide system loop filter f characteristic constant 2 setting [ S L 2 _ _ _ _ _ ]
Step 7 Press once the CD PLAY button. Slide output limitter setting [ S L D L I M _ _ ]
Step 8 Press once the CD PLAY button. Slide servo output dead zone level setting [ S L D L E V _ _ ]
Step 9 Press once the CD PLAY button. Slide kick pulse level setting (forced move) [ S L K L V k _ _ ]
Step 10 Press once the CD PLAY button. Slide kick pulse level setting (for 10 lines jump auxiliary use) [ S L K L V t _ _ ]
Step 11 Press once the CD PLAY button. Slide kick pulse level setting (move) [ S L K L V m _ _ ]
Step No.
Setting Method
Remarks Display
• : Setting volue
• Pressing the REC button causes reversing.
• If the VOL UP button is pressed while the specific setting item is indicated, the setting increases, and the new setting is set in LSI.
• If the VOL DOWN button is pressed while the specific setting item is indicated, the setting decreases, and the new setting is set in LSI.
• If the VOL UP/VOL DOWN button is held down, the setting changes continuously with 100 ms cycle.
•
: Setting volue
• Pressing the REC button causes reversing.
• If the VOL UP button is pressed while the specific setting item is indicated, the setting increases, and the new setting is set in LSI.
• If the VOL DOWN button is pressed while the specific setting item is indicated, the setting decreases, and the new setting is set in LSI.
• If the VOL UP/VOL DOWN button is held down, the setting changes continuously with 100 ms cycle.
Temperature measurement value correction table
Ambient temperature
correction
12.2 °C ~ 15.8 °C -0 3 H
15.9 °C ~ 19.6 °C -0 2 H
19.7 °C ~ 23.2 °C -0 1 H
23.2 °C ~ 26.8 °C ± 0 H
26.9 °C ~ 30.7 °C +0 1 H
30.8 °C ~ 34.3 °C +0 2 H
34.4 °C ~ 37.9 °C +0 3 H
EEPROM record value = Microcomputer measurement value +
Correction
* EEPROM record value
Value to be measured by the microcomputer at +25°C
* Microcomputer measurement value
Value to be measured by the microcomputer at specific
temperature
* Correction value
Correction value for conversion to measurement value at
+25°C (see the table shown left)
Ambient temperature
temperature code
19.6 °C ~ 30.7 °C0 6
8.7 °C ~ 19.6 °C0 7
• Temperature code check
The temperature code is read after automatic adjustment. If it is within the range shown below, the adjustment is OK.