•
Decreasing the value of the skew rotates the horizontal lines counterclockwise. The left end of the
line remains in the same place and the right end moves upward.
Select
OK
.
Print a Quick test page to verify the change.
Repeat steps
1
to 4 until the horizontal line is properly aligned with the leading edge of the page.
Check for proper margin alignment. See
“Adjusting the margins” on page 301
.
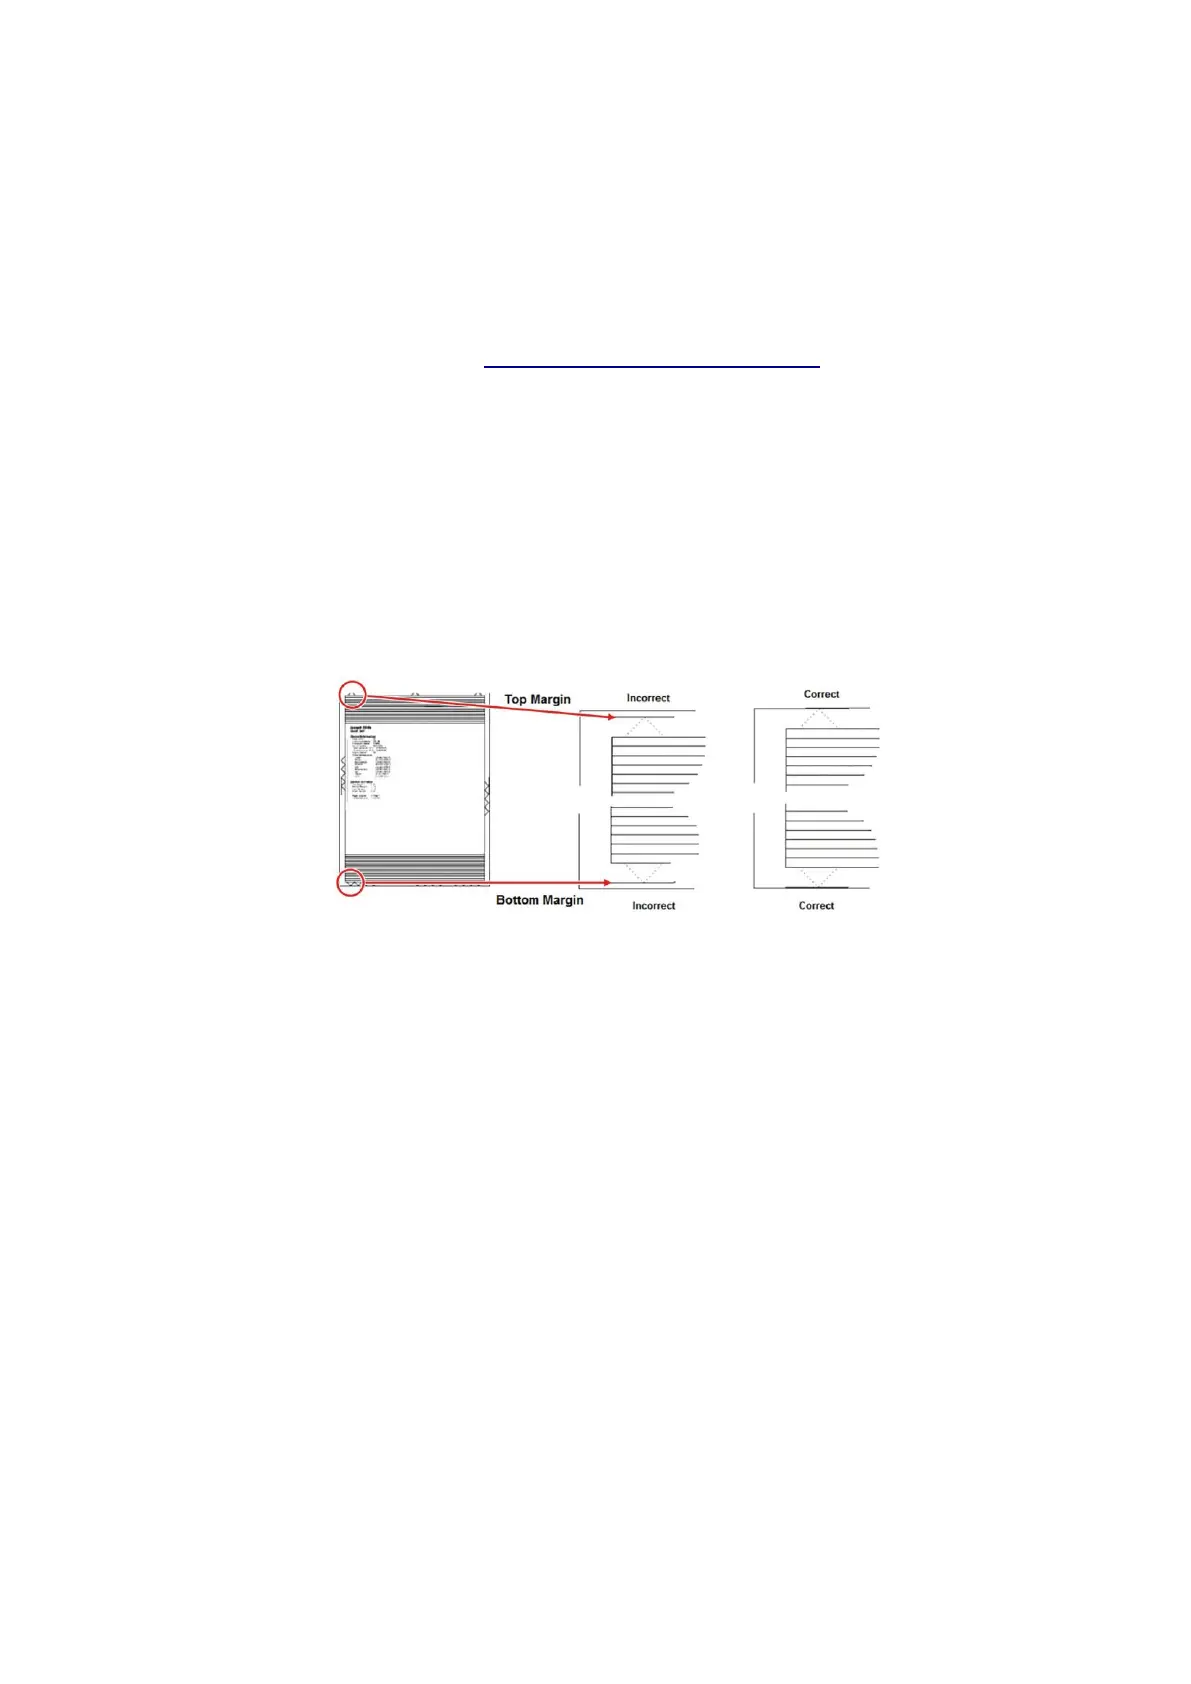
Adjusting the margins
To check for proper margin alignment:
Enter the Diagnostics menu, and then navigate to:
Printer diagnostics & adjustments
>
Registration adjust
Select
Quick Test
, and then press
OK
or touch
Start
.
The printer prints a test page.
Check the top and bottom margins of the test page for proper alignment.
Refer to the test page, and then check the arrows along the margins.
Notes:
•
The arrows should be completely visible along the edges.
•
The tip of the arrows should point to the edges of the paper.
Enter the Diagnostics menu, and then navigate to:
Printer diagnostics & adjustments
>
Registration adjust
Select the field of the margin to adjust.
Specify value. The value range is from -80 to 80.
Notes:
For 2
‑
line LCD screens, use the left or right arrow buttons to increase or decrease the value.
Raising the value of the top margin setting pushes the top edge of the image downward.
Raising the value of the bottom margin setting pushes the bottom edge of the image upward.
Raising the value of the left margin setting pushes the left margin to the right.
Raising the value of the right margin setting pushes the right margin to the left.