AR-PF1/AR-PF2 11 - 1
[11]AR-PF1 BARCODE FONT KIT
AR-PF2 MACRO FONT FLASH ROM KIT
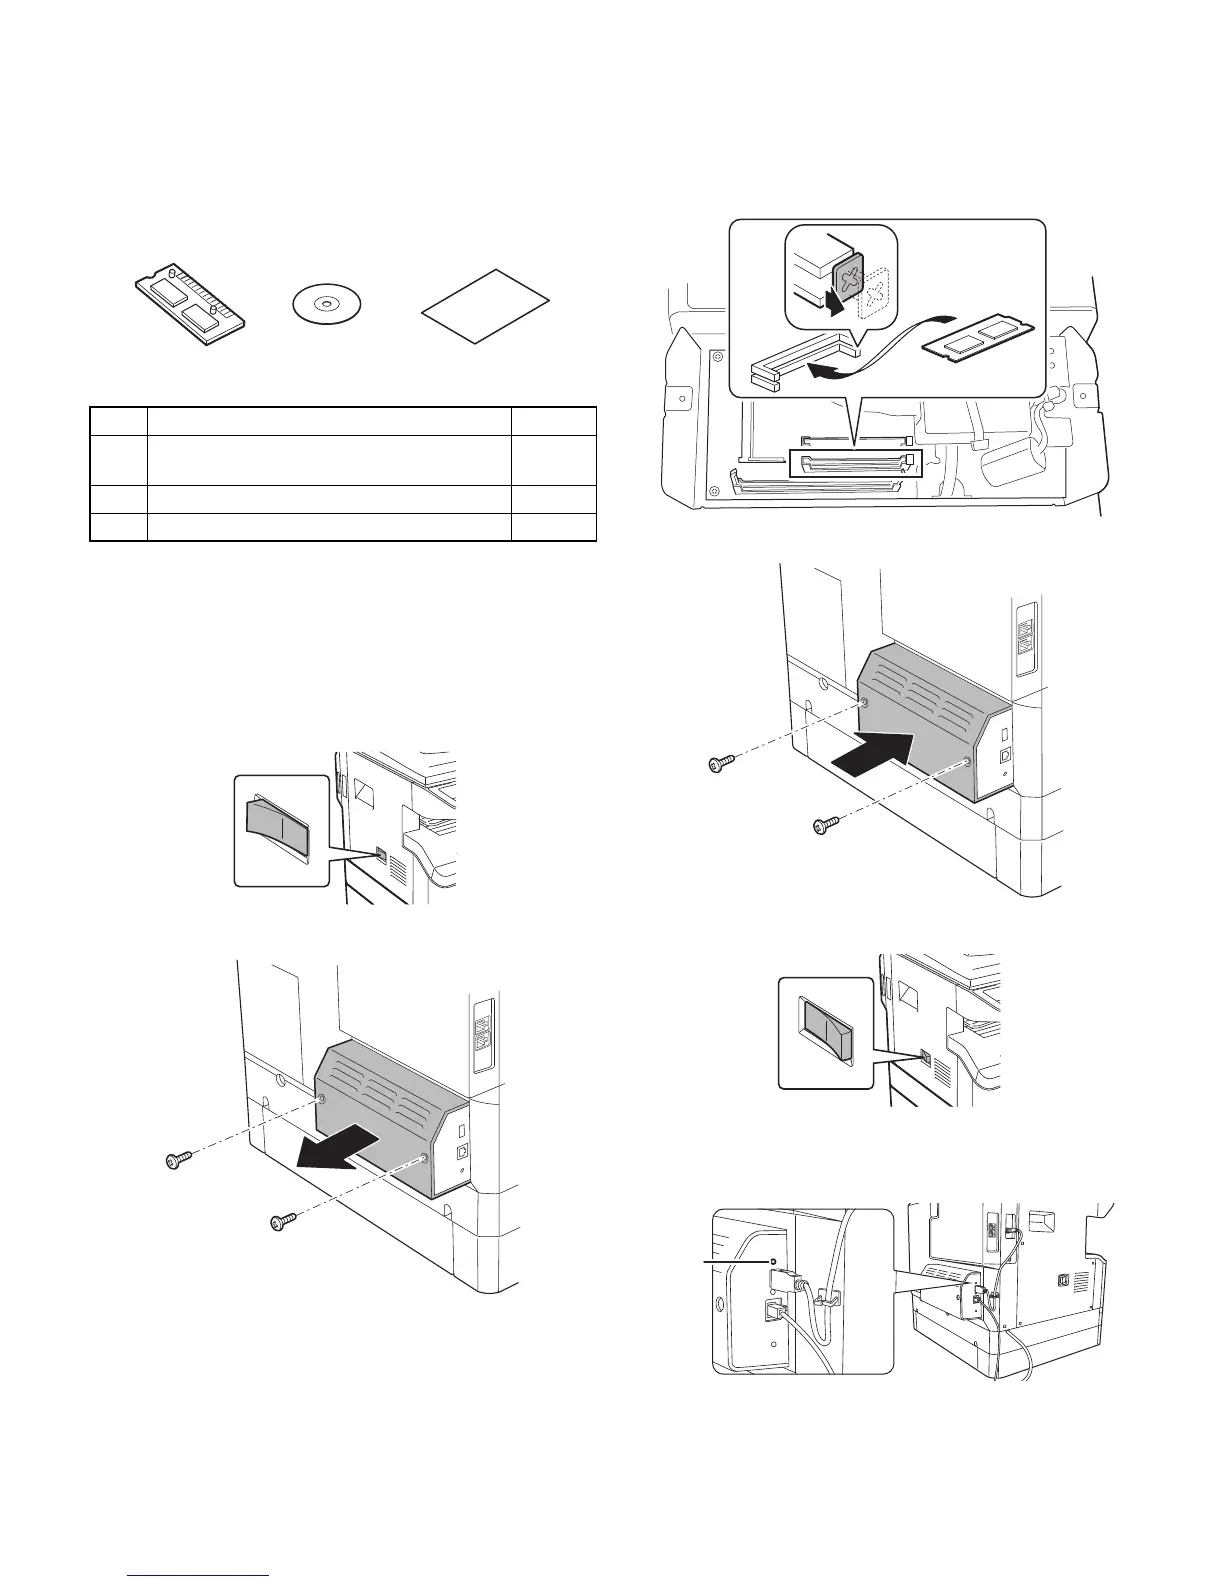
1. Unpacking
<Parts included>
2. Installation
The AR-PF1 and the AR-PF2 cannot be installed at the same time.
For installing of this option, install the network expansion kit (MX-NB10)
in advance.
A. Turn off the power switches of the main unit.
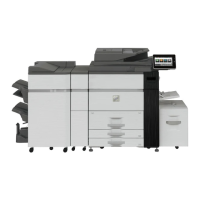
B. Remove two screws, and remove the cover of the network box.
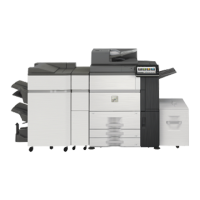
C. Install the ROM PWB to an empty slot in the area shown below.
D. Install the cover of the network box.
E. Turn on the main power switch of the main unit.
F. Check the printer setting list that is printed when the button of the
network expansion kit (MX-NB10) is pressed down for 2 sec. or
more, and confirm that the barcode font or the micro font is printed.
No. Packed part names Quantity
1 Barcode font ROM (AR-PF1)
Flash ROM (AR-PF2)
1
2 CD-ROM 1
3 Operation Manual 1
Status
button