MX-M232D (AR-SP10/AR-RP10) 4 - 2
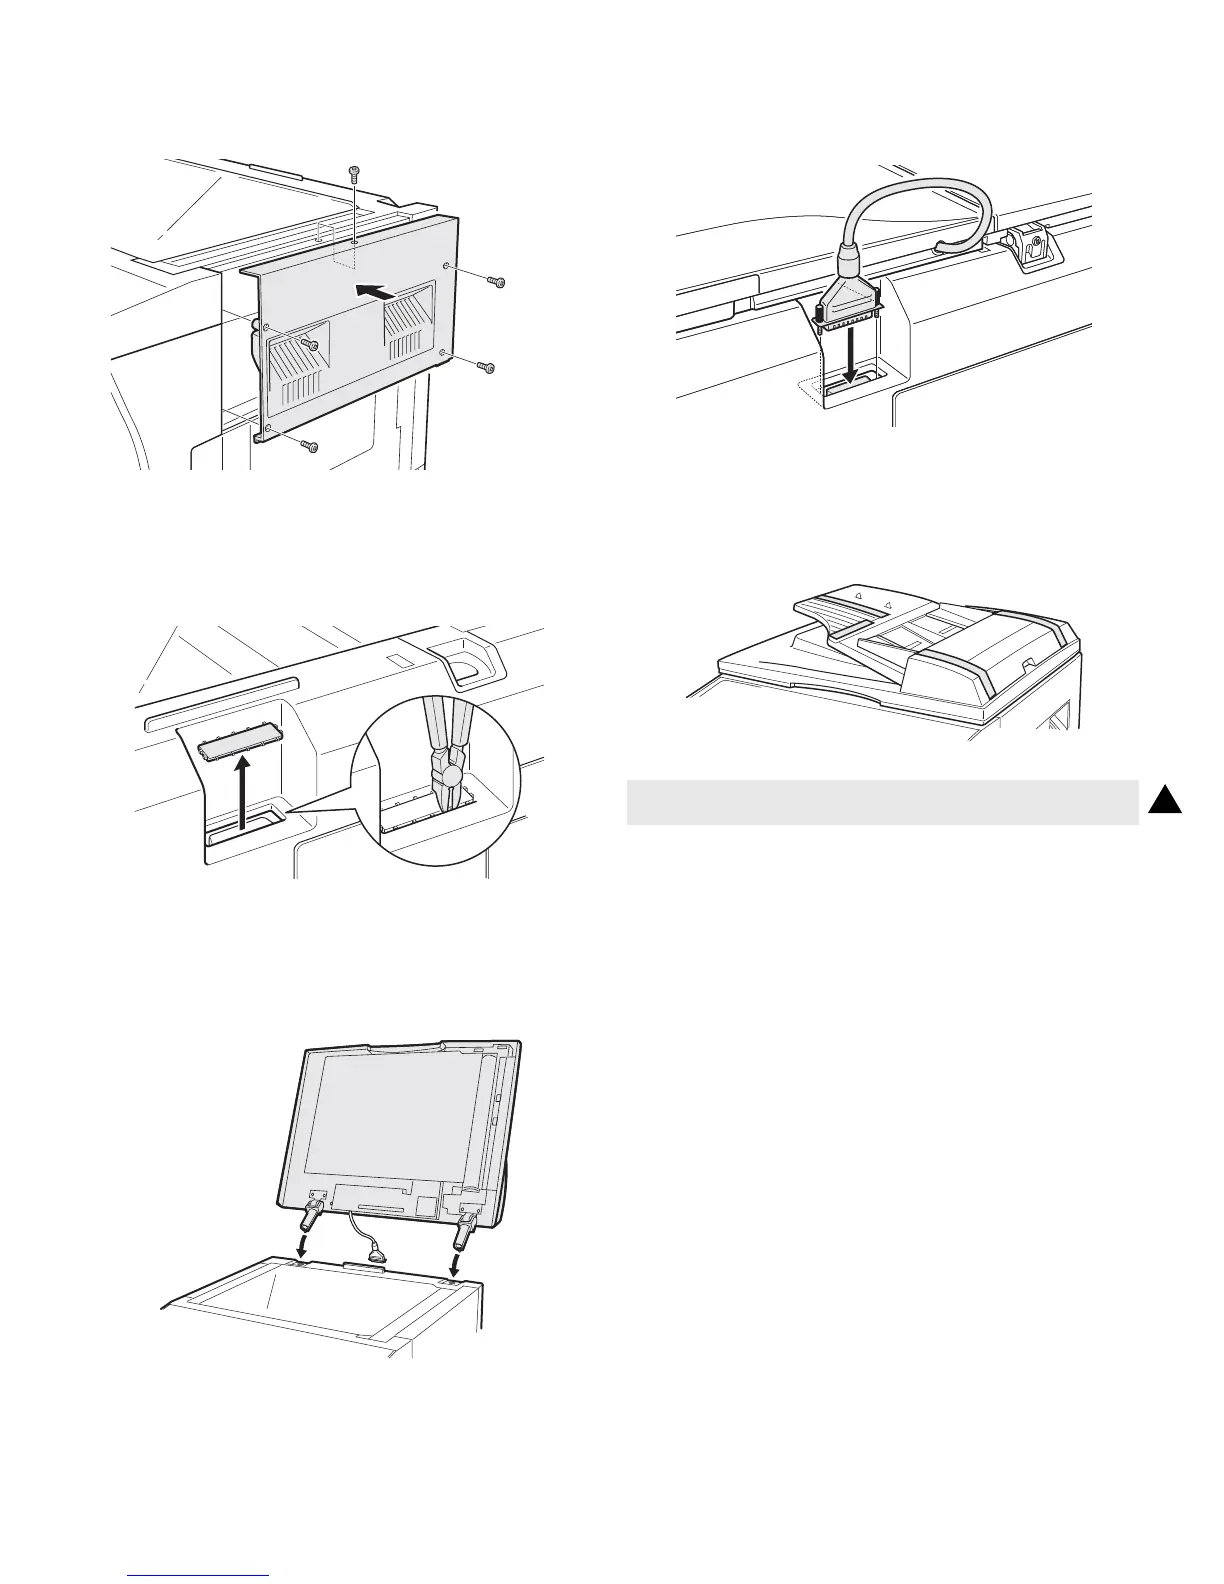
5) Attach the right cabinet.
Reattach the right cabinet to its original position and fix it with the
screws.
6) Cut out the cut-out portion.
Cut out the cut-out portion of the rear cabinet with nippers or the like.
At this time, be careful about the orientation of the nippers so that the
cut plane of the rear cabinet is flat.
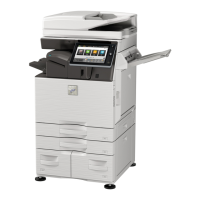
7) Attach the automatic document feeder.
Insert the hinge portions of the document feeder into the mounting por-
tions of the machine by holding the feeder at an angle toward the rear
side.
8) Connect the relay connector.
Connect the harness of the automatic document feeder to the connec-
tor of the machine and tighten the screws on the connector.
9) Remove the filament tape.
Remove the filament tape located in the positions shown in the illustra-
tion.
10) If the optical unit shifts and recognizes the boundary between
the OC glass and SPF glass cover, perform SIM 53-8.
1