Operation
Place the original and tap the [Preview] key.
Place the original in the document feeder tray of the automatic document feeder,
or on the document glass.
AUTOMATIC DOCUMENT FEEDER
DOCUMENT GLASS
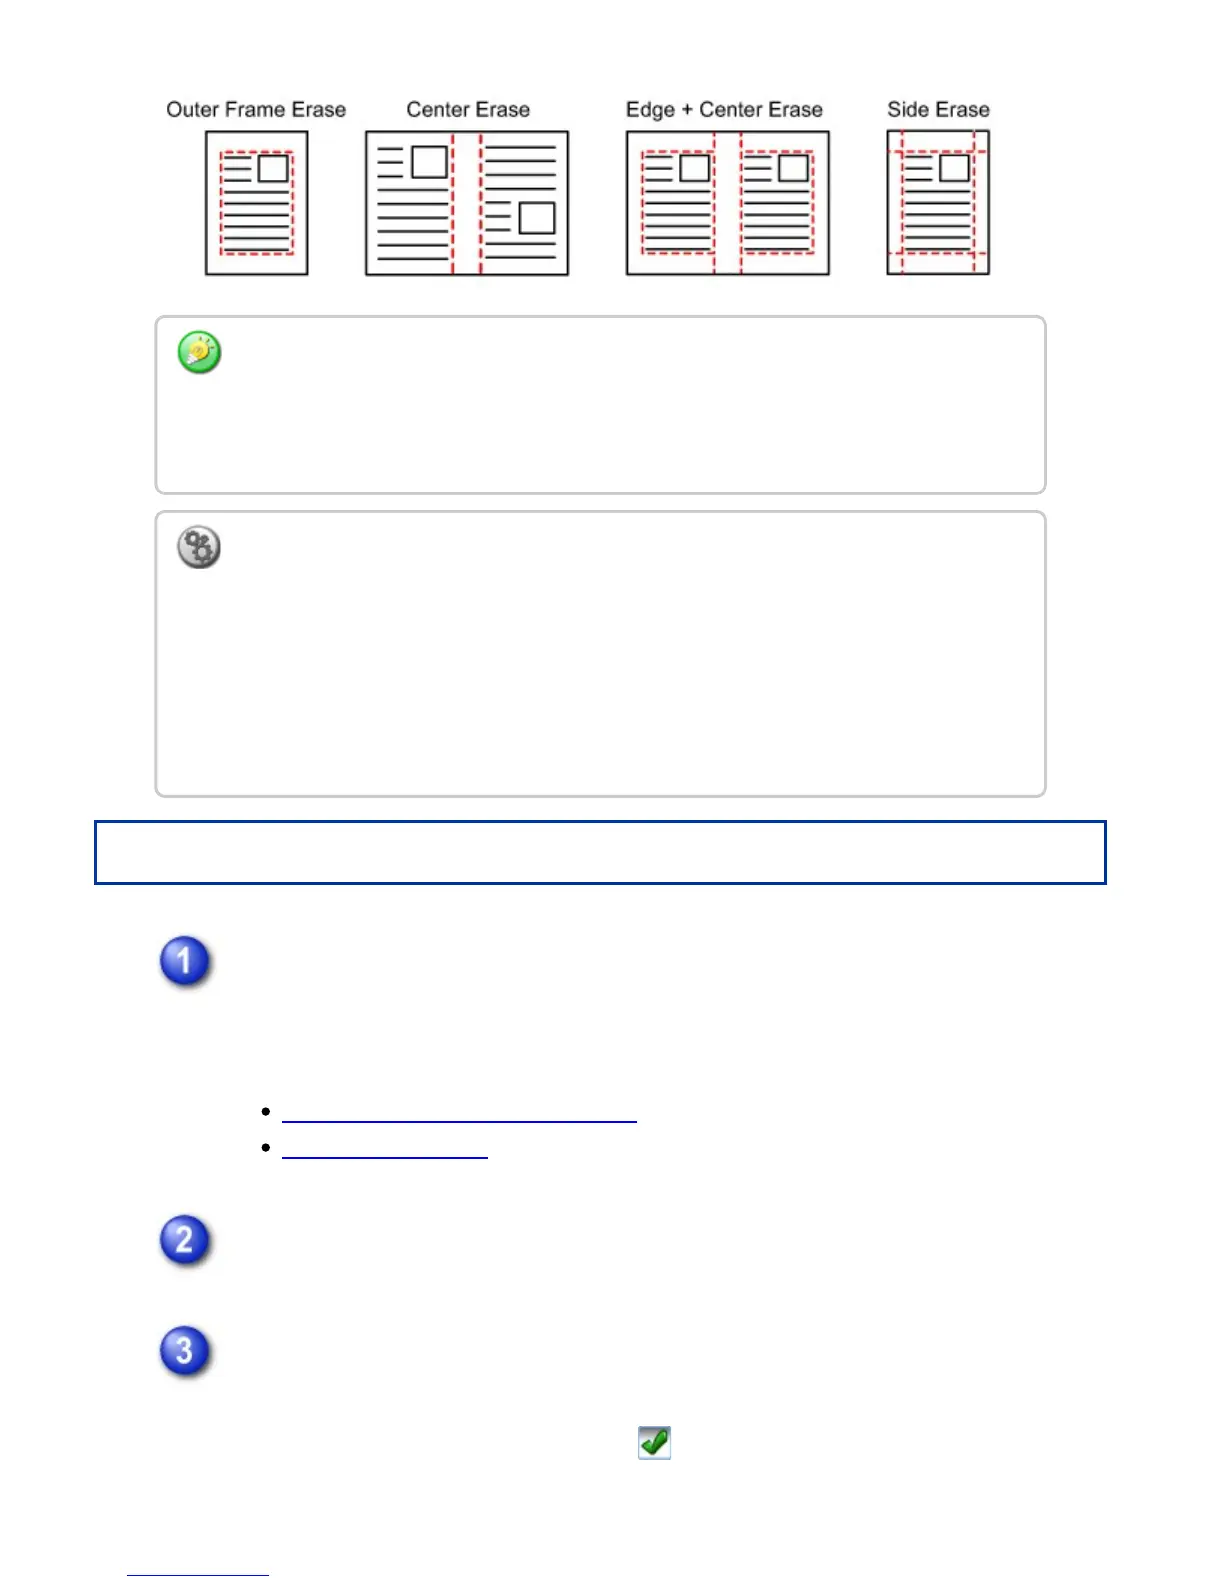
Tap the [Others] key, and tap the [Erase] key.
Tap the checkbox of the edge that you wish to erase, and specify the erase
position.
Check that he tapped checkbox is set to .
If the [Specify Frame] key is tapped, the [Up], [Down], [Left], and [Right]
If a ratio setting is used in combination with an erase setting, the erase width will change
according to the selected ratio.
If the erase width setting is 1" (20 mm) and the image is reduced to 50%, the erase width
will be 1/2" (10 mm).
To change the default erase width setting:
In "Setting mode", select [System Settings] → [Copy Settings] → [Copy Setting] →
[Erase Width Adjustment].
The factory default setting is 2/5" (10 mm). The default margin shift setting can be set
from 0" to 1" (0 mm to 20 mm) . The factory default setting is 1/2" (10 mm). The changed
setting is also applied to the Setting mode selection of [System Settings] → [Image Send
Settings] → [Operation Settings] → [Default Settings] → [Erase Width Adjustment].
USER'S MANUAL | MX-M365N/MX-M465N/MX-M565N USER'S ... http://siica.sharpusa.com/portals/0/downloads/Manuals/MX-M365N-M...
318 of 1441 3/17/2016 7:14 AM