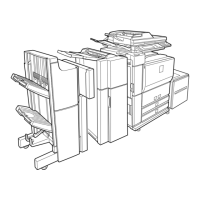
MX-M700N SIMULATION 7 – 41
46-18
Purpose
Adjustment
Function (Purpose)
Used to adjust the gamma (density gradi-
ent) in the copy mode.
Section
—
Operation/Procedure
(Copy mode selection)
1) Select the number corresponding to the copy mode to be
adjusted with 10-key. (Select one of 3 - 14.)
2) Press the [START] key.
(Print mode selection in the FAX mode)
1) Enter 2 with 10-key.
2) Press the [START] key.
3) Select the number corresponding to one of the following
adjustment items with 10-key. (Select one of 3 - 14.)
* Normal mode (Print density adjustment level)
* Normal mode (Print density adjustment level) (Half-tone
mode)
* Auto mode
* Auto mode (Half-tone mode)
[AE mode]
4) Press the [START] key.
(Gamma adjustment)
After completion of the above procedures, perform the following
procedures.
1) Enter the gamma level with 10-key.
2) Press the [P] or [START] key.
When [START] key is pressed, printing is performed and the
adjustment value is set simultaneously.
Check the gamma density (copy density in the low density
area and the high density area) of printed copy image.
The greater the adjustment value is, the greater the gamma
value is, resulting in a higher contrast.
(Copy condition setting in this simulation)
To select paper (paper feed tray), perform the following procedures.
1) Enter 0 with 10-key.
2) Press [START] key. (The mode is changed to the paper feed
tray selection mode.)
3) Enter the number corresponding to the paper feed tray to be
used with 10-key.
4) Press [START] key. (The paper feed tray is selected.)
NOTE: When [P] key is pressed after entering an adjustment value
in this simulation, the adjustment value is set. When
[START] key is pressed, the adjustment value is set and
copying is performed.
46-19
Purpose
Adjustment
Function (Purpose)
Used to set the auto mode operation speci-
fications in each mode (copy, scan, FAX).
Section
—
Operation/Procedure
(Toner save operation YES/NO setting in the auto mode)
1) Select "1. AE MODE" with 10-key.
2) Press the [START] key.
3) Select the number that corresponds to the operation specifica-
tions with 10-key.
4) Press the [START] key.
When [START] key is pressed, the adjustment value is set.
(Auto copy mode operation setting)
1) Select the number corresponding to the mode with 10-key.
(Select one of 2 - 4.)
2) Press the [START] key.
3) Select the number that corresponds to the operation mode
with 10-key.
Item
Setting
range
Default
0 TRAY SELECT Paper feed tray
selection
1 PRINT START Print start (Default)
2 EXP LEVEL Exposure level selection
3 OC_AE AE mode (OC) 0 - 127 96
4 OC_CHARA Text mode (OC) 64
5 OC_MIX Text/Photo mode (OC)
6 OC_PHOTO Photo mode (OC)
7 SPF_AE AE mode (SPF) 96
8 SPF_CHARA Text mode (SPF) 64
9 SPF_MIX Text/Photo mode (SPF)
10 SPF_PHOTO Photo mode (SPF)
11 CIS_AE AE mode (CIS) 96
12 CIS_CHARA Text mode (CIS) 64
13 CIS_MIX Text/Photo mode (CIS)
14 CIS_PHOTO Photo mode (CIS)
Item
3AUTO Auto
41 Exposure level 1
52 Exposure level 2
63 Exposure level 3
74 Exposure level 4
85 Exposure level 5
9 AUTO (H) Auto (Half-tone)
10 1.0 (H) Exposure level 1 (Half-tone)
11 2.0 (H) Exposure level 2 (Half-tone)
12 3.0 (H) Exposure level 3 (Half-tone)
13 4.0 (H) Exposure level 4 (Half-tone)
14 5.0 (H) Exposure level 5 (Half-tone)
Normal display NOW PRINTING.
ERROR display Door open DOOR OPEN.
Jam JAM
Paper empty PAPER EMPTY.
1TRAY1 TRAY1
2TRAY2 TRAY2
3TRAY3 TRAY3
4TRAY4 TRAY4
5 BPT Manual paper feed
6 LCC Side LCC
SIMULATION 46-18
GAMMA SETUP(COPIER). SELECT 1-14, AND PRESS START.
0.TRAY SELECT 1 1.PRINT START 2.EXP LEVEL 1
3.OC_AE 64 4.OC_CHARA 5.OC_MIX 64
6.OC_PHOTO 64 7.SPF_AE 64 8.SPF_CHARA 64
9.SPF_MIX 64 10.SPF_PHOTO 64 11.CIS_AE 64
12.CIS_CHARA 64 13.CIS_MIX 64 14.CIS_PHOTO 64