8
Address Setting
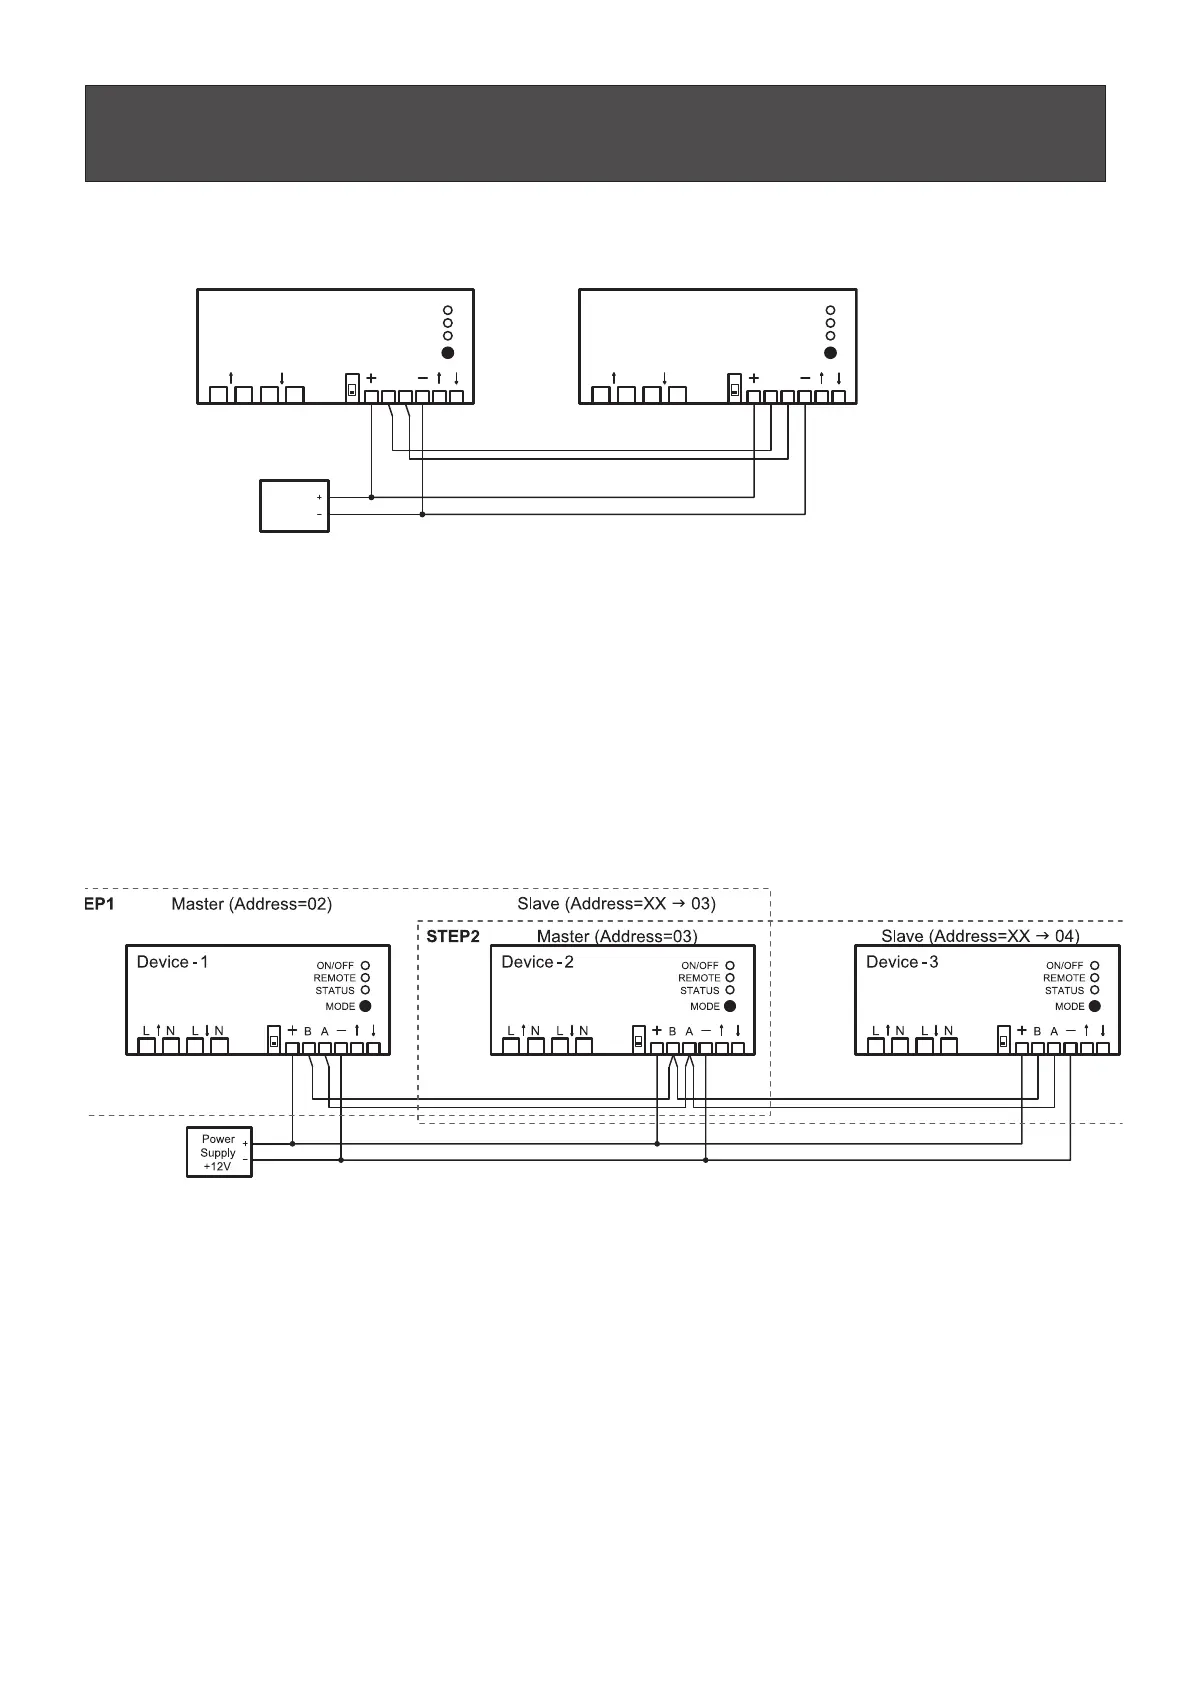
Method for two devices
Master(Address=02) Slave(Address=XX g 03)
Procedure:
1. Connect according to diagram above.
2. Switch on the DC Power supply.
3. Press the MODE button of the master device within 10 sec after turning the power on and keep the button
pressed for at least 15 sec.
Note
(1) Power Supply is not included in the scope of delivery and has to be purchased
externally from a third-party provider.
The slave device address will be set to master address + 1.
The slave device will confirm the new address with 6-times fast flashing of the “STATUS” LED.
Method for more devices
(1)
1. Connect according to diagram above STEP-1 (Device-1 = Master, Device-2 = Slave).
2. Switch on the DC Power supply.
3. Press the MODE button of the master device within 10 sec after turning the power on and keep the button
pressed for at least 15 sec.
4. Connect according to diagram above STEP-2 (Device-2 = Master, Device-3 = Slave) .
5. Switch on the DC Power supply.
6. Press the MODE button of the master device within 10 sec after turning the power on and keep the button
pressed for at least 15 sec.
Note
(1) Power Supply is not included in the scope of delivery and has to be purchased
externally from a third-party provider.
The slave device address will be set to master address + 1.
The slave device will confirm the new address with 6-times fast flashing of the “STATUS” LED.
Power
Supply
+12V
Device -1
AB
LNLN
Device - 2
AB
LNLN
ON/OFF
REMOTE
STATUS
MODE
ON/OFF
REMOTE
STATUS
MODE
(1)