ENGLISH
7
E
Turning Power On/Off
Caution
• Turnonthemonitorrstbeforeturningonthecomputeror
playbackdevice.
• WhenswitchingthemainpowerswitchorthePOWER
buttonoffandbackon,alwayswaitforatleast5seconds.
Ashortintervalmayresultinamalfunction.
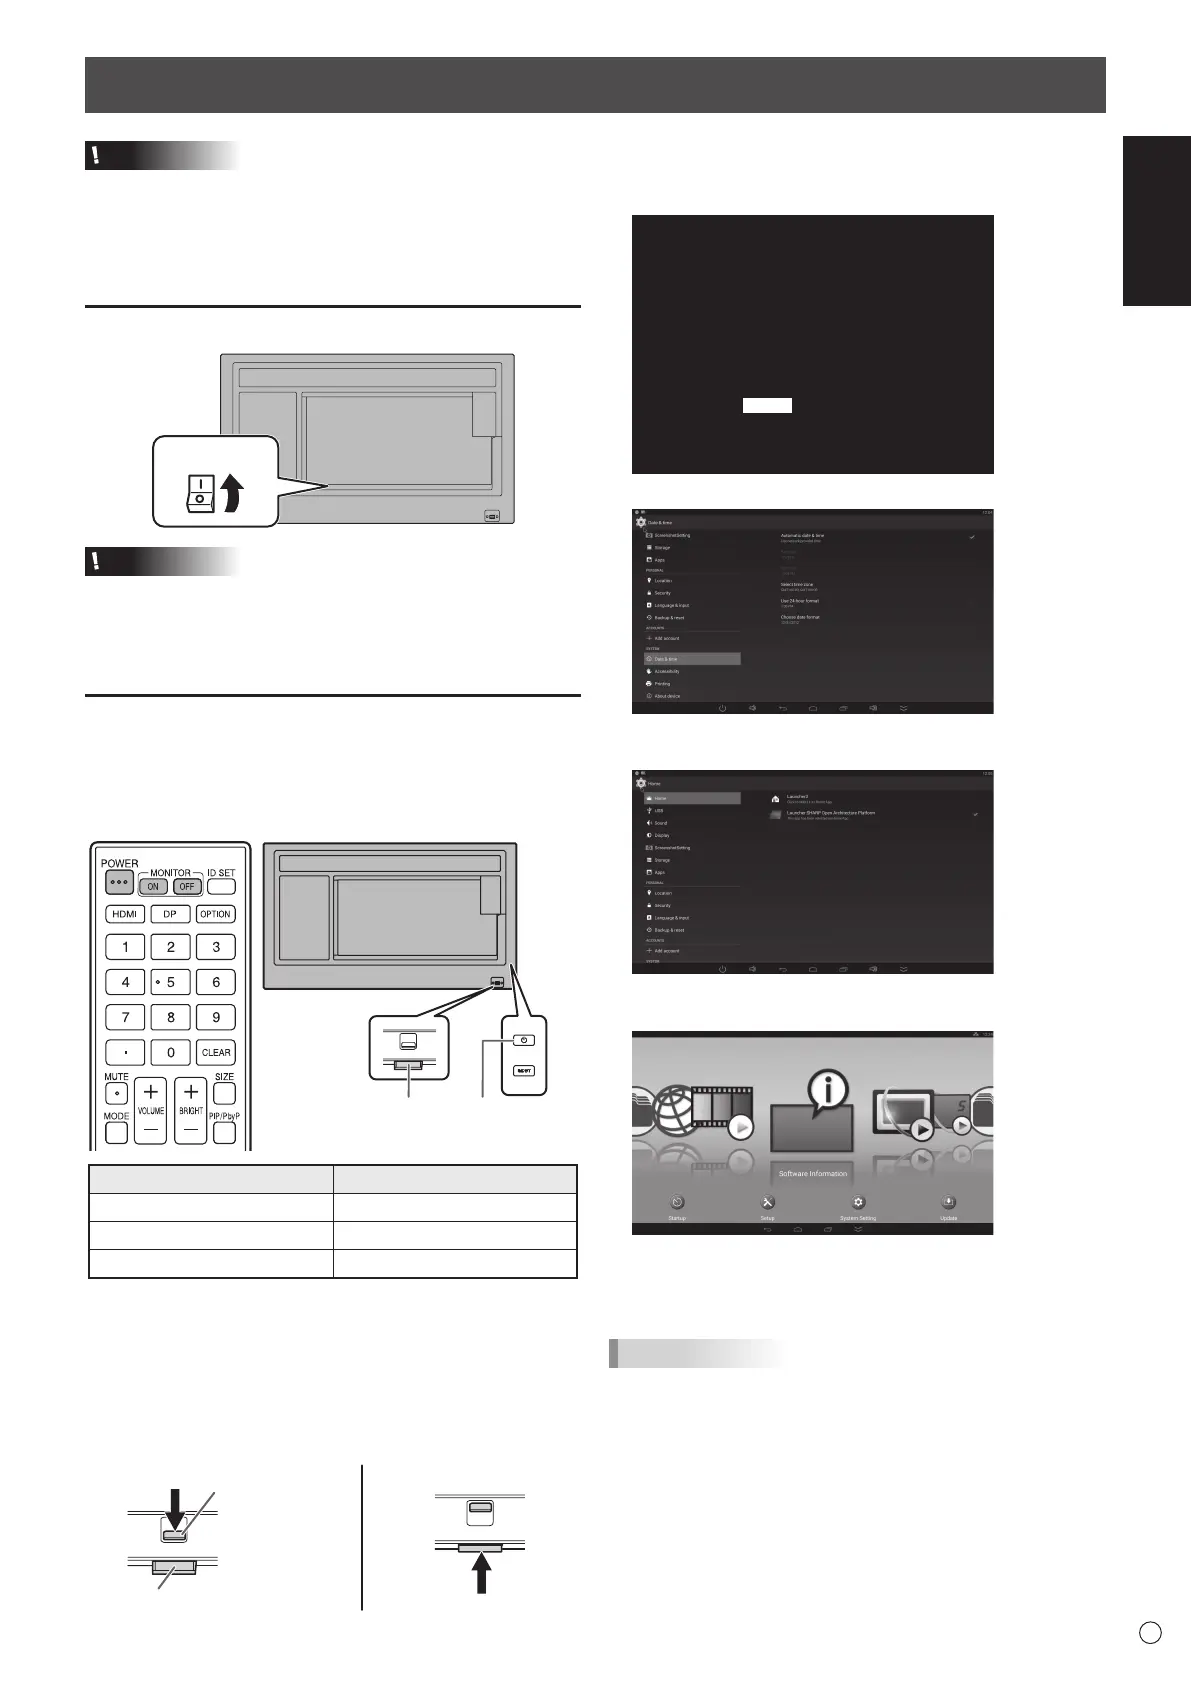
Turning on the main power
Main power switch
Caution
• Themainpowermustbeturnedon/offwiththemainpower
switch.Donotconnect/disconnectthepowercordorturn
thebreakeron/offwhilethemainpowerswitchison.
•
Foracompleteelectricaldisconnection,pulloutthemainplug.
Turning power on/off
PressthePOWERbuttontoturnthepowerON/OFF.
YoucanalsoturnthepowerON/OFFbypressingthe
MONITORONbutton/MONITOROFFbuttonontheremote
controlunit.
Power LED
Status Status of the monitor
Greenlit Poweron
Orangelit Poweroff(Standbymode)
Greenashing Inputsignalwaitingmode
• SettingtheSCHEDULEashesthepowerLEDalternately
inredandorangeinstandbymode.
• ASCHEDULEissetbyfactorydefaultinthismonitorthat
restartstheAndroidsystemat3:00AM.
n
How to pull out the power LED/remote
control sensor
Lever
Power LED / Remote control sensor
n
Operations after rst power-on
Whenyouturnonthepowerforthersttime,ascreenfor
settingthedateandtimeappears.
DATE/TIME
1 920x1080
The date/time setting must be set by Application.
[SET] : Display "Date & time" on Application
<APPLICATION>
01/01/2017 SUN 00:00 AM
SET CANCEL
V: 60 Hz H: 67.5 kHz
1. Select “SET”, and set the time zone and date/time.
2. Select “Launcher:SHARP Open Architecture Platform”
in “Home”.
3.
Press the CONTENT MENU button on the remote control
unit.
Thisisthebasescreen(CONTENTMENUscreen)when
theinputmodeisAPPLICATION.
ForinformationonAPPLICATIONmode,seetheSoftwareGuide.
• Besuretosetthedateandtime.
TIPS
• Theclockismaintainedbytheinternalbattery.
• Ifyoualreadysetthetimebutthedate/timesettingscreen
appearswhenthepoweristurnedon,theinternalbattery
maybeexhausted.Afterreplacingtheinternalbattery,set
thedateandtimeasexplainedinstep1intheabove.
• PleasecontactanauthorizedSHARPservicingdealeror
servicecenterforassistancewithinternalbatteryreplacement.
• Estimatedservicelifeoftheinternalbattery:About5years
(dependingonmonitoroperation)
• Theinitialbatterywasinsertedatthefactorywhenthe
monitorwasshipped,soitmayrunoutofpowerbeforeits
expectedoperationlife.