EN - 16
Maximum storage time
(months)
Thawing time at room
temperature (hours)
Thawing time in oven
(minutes)
Pastry 1 - 3 2 - 3 5-10 (200-225 °C)
Pie 1 - 1,5 3 - 4 5-8 (190-200 °C)
Phyllo dough 2 - 3 1 - 1,5 5-8 (190-200 °C)
Pizza 2 - 3 2 - 4 15-20 (200 °C)
Dairy products Preparation
Maximum storage time
(months)
Storage conditions
Packet (Homogenized)
Milk
In its own packet 2 - 3 Pure Milk – in its own packet
Cheese - excluding
white cheese
In slices 6 - 8
Original packaging may be
used for short-term storage.
Keep wrapped in foil for
longer periods.
Butter, margarine In its packaging 6
5 CLEANING AND
MAINTENANCE
Disconnect the unit from the power
supply before cleaning.
Do not wash your appliance by pouring
water on it.
Do not use abrasive products,
detergents or soaps for cleaning the
appliance. After washing, rinse with clean
water and dry carefully. When you have
nished cleaning, reconnect the plug to the
mains supply with dry hands.
• Make sure that no water enters the lamp
housing and other electrical components.
• The appliance should be cleaned
regularly using a solution of bicarbonate
of soda and lukewarm water.
• Clean the accessories separately by
hand with soap and water. Do not wash
accessories in a dish washer.
• Clean the condenser with a brush at least
twice a year. This will help you to save on
energy costs and increase productivity.
The power supply must be
disconnected during cleaning.
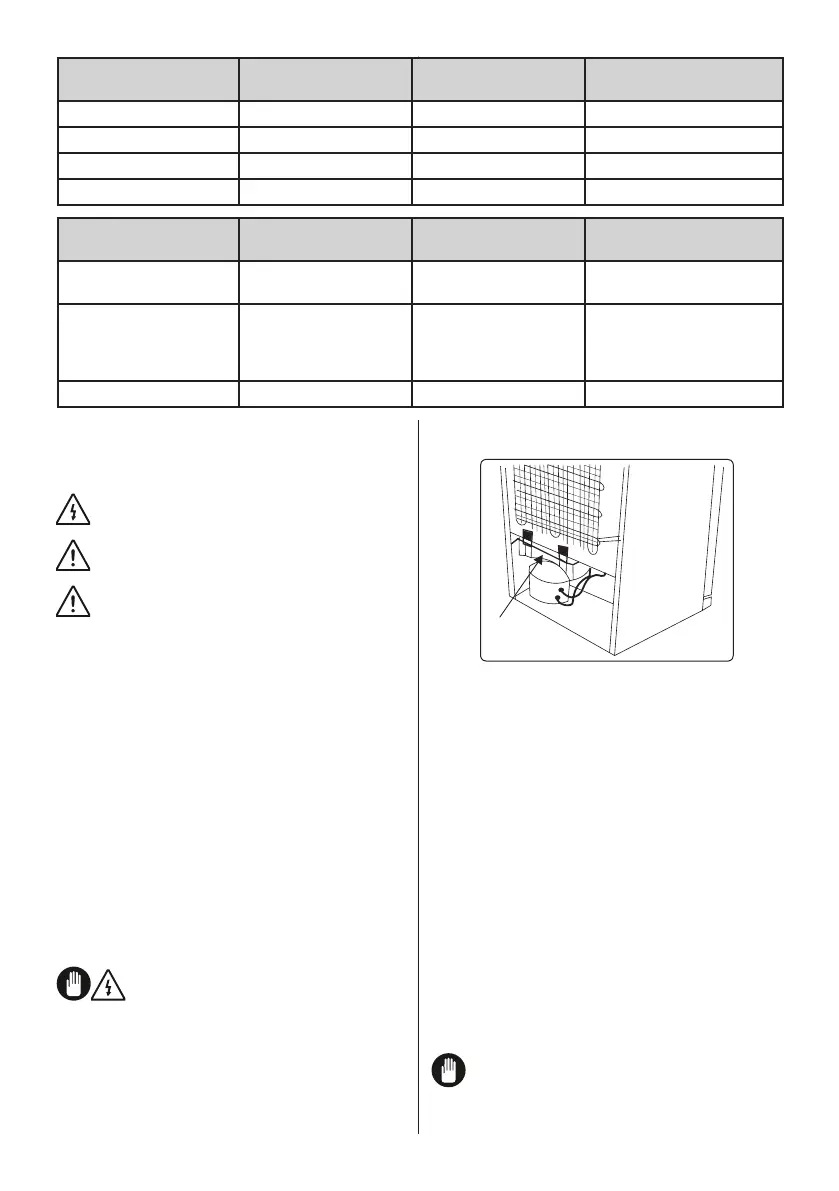
5.1 Defrosting
water tray
• Your appliance performs automatic
defrosting. The water formed as a result
of defrosting passes through the water
collection spout, ows into the water tray
behind your appliance and evaporates
there.
• Make sure you have disconnected the
plug of your appliance before cleaning
the water tray.
• Remove the water tray from its position
by removing the screws (if it has screws).
Clean it with soapy water at specic time
intervals. This will prevent odours from
forming.
Replacing LED Lighting
To replace any of the LEDs, please contact
the nearest Authorised Service Centre.
Note: The numbers and location of the
LED strips may change according to
the model.