18
SJ-P43N/43N
SJ-P47N/47N
ASSEMBLING PROCEDURES OF MAIN PARTS AND CAUTIONS
CAUTION: DISCONNECT THE UNIT FROM THE POWER SUPPLY BEFORE ANY REPAIRING.
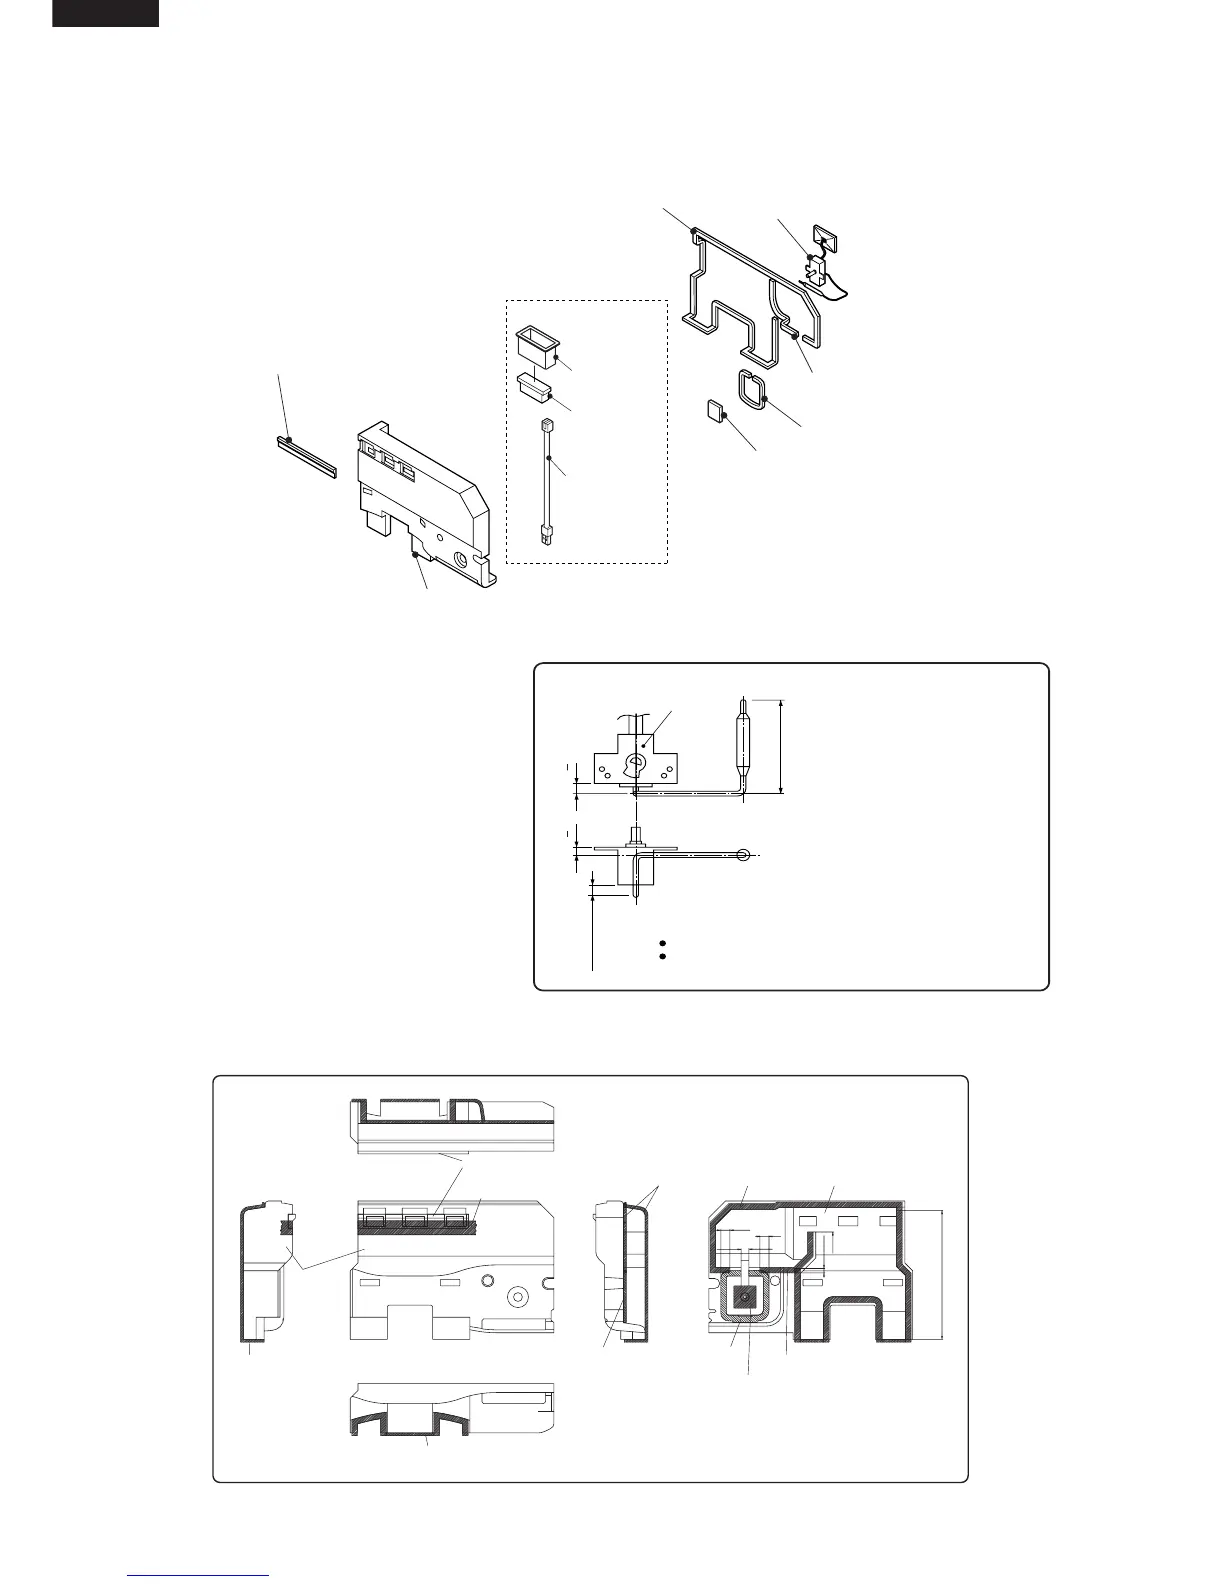
1. R-AIR GUIDER ASSEMBLY
Figure A-1
After forming, fix it to the refrigerator.
Less than 160 mm
Damper
thermostat
5
1
mm
8
1
mm
Less than 12 mm
NOTE
Minimum bending radius is R5mm.
There should be no gas leak by reforming of sensor tube.
++
Figure A-2
(1) Forming sensor of Damper thermo.
(2) Setting R air guider S (Only for SJ-43N,47N) and sticking sealers to R air guider.
R air guider
R air guider S
A-sealer ag1A-sealer ag1
Masking tape
A-sealer ag3
A-sealer ag2A-sealer ag2
Dial sealer
R air guider
A-sealer ag1
A-sealer ag1
OVERLAP AREA
OVERLAP 8mm
OVERLAP 15mm
OVERLAP 15mm
DATUM
DATUM
DATUM
(Only for SJ-43N,47N)
Figure A-3
Damper thermo.
A-sealer ag3
A-sealer ag2
Dial sealer
R air guider
R air guider S
Ionizer-K
Plasma holder
Plasma harness
A-sealer ag1
(Only for SJ-P43N,P47N)
(Only for SJ-43N,47N)