Use 2 “AAA” size batteries (UM-4, R03, HP-16 or similar).
Batteries are not included.
as shown.
VCR, DVD, etc.
Listening to a CD
Total number of tracks
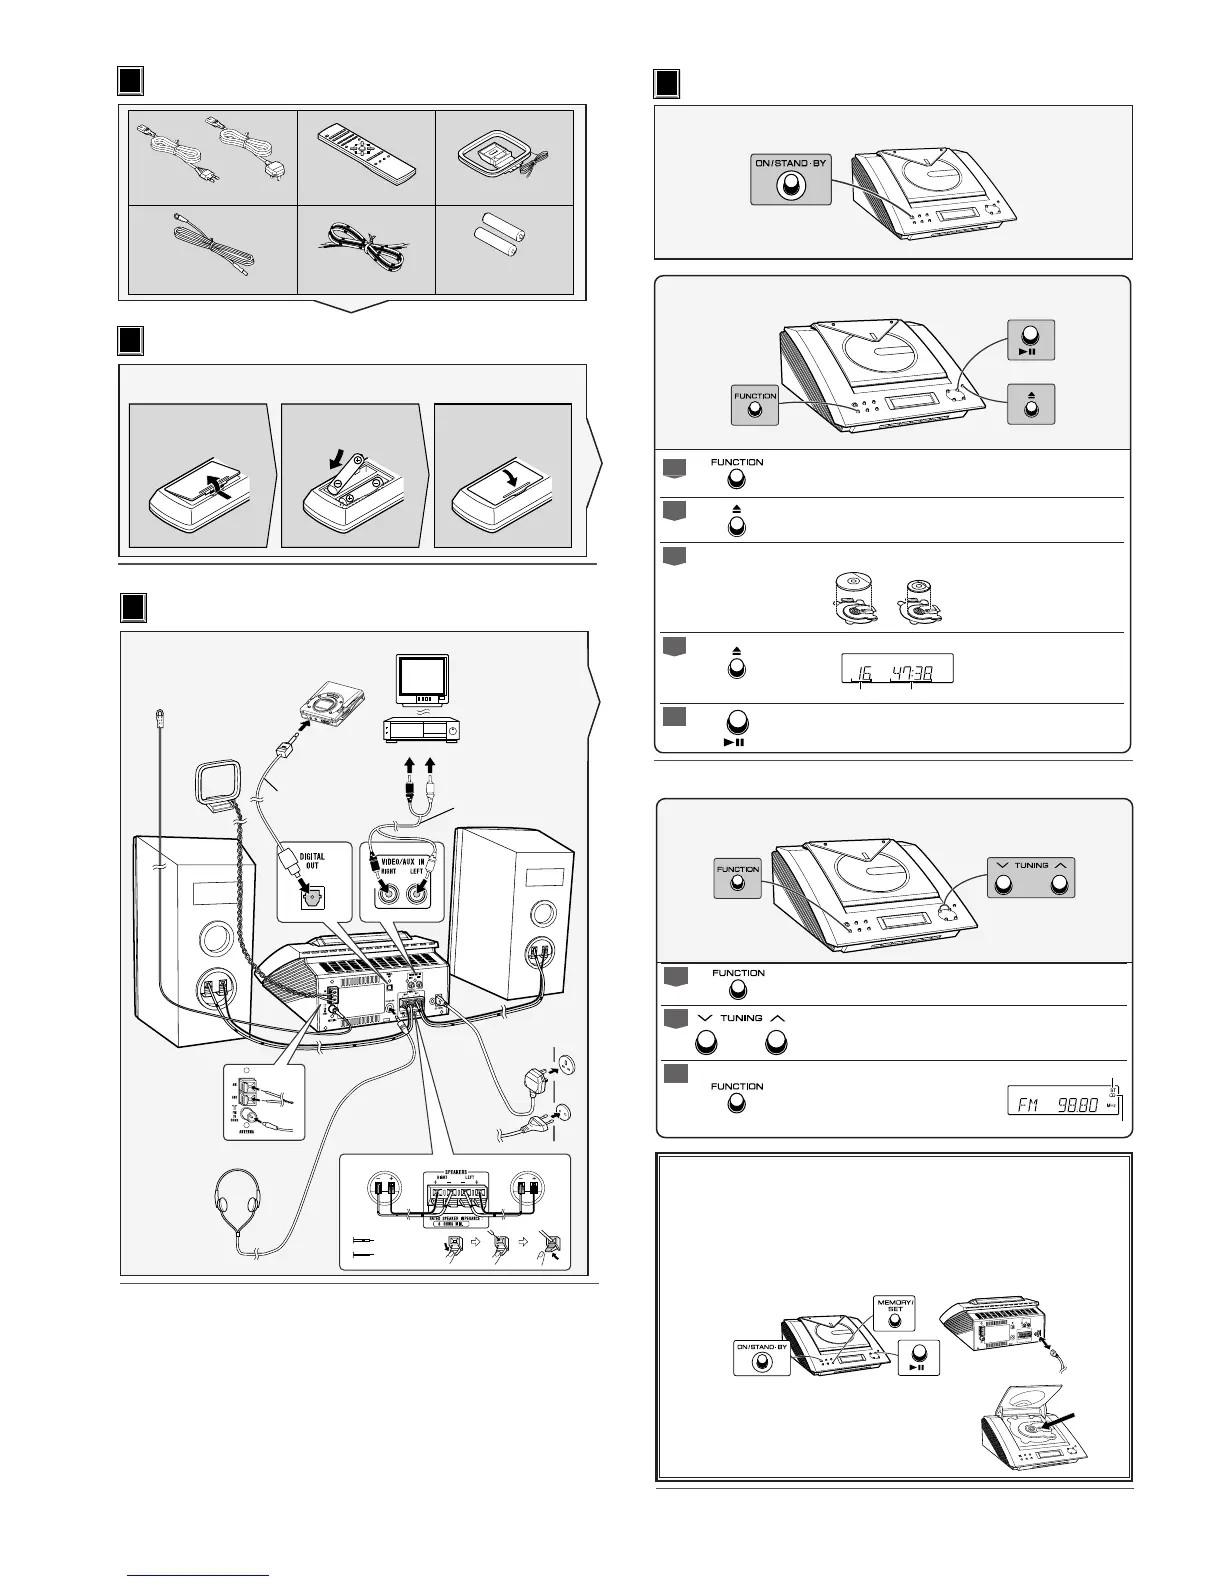
Turn on your system
4
4
Total playing time
Press the ON/STAND-BY button to turn the power on.
1
Press the FUNCTION button until “CD STOP” or “NO DISC” appears on
the display.
2
Press the
77
77
7 button to open the CD compartment.
3
Place a CD on the spindle, label side up.
4
Press the
7 7
7 7
7 button to close the CD compartment.
5
Press the
0606
0606
06 button to start playback from track 1.
12 cm (5")
8 cm (3")
■
If trouble occurs
When this product is subjected to strong external interference (mechanical shock, excessive static electricity,
abnormal supply voltage due to lightning, etc.) or if it is operated incorrectly, it may malfunction.
If such a problem occurs, do the following:
1. Set the unit to the stand-by mode and turn the power on again.
2.
If the unit is not restored in step 1, unplug and plug in the unit, and then turn the power on.
3.
If neither step 1 nor 2 restores the unit, do the following:
¡
Press the ON/STAND-BY button to enter the power stand-by mode.
™
Unplug the AC power lead from the AC INPUT socket on the unit.
œ
Whilst pressing down the MEMORY/SET button and the J button, plug the AC power lead into the AC
INPUT socket on the unit.
■
Maintenance
Do not touch the laser pickup lens. If fingerprints or dust accumulate on
the pickup, clean it gently with a dry cotton swab.
1
Press the FUNCTION button until “FM” or “AM” appears on the display.
2
Press the TUNING (
XX
XX
X or
WW
WW
W) button to tune in to the desired station.
When the TUNING button is pressed for more than 0.5 seconds, scanning will start auto-
matically and the tuner will stop at the first receivable broadcast station.
3
To receive an FM stereo transmission:
Press the FUNCTION button to display the
“ST” indicator.
●
“
j
” will appear when an FM broadcast is in stereo.
Listening to the radio
AC INPUT
FM stereo mode indicator
FM stereo receiving indicator
 Loading...