EN
EN – 12EN – 12
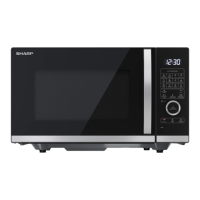
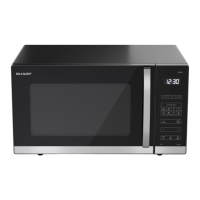
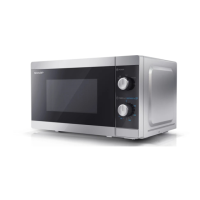
OVEN AND ACCESSORIES
1. Door safety lock system
2. Oven window
3. Control Panel
4. Display
5. Oven cavity
6. Flatbed, Keep this clean and free from food
deposits
7. Grill Rack
8. Baking Tray
9. Ventilation openings
10. Outer cabinet
11. Power supply cord
• The Grill Rack and Baking Tray are designed for
use with grill and convection ovens only. DO
NOT use any metal accessories when using the
microwave function.
• For use of the Grill Rack refer to the GRILL
sections of this User Manual.
Never touch the grill when it is hot.
NOTE: When you order accessories, please
mention two items: part name and model name.
NOTES:
• After cooking fatty foods without a cover,
always clean the cavity and any cooking
utensils thoroughly, these must be dry and
free from grease. Built-up grease may overheat
and begin to smoke or catch re.
• When microwaving, always place cookware on the oven baseplate.
• DO NOT use the Grill Rack or Baking Tray while using the microwave function.
WARNING: This symbol means that the surfaces are liable to get hot during use. The door, outer
cabinet, oven cavity, accessories and dishes will become very hot during operation. To prevent burns,
always use thick oven gloves.
EN – 13
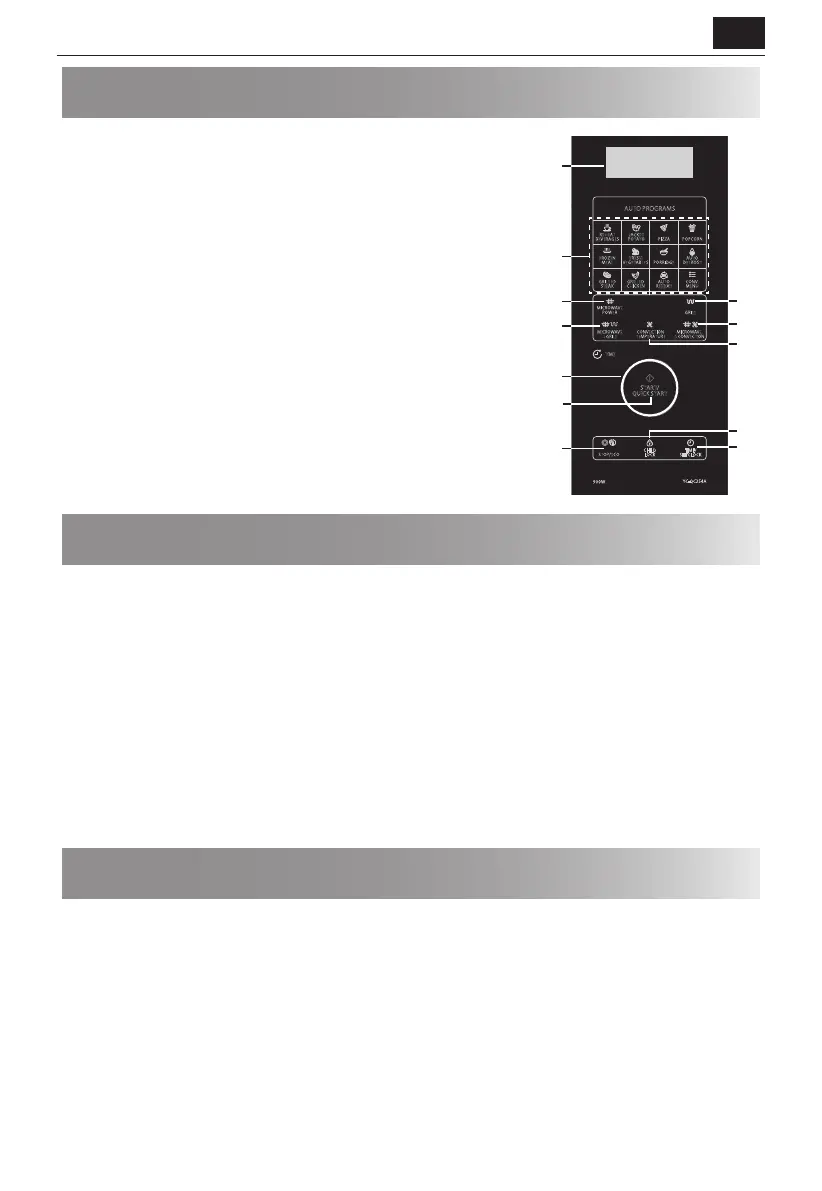
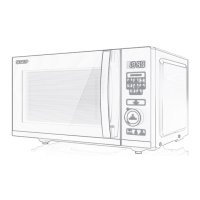
CONTROL PANEL
1. DIGITAL DISPLAY – Cooking time, power, indicators and clock time are
displayed.
2. AUTO MENU keys – Press to select auto cooking menu. (Refer to page 17
for advice on use).
3. MICROWAVE POWER – Press to select microwave power level. (Page 14).
4. GRILL – Press to set grill cooking program. (Page 15).
5. MICROWAVE+GRILL – Press to set microwave and grill combination cooking
program. (Page 15).
6. CONVECTION TEMPERATURE – Press to select convection temperature.
7. MICROWAVE+CONVECTION – Press to select convection ombination
cooking.
8. JOG DIAL – Use to set time of cooking or the clock.
9. START/QUICK START – (Page 14).
10. STOP/ECO – Press once to temporarily stop cooking, or twice to cancel
cooking altogether. Use to set power saving mode. (Page 19).
11. CHILD LOCK – (Page 19).
12. TIME/SET CLOCK –
Use to set clock time. Use to set timer function. (Page 13).
BEFORE USING THE OVEN
When the oven rst plugged in, beep will sound and the display will show "1:00". Note that the clock does not have to
be set for the oven to operate correctly. To set the clock, follow the instructions in the “Setting the Clock” section of
this User Manual.
When new, the very rst time the grill and/or convection is used, smoke and odors will be given off . To avoid this
happening when food is being cooked, use the grill and convection function without food for approx. 20 minutes.
• After opening and closing the door, the oven will enter the standby mode. If no buttons are press within 1 minute,
the display will remain on and the buttons will not operate. To enter standby mode again, open and close the door.
• During cooking, if the STOP/ECO button is pressed once, the cooking cycle will be paused. To restart cooking press
the START/QUICK START button. If the STOP/ECO button is pressed twice, cooking will be canceled.
• When programming the oven for a particular function and there is a pause between button presses of more than 30
seconds the oven will return to the standby mode.
• When a cooking cycle is completed, the display will show “End” and a tone will be heard every two minutes until a
button is pressed or the door is opened.
SETTING THE CLOCK
This oven has a clock which can be used in either 12- or 24-hour mode. To set the clock, follow the instructions as
below:
1. In standby mode, press and hold TIME/SET CLOCK button for at least 3 seconds to enter the clock setting mode.
2. Press the TIME/SET CLOCK button to select the 12- or 24-hour clock mode.
3. Use the JOG DIAL buttons to set the desired hours and minutes.
4. Press the TIME/SET CLOCK button to store and exit the clock setting mode.
• It is not necessary to set the clock for the oven to work normally.
• While in the cook mode, press the TIME/SET CLOCK button to see the time of day (if set). The time of day will
change back to the cooking count down after 5 seconds. Note that the time of day can not be viewed if the kitchen
timer has been set.
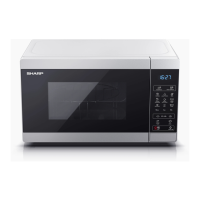
YC-QC254A
900 W
MICROWAVE
POWER
MICROWAVE
+
CONVECTION
CONVECTION
TEMPERATURE
GRILL
START/
QUICK START
AUTO PROGRAMS
REHEAT
BEVERAGES
JACKET
POTATO
PIZZA
POPCORN
FROZEN
MEAL
FRESH
VEGETABLES
PORRIDGE
AUTO
DEFROST
GRILLED
STEAK
GRILLED
CHICKEN
AUTO
REHEAT
C
ONV.
MENU
TIME
STOP/ECO
TIME/
SET CLOCK
CHILD
LOCK
MICROWAVE
+
GRILL
11
2
12
4
6
7
5
8
9
10
3
1