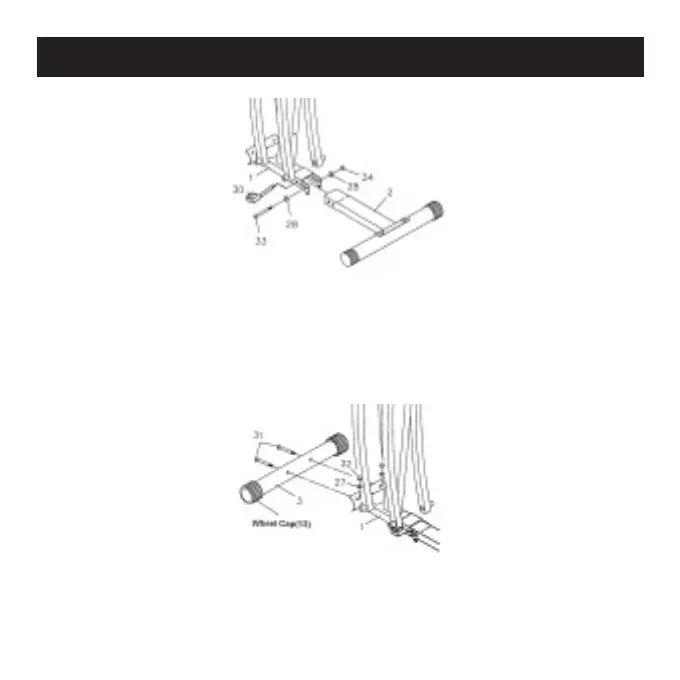
Step 2
Attach the Base Frame (2) onto the Main Frame (1) with Bolt
(9.5 mm x 82.5 mm L) (33), Nylock Nut (9.5 mm) (34) and
Washers (9.5 mm) (28). Lock the Base Frame (2) into position
with Locking Pin (30).
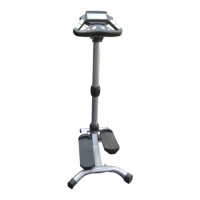
Step 3
Attach the Stabilizer (3), with Wheel Caps (13), onto the Main
Frame (1) with Carriage Bolts (9.5 mm x 63.5 mm L) (31), Acorn
Nuts (9.5 mm) (32) and Arc Washers (9.5 mm) (27).
Assembly Guide