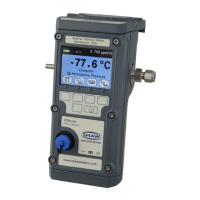
SADP_Operating_ Instructions_0114
7.0 Calibration Checking
When Shaw invented the capacitance sensor many years ago it was a real breakthrough. The second
major breakthrough came when we introduced the unique Automatic Calibration System for our
sensors.
This is a major advantage of the Shaw measurement system. No other instrument can be checked so
easily and quickly.
The system relies on the fact that each sensor is designed to give no further increase in reading when it
reaches its maximum moisture level. This means, for example, that the Grey Spot sensor used in the
Model SADP-G for the range -80 to 0 C dewpoint will read 0 deg C when exposed to gas at 0 deg C
dewpoint, but will continue to read 0 deg C dewpoint when it is exposed to wetter gas. The system can
therefore be calibrated very simply by exposing the sensor to anything wetter than 0 deg C dewpoint,
and adjusting the reading to that point on the dial. In practice there is not an immediate cut-off, and the
0 deg C dewpoint mark on the dial will be found at about 3 deg below the Automatic Calibration line.
This enables the instrument to retain the maximum possible accuracy throughout its range.
In practice, the instrument’s calibration is checked as follows:
AUTOMATIC CALIBRATION - All Models Excluding SADP-Bl
1. Ensure that no gas sample is connected to the instrument head connections. Switch meter to
Read, or Standard range if a TR Model. Switch to On for SADP-D models.
2. Raise the head of the instrument by hand and pump it up and down a few times, ending in the
raised position.
3. After about 1 minute (not critical, but not more than a few minutes) check the instrument reading.
On SADP models it should be at the Automatic Calibration line. It is not critical within 1 or 2
degrees. N.B. Extremes of humid or dry room air conditions may affect the reading slightly - see
below. SADP-D models must be set to the Wet limit of the sensor.
4. If the reading requires adjustment locate the Automatic Calibration control, which is to be found
on the front panel of the instrument, and using the small screwdriver provided, turn the control
clockwise to increase the reading (wetter) or anti-clockwise to decrease it.
5. Close the instrument head.
NOTE: When the outside temperature is below 0 deg C or in an Air-Conditioned environment the room
dewpoint may also be below 0. Under these conditions we suggest that an independent check of the
room dewpoint be made against which the calibration can be set or, more easily, assume that the room
dewpoint temperature is the same as the outdoor air temperature. This will be quite sufficient except in
very unusual weather conditions.
MANUAL CALIBRATION - Models SADP-Bl and SADP-D-Bl
The wide range of the Model SADP-Bl and SADP-D-Bl means that very rarely will the room air dewpoint
be above the maximum of the range. This means that true Automatic Calibration will not work. To
overcome this, simply use a wet & dry bulb hygrometer, or similar, to determine the room air dewpoint
temperature, and at stage (4) above set the reading to the actual air dewpoint. There is, of course, no
Automatic Calibration line on these meters.
We suggest you check the automatic calibration a minimum of two to three times each year, and that
annually the instrument is returned for a full range calibration check