WARNING: If you are not sure you have the experience, skills, and tools to correctly perform all steps to properly
secure and verify the security of the handlebar, front wheel, and handlebar stem you MUST consult a certified,
reputable bike mechanic to check your work and/or secure those components to the bike properly.
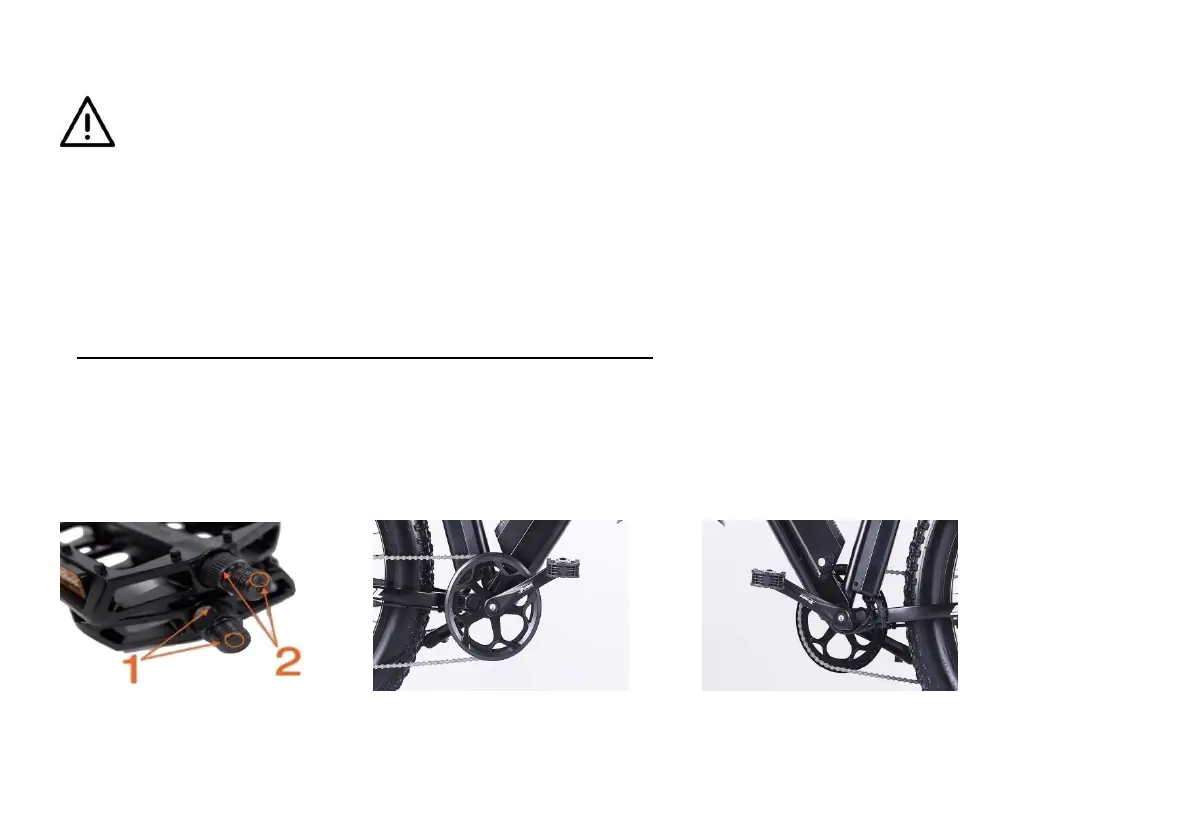
Step 5: Install the pedals. Locate the pedal with a smooth pedal axle exterior and an "R" stamped into the end of the pedal axle (L
below), which indicate it is the right pedal. The right pedal goes on the crank on the right side of the bike (which has the drivetrain
gears and is the same as a rider's right side when riding).
The right pedal (1) is threaded so that it is tightened by turning clockwise. Carefully thread the right pedal onto the crank on
the right side of the bike slowly and by hand. Do not cross thread or damage the threads.
The left pedal (2) is reverse-threaded and tightens counterclockwise. Ensure the remaining pedal has notches on the exterior
of the axle and an "L" stamped into the end of the axle (2, below), indicating it is the left pedal. Carefully thread the pedal onto the
left crank by hand slowly. Do not cross thread or damage the threads.
Torque each pedal to 35 Nm. Use a pedal wrench to avoid damage caused by wider wrenches.
Identifying marks Right pedal (1) tightens clockwise Left pedal (2) tightens counterclockwise