3824111
Setup
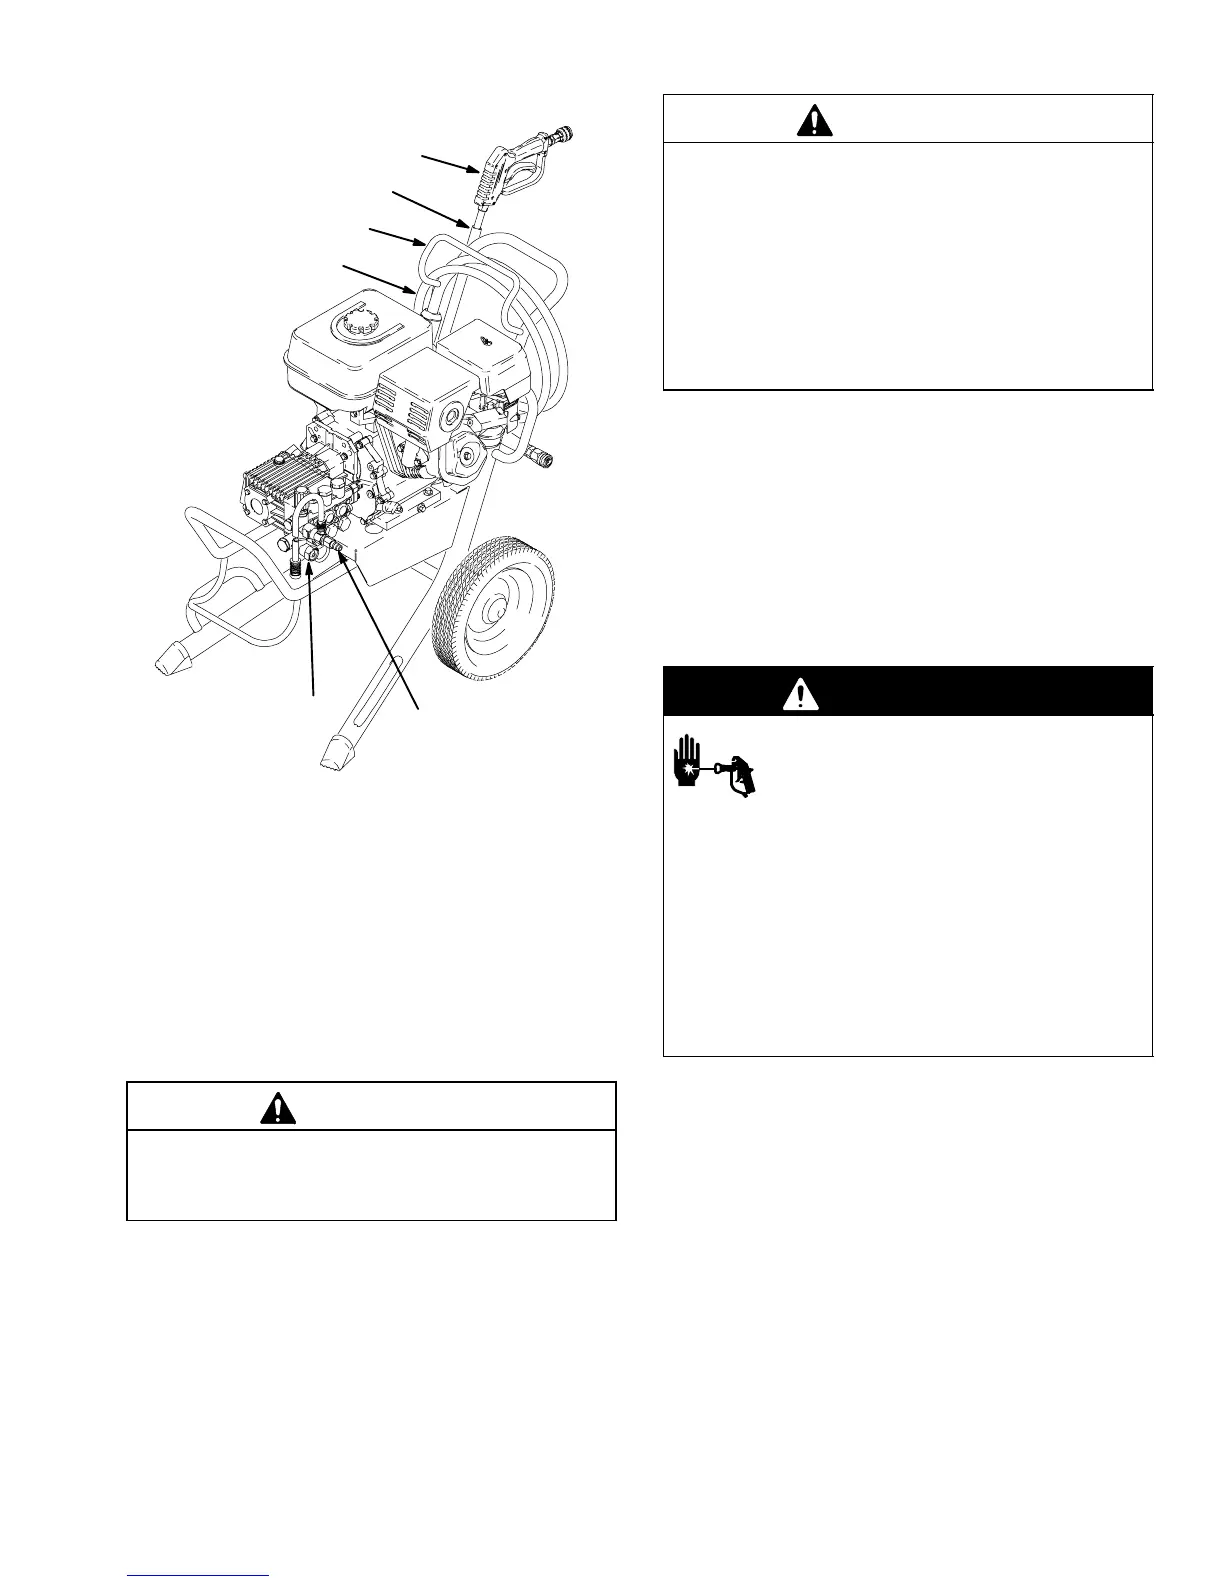
8777B
high-pressure hose
connection
hose rack
inlet water connection:
3/4-in. garden hose
gun
high-pressure hose
wand
Check for Shipping Damage
Check the pressure washer for shipping damage.
Notify the carrier immediately if there is any
damage.
Connect High-Pressure Hose and Gun
Connect the high-pressure hose to the high-pressure
hose connection and the gun. Both of these
connections are made with quick couplers.
CAUTION
Up to 100 ft (30 m) of high-pressure hose may
be used. Longer hoses could affect sprayer
performance and chemical injector performance.
Install Spray Tip
Install the appropriate spray tip on the wand. See
Installing and Changing Spray Tips on page 5.
If you are using a Sandblaster Kit, see its separate
manual for installation instructions.
Connect to Water Supply
CAUTION
Before you connect the garden hose to the pressure
washer, check your local plumbing code regarding
cross-connection to the water supply. If required,
install a backflow preventer.
If the inlet water pressure is over 60 psi (4.1 bar), a
regulating water valve must be installed at the
garden hose connection.
Do not exceed 160_F (70_C) inlet water
temperature.
Connect a hose with at least a 3/4-in. (19 mm) ID from
the water supply to the 3/4-in. garden hose inlet. The
supply hose should not be more than 50 ft (15 m) long.
NOTE: The water supply must have a minimum flow
rate equal to that of the pressure washer. See
Technical Data on page 19.
Pressure Relief
Procedure
WARNING
INJECTION HAZARD
The system pressure must be manually
relieved to prevent the system from
starting or spraying accidentally. Fluid
under high pressure can be injected through the
skin and cause serious injury. To reduce the risk of
an injury from injection, splashing fluid, or moving
parts, follow the Pressure Relief Procedure
whenever you
D Are instructed to relieve the pressure
D Stop spraying for more than 10 minutes
D Check or service any of the system equipment
D Install or clean the spray nozzle
1. Engage the gun trigger safety latch.
2. Turn the sprayer off, and remove the ignition cable
from the spark plug.
3. Shut off the water supply.
4. Disengage the trigger safety latch, and trigger the
gun to relieve pressure. Then engage the trigger
safety latch.
If you suspect that the spray tip or hose is clogged or
that pressure has not been fully relieved after following
the steps above: Disengage the trigger safety latch,
and trigger the gun to relieve pressure. Wrap a rag
around the hose end coupling, and VERY SLOWLY
loosen the coupling to relieve pressure gradually. Then
loosen it completely. Then clear the tip or hose.