This document is a Dealer's Manual for Shimano Flat Pedals, specifically covering the Non-Series models PD-EF102, PD-EF202, PD-EF205, and PD-GR400. It provides detailed instructions for installation, removal, adjustment, and maintenance, intended primarily for professional bicycle mechanics.
Function Description
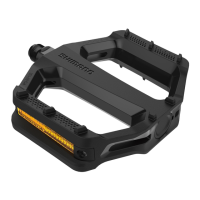
These flat pedals are designed for various bicycle types, including Road, City Touring/Comfort Bike, MTB, Urban Sport, Trekking, and E-Bike. They provide a stable platform for the rider's feet, facilitating power transfer to the drivetrain. The pedals are equipped with pins for enhanced grip and reflectors for increased visibility, contributing to rider safety.
Important Technical Specifications
The manual specifies torque values for various installation and maintenance procedures:
- Pedal Installation to Crank: 35 - 55 N·m (using a 15 mm spanner). The right pedal has a right-hand thread, and the left pedal has a left-hand thread.
- Pin Replacement (PD-GR400): 1 - 1.5 N·m (using a 2.5 mm hexagon wrench).
- Axle Bearing Adjustment (PD-EF202/PD-EF205):
- Lock nut tightening: 10 - 15 N·m (using TL-PD400 tool). Both cones and lock nuts have right-hand threads.
- Axle Bearing Adjustment (PD-EF102/PD-GR400):
- Lock nut A tightening: 5 - 7 N·m (using TL-PD400 tool). Lock nut A and lock nut B are threaded right-hand for the left pedal and left-hand for the right pedal.
- Reflector Installation (PD-EF102): 1 - 1.5 N·m (using a cross head screwdriver [#2]).
- Reflector Installation (PD-EF202/PD-EF205): 0.8 N·m (using a cross head screwdriver [#2]).
- Reflector Installation (PD-GR400): 1 - 1.5 N·m (using a 5.5 mm spanner).
The manual emphasizes the use of SHIMANO genuine parts for all components and replacements to ensure proper assembly and prevent component failure.
Usage Features
The pedals are designed for a wide range of cycling disciplines, offering versatility across different bicycle categories. Key usage features include:
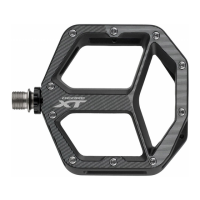
- Enhanced Grip: Pins are integrated into the pedal design (specifically mentioned for PD-GR400 replacement) to provide better traction between the rider's shoes and the pedal surface.
- Visibility: Reflectors are included and their installation/removal is detailed, ensuring that riders are more visible to oncoming vehicles, especially when traveling on roads.
- Durability: The manual advises against continuing to ride if reflectors are dirty or damaged, highlighting their importance for safety. It also mentions that products are not guaranteed against natural wear and deterioration from normal use and aging, implying a focus on long-term performance through proper maintenance.
Maintenance Features
The manual provides comprehensive instructions for maintaining the pedals, ensuring their longevity and optimal performance:
Tools Required:
- 2.5 mm hexagon wrench
- 5.5 mm spanner
- 15 mm spanner
- Slotted screwdriver
- TL-PD400 (Shimano original tool for cone adjustment)
- Pin or similar tool [#8]
- Cross head screwdriver [#2]
- Bearing puller
Key Maintenance Procedures:
-
Installation to the Crank:
- Apply grease to the threads before installation.
- Use a 15 mm spanner to tighten to 35 - 55 N·m.
- Note the different thread directions for right and left pedals.
-
Replacing the Pins (PD-GR400):
- If pins are worn or damaged, replace them.
- Tighten new pins to 1 - 1.5 N·m using a 2.5 mm hexagon wrench.
-
Adjusting Axle Bearings:
- PD-EF202/PD-EF205:
- Remove the cap with a slotted screwdriver.
- Use the TL-PD400 tool to adjust the cone for bearing preload.
- Tighten the lock nut to 10 - 15 N·m after locking the cone.
- Ensure smooth rotation without excess play.
- PD-EF102/PD-GR400:
- Detailed breakdown of parts: inner bush, outer bush, axle unit, lock nuts.
- Remove the cap with a slotted screwdriver.
- Remove lock nut A and lock nut B.
- Pull out the axle unit.
- Use a bearing puller to remove the inner bush, ensuring the attachment engages the far end of the bush.
- Remove the outer bush using a pin or similar tool [#8].
- Clean old grease and apply new grease (approx. 0.6 g for inner bush, 0.4 g for outer bush).
- Insert new inner and outer bushes using a pin or similar tool [#8].
- Install the axle unit.
- Tighten lock nut A to 5 - 7 N·m after locking lock nut B.
- Adjust lock nut B for smooth rotation without excess play.
- Note the different thread directions for lock nuts A and B on left and right pedals.
-
Installing/Removing the Reflectors:
- PD-EF102/PD-EF202/PD-EF205:
- Remove/install using a cross head screwdriver.
- Tighten to 1 - 1.5 N·m for PD-EF102 and 0.8 N·m for PD-EF202/PD-EF205.
- PD-GR400:
- Install using a 5.5 mm spanner.
- Tighten to 1 - 1.5 N·m.
General Maintenance Advice:
- Periodically retighten cranks and pedals.
- Check for excess play or looseness in fastening sections before riding.
- Contact the place of purchase or a distributor if pedaling performance is abnormal or if there are issues with rotating parts.
- Use SHIMANO lubricants and maintenance products for maximum performance.
- Wear approved eye protection during maintenance tasks.