EasyManua.ls Logo

Shinerich SRPHN02 User Manual

Shinerich SRPHN02
19 pages
To Next Page IconTo Next Page
Page #1 background imageLoading...
Page #1 background image
Manual,Instructions & Parts List
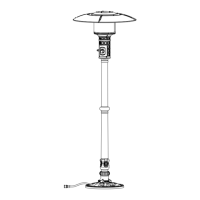
PATIO HEATER
FOR YOUR SAFETY
If you smell gas:
1. Shut off gas to the appliance.
2. Extinguish any open flame.
3. If odor continues ,immediately
call gas supplier.
FOR YOUR SAFETY
Do not store or use gasoline or
other flammable vapors or liquids
in the vicinity of this or any other
appliance.
WARNING: For Outdoor Use Only.
CAUTION: Retain the instructions
for future use.
Natural Gas
CERTIFIED
I
S
G
E
N
D
C
D
E
E
R
I
T
F
I
Model No.:SRPHN02
Master Contract No.:217109
Customer Item No.: PTHC38NK
Questions and Answers:

Shinerich SRPHN02 Specifications

General IconGeneral
Power SourceElectric
Weather ResistanceYes
ColorBlack
TypePatio Heater
Safety FeaturesTip-Over Protection

Summary

General Safety and Hazard Warnings

Outdoor Use Only

This patio heater is designed and approved for outdoor use only.

Gas Safety Precautions

Instructions to follow if gas odor is detected: shut off gas, extinguish flames, call supplier if odor persists.

Flammable Vapors Warning

Do not store or use gasoline or other flammable vapors or liquids near the appliance.

Hazard Alerts and Assembly Tools

Carbon Monoxide Hazard

Appliance can produce odorless carbon monoxide; never use in enclosed spaces like campers or homes.

Installation and Service Warning

Improper installation, adjustment, or service can cause injury, death, or property damage. Read all instructions.

Required Tools for Assembly

List of tools needed for assembly: wrenches, screwdriver, and leak detection solution.

Parts List and Diagram

Component Identification

Detailed list of all parts with corresponding numbers for assembly, including reflector, head, posts, and base.

Comprehensive Safety Precautions

Outdoor Use and Installation Regulations

Appliance must be used outdoors only. Installation must comply with local codes and national fuel gas codes.

Gas Supply and Pressure Requirements

Check gas hose and pipe condition. Manifold pressure and minimum inlet supply pressure requirements are detailed.

Safe Operation Guidelines

Ensure ample ventilation, avoid combustible cleaners, never use open flame for leaks, and check for insects annually.

Light System Assembly

Battery Installation for Ignition

Instructions for installing an AA battery into the ignition button for the light system.

Main Body Assembly

Lower Post and Base Assembly

Step 1: Attach the lower post to the base using bolts, washers, and nuts.

Mid Post Connection

Step 2: Attach the mid post to the lower post by turning clockwise until tightened.

Post and Head Assembly

Upper Post Connection

Step 3: Attach the upper post to the mid post by turning clockwise until tightened.

Head Assembly to Post

Step 4: Load head assembly by inserting gas hose into post and attaching to upper post.

Hose Routing and Bolt Attachment

Hose Routing to Base

Step 5: Route the gas hose through the opening in the cylinder base.

Securing Head Assembly

Step 6: Attach double-pointed bolts and washers to the top of the head assembly.

Reflector Assembly

Center Reflector to Reflector

Step 7: Attach the center reflector to the top of the main reflector using screws, washers, and nuts.

Reflector Assembly to Head

Step 8: Attach the assembled center reflector and reflector to the top of the head assembly.

Gas Connection and Leak Check

Connecting Gas Hose

Step 9: Attach the gas hose to the natural gas supply using the quick disconnect device.

Performing Leak Test

Step 10: Check all gas connections for leaks using a soapy water solution.

Disconnecting for Storage

Natural Gas Disconnection

Step 11: Disconnect natural gas by turning off the heater, shutting off the valve, and disconnecting the hose.

Operation and Lighting Procedures

Pre-Operation Safety Checks

Ensure outdoor use, clear surroundings, tight connections, and no leaks before operating. Inspect annually.

Pilot and Burner Lighting

Detailed instructions for lighting the pilot and main burner, including electronic ignition and manual methods.

Burner Operation and Shutdown

Initial Use Cautions

Avoid inhaling fumes during first use; smoke and odor will dissipate. Burner noise can be reduced by setting to 'LOW'.

Burner Flame Characteristics

Observe flame color: blue is normal, yellow or black smoke indicates issues. Heater will be hot after use.

Shutting Down the Heater

Instructions to turn off the control knob, shut off the gas valve, and disconnect the gas hose.

Heater Placement Guidelines

Safe Placement and Spacing

Place heater on level ground, away from combustible materials. Maintain recommended spacing for ventilation and safety.

Injector Replacement Procedure

Altitude Conversion Information

Details on replacing the injector for use at higher altitudes (2000-4500 ft) in Canada.

Injector Replacement Steps

Step 1-3: Instructions to remove reflector, emitter, and cone cylinder for injector access.

Completing Injector Replacement

Final Injector Installation

Step 4: Use a spanner to remove the old injector and install the new one.

Conversion Labeling Requirement

Step 5: Attach the conversion label to the appliance after replacing the injector.

Maintenance and Cleaning Guide

Hose Assembly Inspection

Inspect the gas hose and natural gas pipe annually for damage, abrasion, or wear. Replace if necessary.

Flame and Burner Checks

Visually check flame pattern; it should be blue. Address issues like yellow flames or flame lift immediately.

Cleaning and Routine Checks

Clean exterior surfaces with soapy water. Keep burner area dry. Check for insects and carbon deposits. Allow 45 mins to cool.

Storage and Transport Instructions

Storing Between Uses

Turn off gas and control knob. Store upright in a sheltered area, covered if desired.

Long-Term Storage and Transport

Disconnect gas, move to a secure location (below 125°F). Store upright and sheltered from weather.

Troubleshooting Common Issues

Pilot Light Problems

Solutions for when the pilot will not light or will not stay on, including checking gas, battery, and thermocouple.

Burner Ignition Issues

Troubleshooting steps for when the burner will not light, such as checking orifice, valve, and thermocouple.