Page 17
845180 SHOPSMITH MARK V
Figure 51
b. Adjust the Worktable, then again
move the Miter Gauge and Wrench
along the face of the Saw Blade
until the Wrench tip consistently
contacts the entire Saw Blade sur-
face.
c. When the Miter Gauge Slot is
aligned, tighten the two Trunnion
Bolts which are closer to the Head-
stock. Then tighten the other two
Trunnion Bolts.
d. Loosen the Table Tilt Lock and move
the Table, then return it to the hori-
zontal 0° position. Recheck the Slot
alignment. If it is off, repeat steps 5a
through 5c. (It is very important to
recheck this setting!)
(MARK V MODELS 510 & 520)
a. Tilt the Table to 45° and tighten the
Tilt Lock.
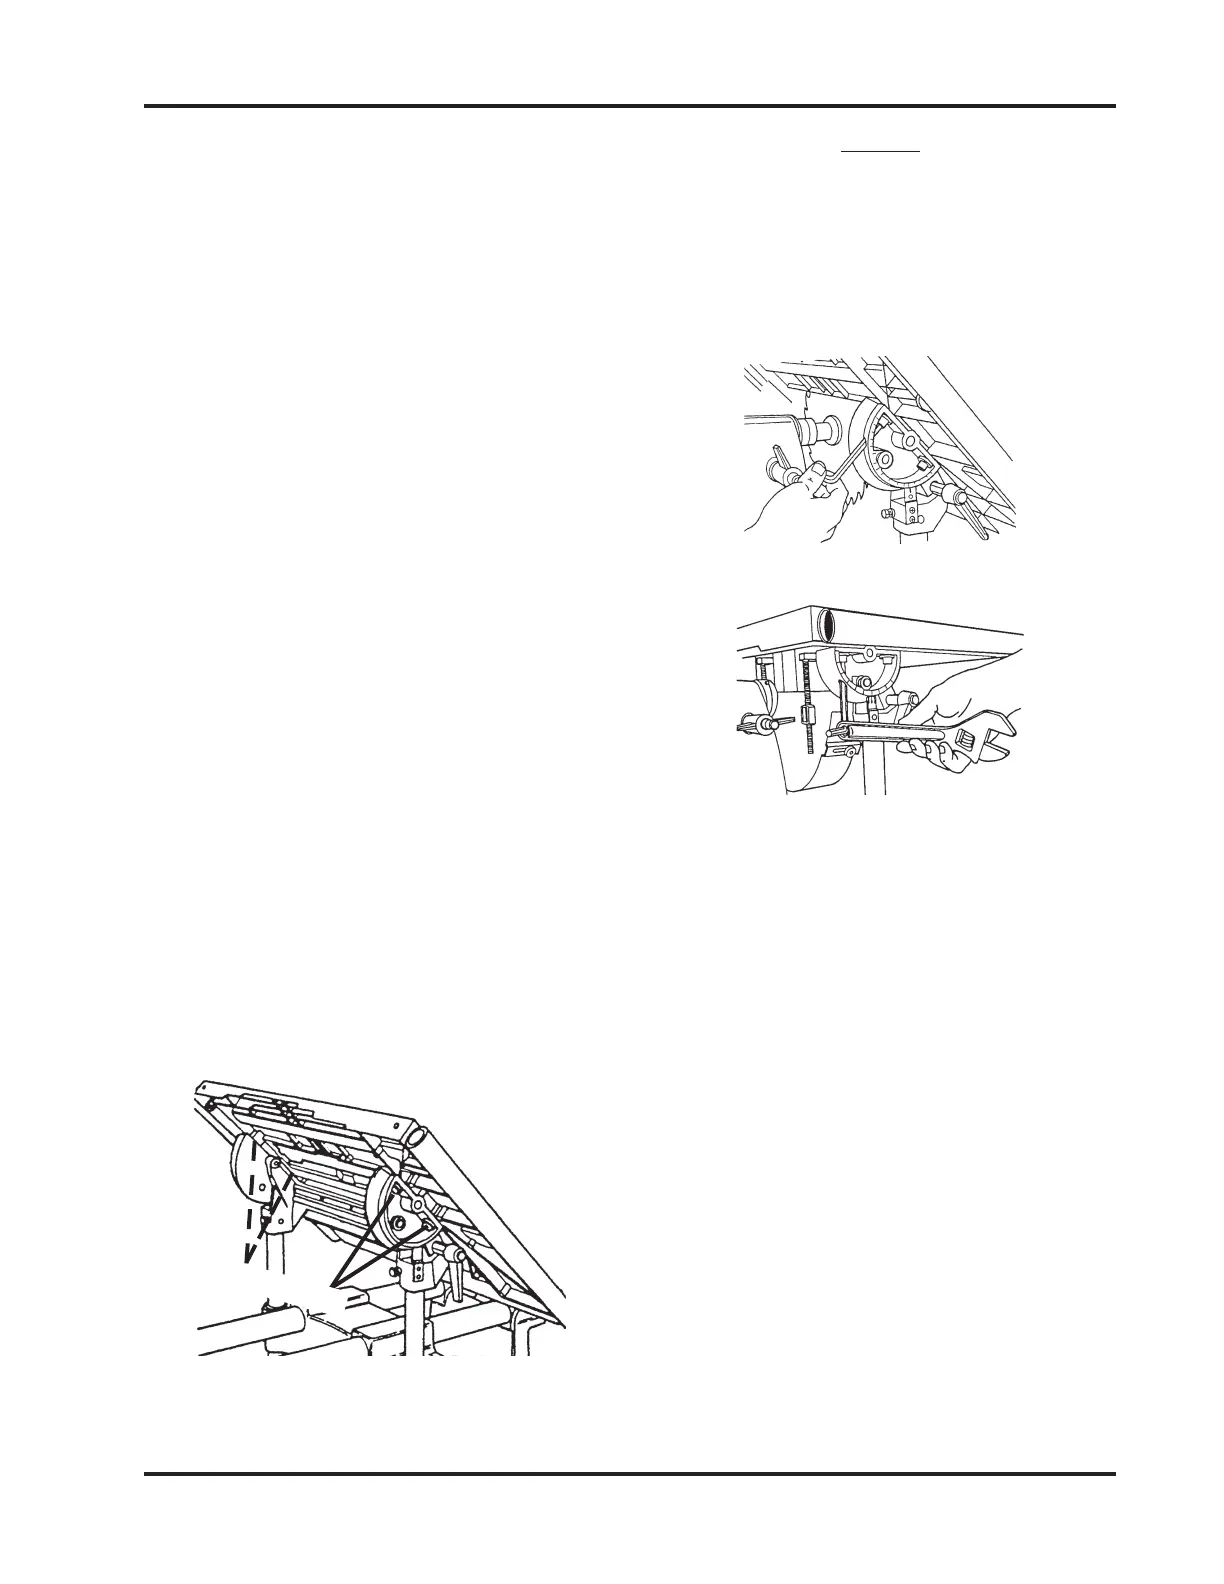
b. Use a 5/16" Allen Wrench to loosen
all four Bolts which hold the Work-
table to the Trunnions, as pointed
out in Figure 51. Loosen the Bolts
only enough to allow movement
with firm pressure.
c. Position the Worktable back to the
horizontal 0° and tighten the Tilt
Lock.
d. Adjust the Worktable, then again
move the Miter Gauge and Wrench
along the face of the Saw Blade
until the Wrench tip consistently
contacts the entire Saw Blade sur-
face.
e. When the Miter Gauge Slot is
aligned, use the 5/16" Allen
Wrench to retighten the two Trun-
nion Bolts which are closer to the
Headstock. Then loosen the Table
Tilt Lock, tilt the Worktable to 45°,
and tighten the Table Tilt Lock. Use
the 5/16" Allen Wrench to tighten
the other two Trunnion Bolts.
NOTE
If you find it difficult to loosen the Bolts, consider
using a T-Handle Allen Wrench, or use a Box End
Wrench for extra torque. Another alternative is to
use the hanging hole in an Adjustable Wrench, as
demonstrated in Figure 52 and 53.
Figure 52
Figure 53
Trunnion Bolts