SHOPSMITH MARK V 845180
Page 20
then tighten the lock. Unlock the Car-
riage Lock and move the Worktable to
the right.
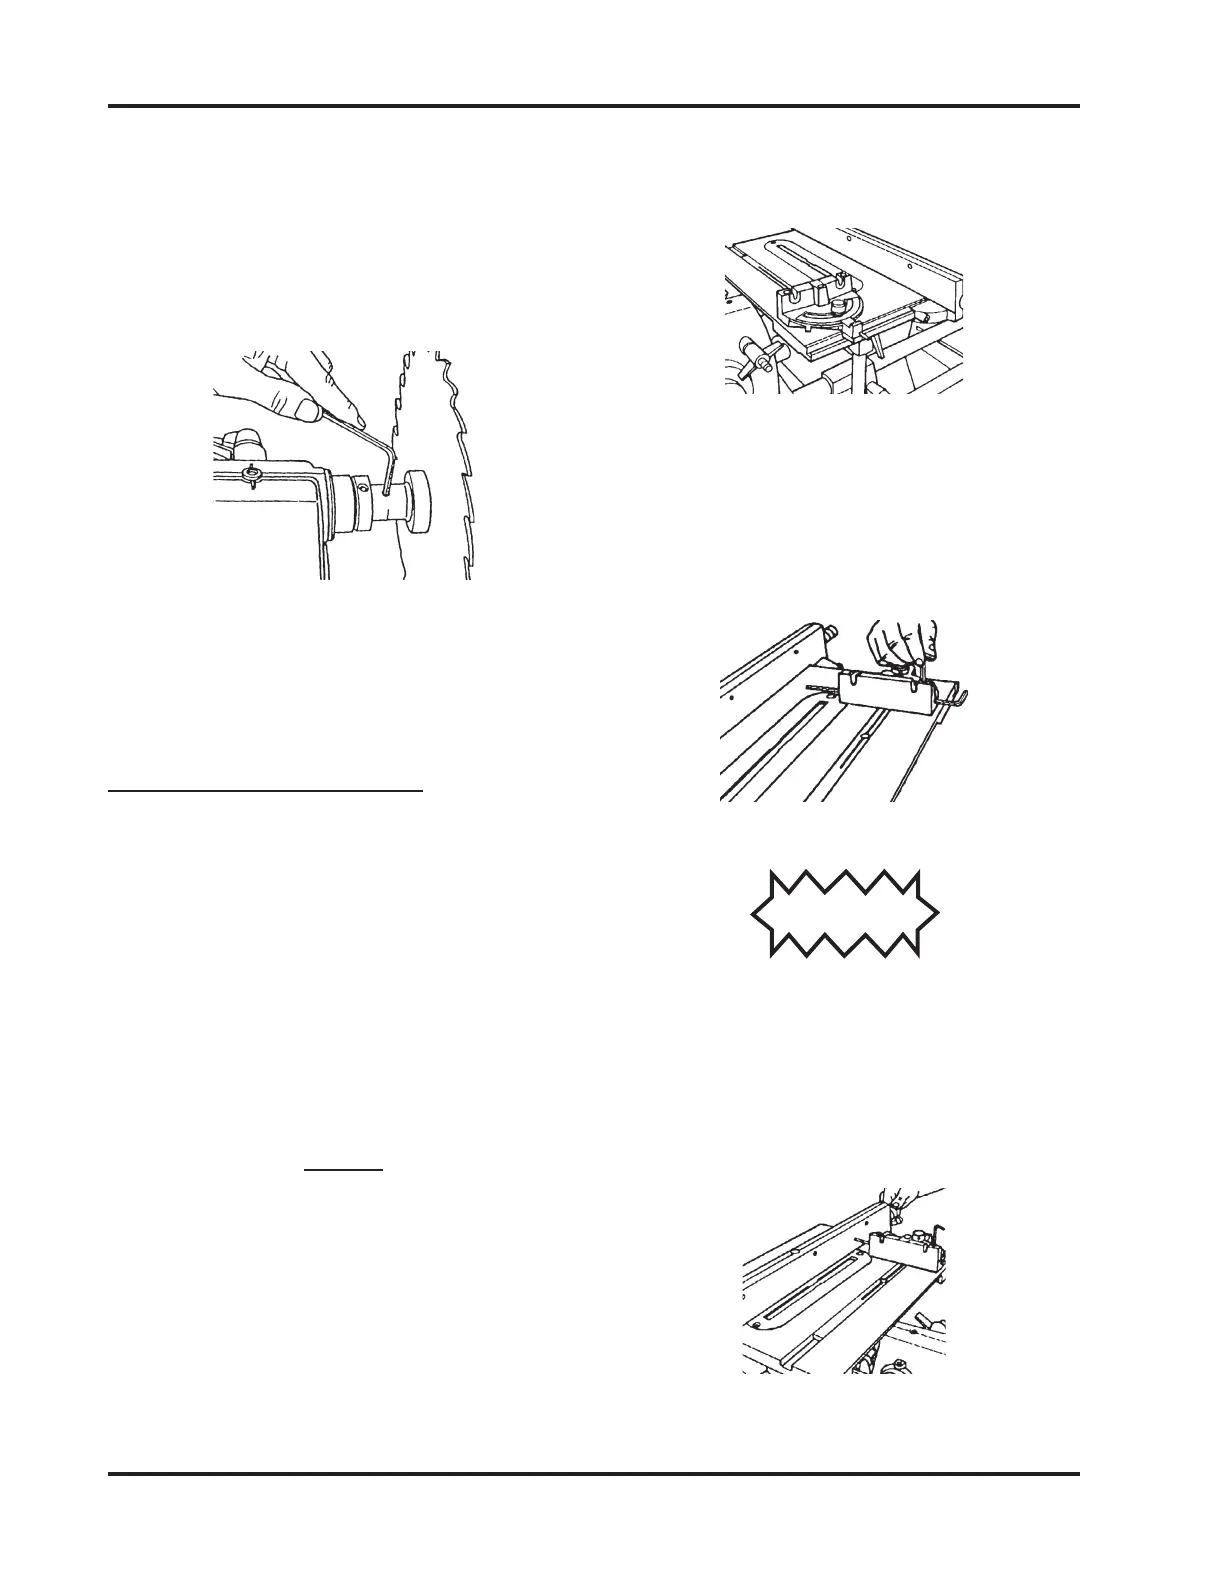
2. Use the 5/32" Allen Wrench to loosen
the Arbor Set Screw. Remove the Saw
Blade. See Figure 62.
Figure 62
3. Unlock the Table Height Lock and lower
the Table to a comfortable working
height. Tighten the Lock.
ALIGN THE RIP FENCE
(MARK V MODEL 500 STYLE 1)
1. Place the Rip Fence on the Worktable by
first putting the Fence Base on the Front
Rail, then lowering the rest of the Rip
Fence.
2. Use a 5/32" Allen Wrench to back out the
two Adjusting Set Screws from the Fence
Base so they don't contact the infeed
edge of the Table Rail.
NOTE
The Outfeedlock should press against the bottom
edge of the Table, not hook under it. As you tighten
the Locking Handle, a clamp just behind the Fence
Base pulls the Rip Fence so the Fence Base rests
flush against the Table mounting bar, and is now
automatically aligned to the Blade. The Outfeed
Lock now secures the Fence at the same time.
3. Place the Miter Gauge in the Left Slot of
the Worktable on the infeed side, as
shown in Figure 63.
Figure 63
4. Insert the Long 5/32" Allen Wrench
through the Miter Gauge and secure it
using a Short 5/32" Allen Wrench and a
Set Screw borrowed from the Lathe Tool
Rest, as seen in Figure 64.
Figure 64
CAUTION
Be sure the end of the Allen Wrench is smooth.
Watch that you don't scratch the Rip Fence surface.
5. Move the Rip Fence toward the Allen
Wrench until it just touches it. When is
does touch the Fence, lock the Base Knob,
as in Figure 65.
Figure 65