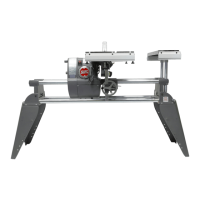
Page 21
845180 SHOPSMITH MARK V
Figure 66
a. Loosen the Base Knob.
b. Use a 1/2" Wrench to loosen the
two Hex Bolts attaching the Fence
Base, so they are just tight enough
to require firm pressure to align the
Fence. See Figure 66.
c. Make any needed adjustments.
DO NOT tighten the Hex Bolts yet.
d. Tighten the Base Knob.
e. Slide the Miter Gauge back and
forth, readjusting the Fence until
the Allen Wrench makes consistent
contact along the entire length of
the Rip Fence.
f. When alignment is reached, tighten
the two Hex Bolts in the Base.
g. Carefully unlock the Handle and
the Base Knob on the Base and lift
the Rip Fence from the Table.
h. To recheck the alignment, repeat
Steps 5 through 7g. (It is very im-
portant to recheck the alignment!)
ALIGN THE RIP FENCE
(MARK V MODEL 500 STYLE 2)
1. Place the Rip Fence on the Worktable by
first putting the Fence Base on the Front
Rail, then lowering the rest of the Rip
Fence. Figure 67.
Figure 67
2. Place the Miter Gauge in the Left Slot of
the Worktable on the infeed side. Insert
the Long 5/32" Allen Wrench through
the Miter Gauge and secure it using a
Short 5/32" Allen Wrench and a Set Screw
borrowed from the Lathe Tool Rest, as
seen in Figure 68.
Figure 68
3. Move the Rip Fence toward the Allen
Wrench until it just touches. Tighten the
Handle, then lock the Outfeed Clamp
Lever to secure both ends of the Rip
Fence, as shown in Figure 69.
Figure 69
6. Slide the Miter Gauge back and forth in
the Slot. The tip of the Allen Wrench
should keep in slight contact with the
Rip Fence.
7. If it pulls away from or binds against the
Rip Fence, the Fence needs aligning. If
so, do the following: