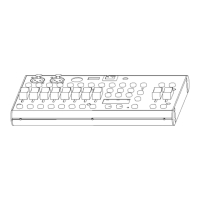
The manual mode allows direct control of all fixtures. You are able to move them and change
attributes by using the channel faders.
Action
1. Select a FIXTURE button
2. Press the AUTO DEL button repeatedly until the MANUAL LED is lit.
3. Move the faders to change parameters for the selected fixture(s)
PAGE/SELECT A/B button: Use to switch between fader control pages (A: Ch1~8), (B: Ch 9~16)
TAP DISPLAY button: Press to toggle the output indicator on the LCD display between DMX values
(0-255) and percentage (0-100)
Note: All changes made within MANUAL mode will be temporary and will not be recorded
3.2.1 Review Scene or Chase
This instruction assumes that you have already recorded scenes and chases on the controller. Otherwise skip this section
and go to programming.
Action (SCENE review)
1. Select a SCENE button (1-8) to review
2. Select any one of the 30 banks by pressing the BANK UP/DOWN buttons
3. Move faders to change fixture attributes
Action (CHASE review)
1. Select a CHASE button (1-6) to review
2. Press the TAP DISPLAY button to view the step number on the display
3. Press the BANK UP/DOWN buttons to review all scenes in the chase
Note: Make sure you are still in MANUAL mode
3.3
Programming
A program (bank) is a sequence of different scenes (or steps) that will be called up one after another.
In
the FIXTURE, 30 programs can be created with 8 scenes in each.
3.3.1 Entering Program Mode
Press the Program button until the LED blinks.
3.3.2 Create a Scene
A scene is a sta tic lig h tin g s ta te . S cen es a re s to re d in ba n k s. T h ere a re 30 ba nk m e m o ries o n th e co n tro lle r an d
eac h ban k can ho ld 8 scene m e m o rie s. T he D M -X 10 can sav e 240 scen e s to ta l.
Action
1. Press and hold the PROGRAM button until the LED blinks.
2. Position SPEED and FADE TIME sliders all the way down.
3. Select FIXTURE(S) to begin adjusting the DMX values
4. Move faders to adjust parameters to the required setting for the fixture(s)
5. De-select a fixture to hold its DMX values
6. Adjust for all fixtures until all are set at the required state
7. Press the MIDI/ADD button
8. Select a BANK and then select a SCENE to store the scene
9. Press PROGRAM to store
10. Repeat the above process for up to 8 scenes in the bank
11. Hold the PROGRAM button to exit Program mode
Notes:
Deselect BLACKOUT if LED is lit.
Toggle the PAGE SELECT button to access channels 9-16 All
LEDs flash to confirm storing a scene
Shortcut: Press [P R O G R A M ] [F IXT U R E S ] Adjust [Faders] [B A N K ] [SCENE ] Press [P R O G R A M ]
to store.

 Loading...