Shure Incorporated
11/14
•
•
Monitoring Batteries with Wireless Workbench
Wireless Workbench provides detailed information for batteries currently docked in the charger. You can also view battery error
notifications and change the charger's network settings.
Click the Inventory tab to view your charger in Wireless Workbench. The charger properties panel provides different battery
statistics:
Charge
Displays charge as a percentage of the total battery capacity. Also shows time remaining to full charge.
Health
Displays health of selected battery as a percentage of the charge capacity of a new battery. Charge capacity (battery life
when fully charged) will decline as a result of repeated charge cycles, age, or storage conditions.
Cycle
Displaystotalnumberoftimesthatthebatteryhasundergoneonefullcountofdischargeandcharge.Rechargingafterdis
charging halfway counts as one half of a cycle. Recharging after discharging a quarter of the way counts as one quarter of
a cycle.
Temperature
Displays battery temperature (in Celsius and Fahrenheit) and status.
Charger Network Settings
To adjust charger network settings, open the charger properties panel in Wireless Workbench. Click the gear icon to set the IP
mode and IP address, view the MAC address, and view firmware version.
Connecting to an External Control System
TheSBC240networkedchargerconnectstoexternalcontrolsystemssuchasAMXorCrestronviatheEthernet.Foracom
prehensive list of command strings, visit pubs.shure.com/guide/SBC240.
Connection: Ethernet (TCP/IP; SBC240 is the client)
Port: 2202
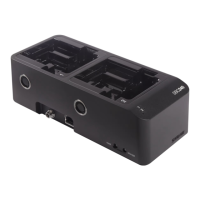
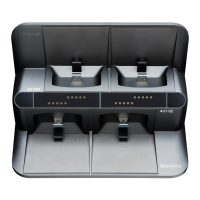
Vertical Mounting
Three mounting points on the bottom of the charger fit #6 round or pan head screws. Mount to a hard surface using 3 screws
that are long enough to secure the charger. To mount, orient the charger so that the 2 mounting points are on top as shown.