3. Use an M5 screw to secure the position of the sender and receiver in the FlexFix
br
acket.
Torque: 2.5Nm to3Nm
Mounting:
D
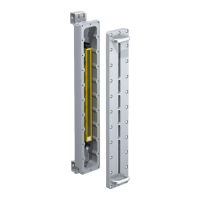
5.3 Mounting the Compact FlexFix bracket
NOTICE
T
he housing of the safety light curtain can become scratched if the screw heads
protrude when the Compact FlexFix brackets are mounted on the back.
This can be avoided by taking the following measure:
b
Use countersunk screws without washer.
Side and rear mounting of the Compact FlexFix bracket on a machine or profile frame
Mounting
me
thod
Description
On the side With the M5 screw through the Compact FlexFix bracket on the machine or
profile frame. A screw nut or threaded hole is required on the machine or
profile frame (1).
With the M5 screw through the Compact FlexFix bracket on the profile
fr
ame. 2 sliding nuts are required on the profile frame (2).
On the back With the M5 countersunk screw through the Compact FlexFix bracket on the
mac
hine or profile frame. A screw nut or threaded hole is required on the
machine or profile frame (3).
Tightening torque: 5Nm…6Nm
S
ecure the sender and receiver in the bracket:
1. After assembling the Compact FlexFix brackets, screw the sender or receiver into
the Compact FlexFix brackets from the front.
2. Align the sender and receiver.
NOTE
T
he protective device can only be screwed in when both brackets are in alignment.
Recommendation:
1. Only hand-tighten the screws on the brackets at first.
2. Align the two brackets. To do this, place a straightedge or spirit level, for
example, on the screw mounting surfaces of the brackets that are not being
used.
3. Tighten the screws.
3. Use an M5screw to secure the position of the sender and receiver in the Compact
F
lexFix bracket.
Torque: 2.5Nm to3Nm
Montage:
E
5.4 Mounting the Flat mount bracket
Approach
1.
Slide the bracket onto the end cap of the device. (
F )
The bracket can be aligned horizontally or vertically.
MOUNTING INSTRUCTIONS
8025628/1HLF/2022-11-03 | SICK M O U N T I N G I N S T R U C T I O N S | C4-RD
15
Subject to change without notice
en
 Loading...