Connecting The Internal CAN, ASI And Analog Audio Bus
CAN BUS Install the CAN cable into P3 of the CC-5/CC-2 or into P2 of the OCM-16 /
SIM-16.
Install the other end of the CAN cable into the first CAN module on the inner
door.
Observe the location of the CAN termination devices. Install a CAN terminator
in the last CAN module on the inner door. Install the 120 Ohm CAN
termination resistor into TB1 10 and 11 on the PSC-12.
ASI BUS with PMI/PMI-2/PMI-3
Install the 60-pin cable into P1 of the CC-5/CC-2.
Install the other end of the 60-pin cable into the PMI on the inner door.
There is no need to install an ASI terminator at the PMI/PMI-2/PMI-3. The
PMI/PMI-2/PMI-3 has it already inside. Install an ASI terminator into the 60-pin
connector on the PSC-12.
Analog Audio BUS Install the Analog Audio cable into the 10-pin connector of the PMI/PMI-
2/PMI-3.
Install the other end of the Analog Audio cable into one 10-pin connector of
the LVM.
If there is a FMT install a further Analog Audio cable into the second 10-pin
connector of the LVM and the other end into the FMT.
The DAC-NET must be installed into any open slot of the CC-5/CC-2 which is
connected at the left side with the PMI/PMI-2/PMI-3.
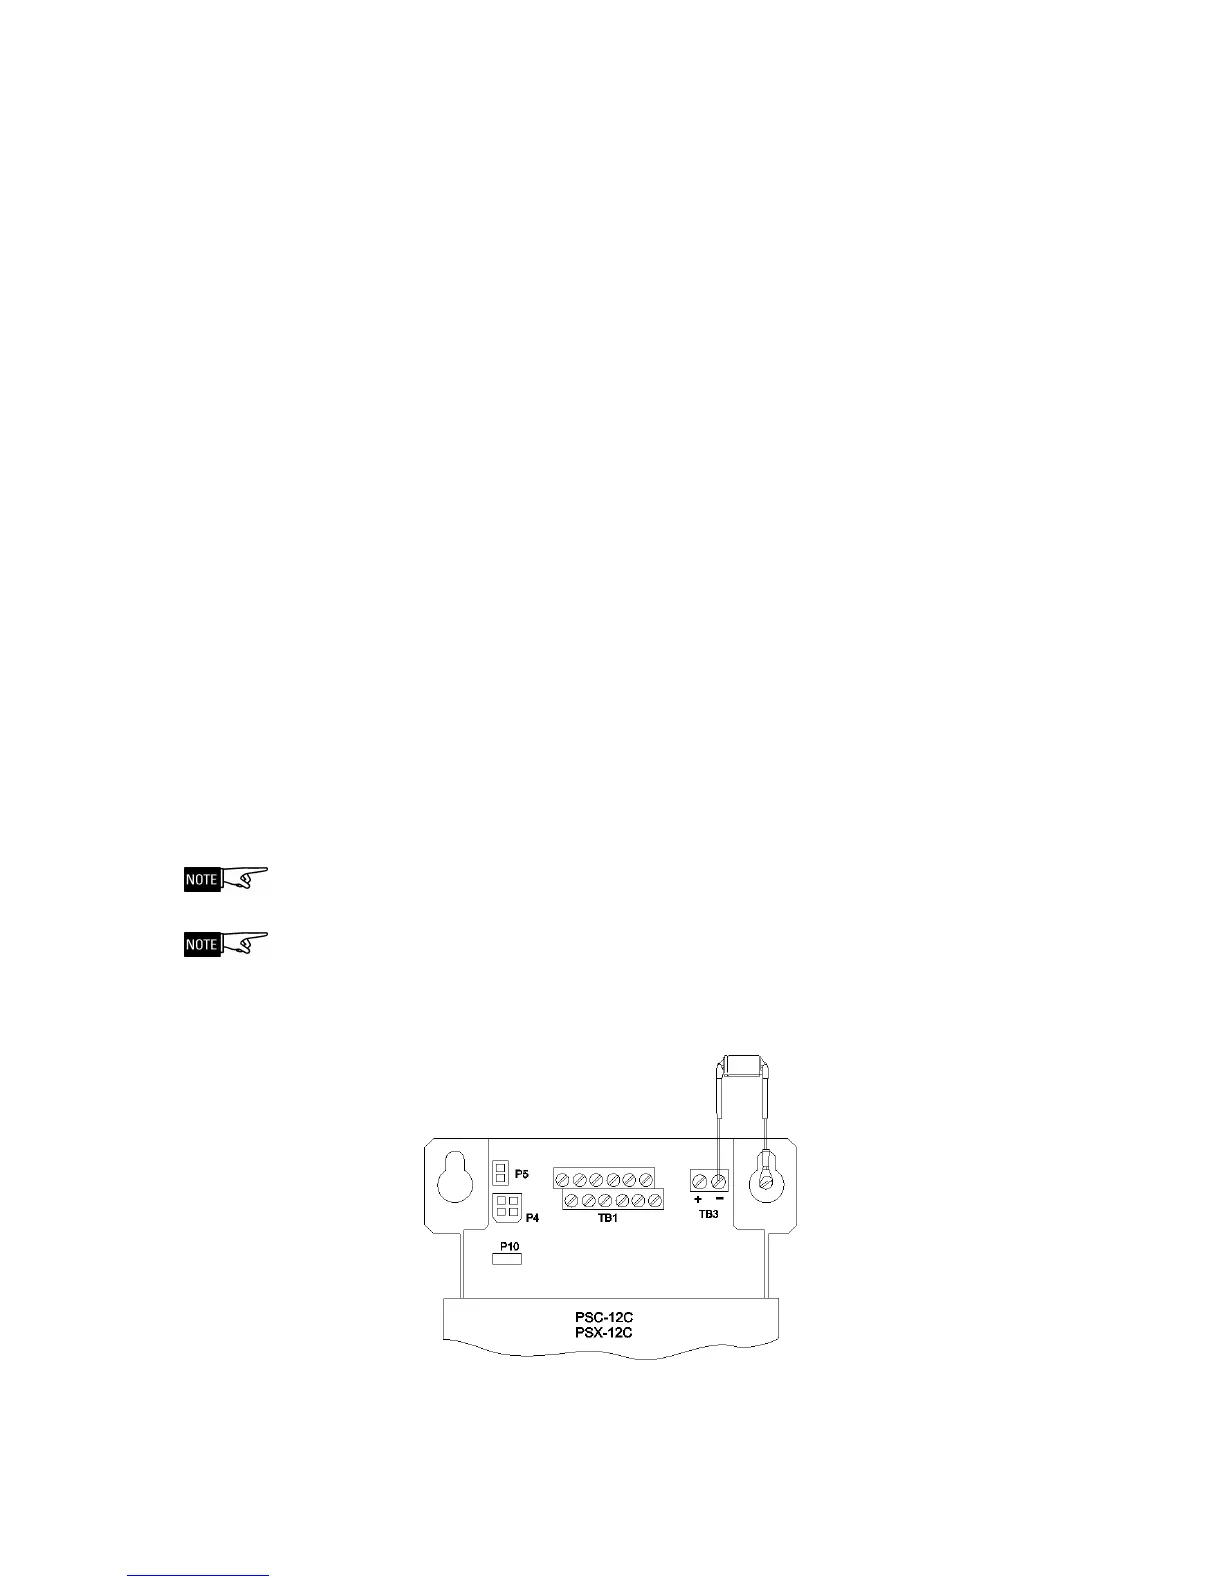
Anti-Interference Capactitor:
It is a 6.8µF / 100V bipolar capacitor. In every Voice system must be one Anti-
Interference Capactitor. It has to be connected between Ground and Earth.
This capacitor is necessary to eliminate noise on the speaker lines.
Figure 8
Anti-interference Capacitor
ANTI-INTERFERENCE CAPACITOR 6.8µF