Assembly Instructions
41
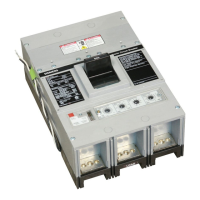
MD and ND-Frame Application
A complete kit consists of handle, cable and breaker operator
The handle can be mounted on either right hand or left hand
flange type enclosures. It can be locked in the OFF position
with up to three padlocks. A two piece door catch is provided
for applications where no interlocking door latch mechanism
is provided. The breaker operator mounts to the circuit
breaker and can be padlocked in the OFF position. The flexible
cable connects the handle to the breaker operator. The
handle operator can be used with I-T-E door latch mecha-
nisms DKR2, DKR3, DKL2. and DKL3.
Mounting
A. Turn off and lock out supply power before installing the
device.
B. Determine mounting location for the handle and circuit
breaker (See Figure 1 and Tables 1 and 2.)
Table 1 - Maximum E Dimensions
AAAA
AAAA
A
AAA
AAAA
AA
AAA
AAAA
A
Enclosure Depth FHONCO48 FHONCO60
0 16 30
2 15.5 29.5
6 15 29.5
18 15.5 29.5
20 16 29
24 15.5 28.5
30 10 26
36 - 23
Table 2 - F Dimensions
AAAA
AAAA
A
A
AAA
AAAA
AAA
AAA
AAAA
AAAA
Enclosur
Depth
48” Cable 60” Cable
Up Down Up Down
10 8 21.5 17.5 31.5
12 7.5 21 18 32.5
16 6.5 21 19 32
18 6 20.5 18.5 32
20 6 20 16.5 31.5
24 4 19 14 31
30 -1.5 15.5 11 28.5
36 - - 6.5 23.5
Table 2 shows the maximum horizontal distance that the
breaker can be located from the handle. Table 3 shows the
maximum vertical distance the breaker can be located from
the handle. Figure 2 shows the mounting range of the circuit
breaker within the enclosure. NOTE: Minimum Bend Radius
for the Cable is 3 1/2 in.
C. Drill the mounting holes for the handle and circuit breaker
and file all burrs.
Handle Installation
A. Push rubber gasket (1) into the groove of the handle
assembly (2) (Figure 3).
B. The handle and the interlock mechanism (3) are supplied
pre-assembled from the factory (Figure 3).
NOTE: For ease of assembly, move the operating handle to
the ON position (toward top of enclosure).
C. Mount the frame (4) and handle assembly to the enclo-
sure flange (5) using two 5/16-18 x 3/4 in. button head
cap screws and lockwashers. Tighten cap screws from
within enclosure (Figure 3).
Figure 1
Figure 2
 Loading...