Do you have a question about the Siemens Iq100 EH8 HVB Series and is the answer not in the manual?
Read manual carefully, keep instructions safe, and do not connect if damaged.
Use for cooking meals and drinks only. Ensure correct installation.
Appliance for children aged 8+ and people with reduced abilities if supervised.
Warnings for fire, burns, and electric shock risks during operation.
Packaging is recyclable. Sort by type for disposal.
Tips to reduce energy consumption during cooking.
Cookware must be ferromagnetic, flat, and smooth.
Overview of buttons, symbols, and their functions on the control panel.
Power specifications for different cooking zone sizes.
Remove packaging and wipe the hob surface with a damp cloth.
Benefits of induction technology for cooking, such as time and energy savings.
How to turn the hob on and the initial signals.
How to turn the hob off and automatic shut-off.
How to select power levels and use the quick start function.
Advice for various cooking methods and techniques.
Assign functions to the Favourite button via Home Connect app.
Program cooking time for automatic switch-off of cooking zones.
Activate a clock timer independently of cooking zones.
Steps to activate the powerBoost function for faster heating.
Steps to deactivate the powerBoost function.
Uses and limitations for shortBoost function.
Steps to activate shortBoost.
Steps to deactivate shortBoost.
Steps to activate the Keep-warm function.
Steps to deactivate the Keep-warm function.
Steps to activate the childproof lock.
Steps to deactivate the childproof lock.
How to activate the childproof lock automatically.
Steps to activate the pause function for cleaning.
Steps to deactivate the pause function.
List of available basic settings and their values.
Steps to access and modify basic settings on the appliance.
How to discard unsaved changes to basic settings.
Steps to perform the cookware test to check suitability.
How to interpret the results of the cookware test for suitability.
Steps to install and set up the Home Connect app on a mobile device.
Requirements and steps for connecting the appliance to Home Connect.
Explanation of the Wi-Fi indicator status and connection.
How to add or remove a Wi-Fi network connection for Home Connect.
How to change appliance settings using the Home Connect app.
Enable automatic confirmation of settings via mobile device when near the hob.
How to update appliance software via the Home Connect app.
How Customer Service can perform remote diagnostics on the appliance.
Information on data transmitted to the Home Connect server.
Configure hood control settings and assign functions to the Favourite button.
Details of fan, automatic mode, and lighting control settings.
Recommended and unsuitable cleaning products for the hob.
Steps for cleaning the hob surface after use.
How to clean the frame around the hob.
Warnings for repairs and error displays (E, F codes).
Explanations for fault codes and display messages on the hob.
Description of normal operating noises from an induction hob.
Steps for unplugging, cutting cord, and environmentally friendly disposal.
Where to find product identification numbers for service.
Compliance statement specific to Great Britain regulations.
Test procedure for melting chocolate.
Test procedure for heating and keeping lentil stew warm.
Test procedure for making Béchamel sauce.
Test procedure for cooking rice pudding with lid.
Test procedure for cooking rice pudding without lid.
Test procedure for cooking rice.
Test procedure for roasting pork loin.
Test procedure for preparing crêpes.
Test procedure for deep-fat frying frozen chips.
This document describes the features, usage, and maintenance of a Siemens induction hob.
The induction hob is designed for preparing meals and drinks in private households and enclosed domestic environments, under supervision. It should not be used with external timers or separate remote controls unless specifically designed for such operation (EN 50615). Users with active implantable medical devices should consult their doctor to ensure compatibility. The appliance is safe for use by children aged 8 and over, and individuals with reduced physical, sensory, or mental abilities, provided they are supervised and instructed on safe use. Children under 8 should be kept away from the appliance and its power cable.
Fire Hazard: Leaving fat or oil unattended on the hob can lead to fires. Never attempt to extinguish a fire with water; instead, switch off the appliance and cover it with a lid or fire blanket. Flammable objects, aerosol cans, or hob covers should never be placed on or near the hot cooking surface. After each use, switch off the hob using the main switch.
Burn Hazard: The appliance and its parts, especially the hob surround, become hot during use. Exercise caution to avoid touching heating elements. Young children under 8 should be kept away. Metal objects (knives, forks, spoons, lids) placed on the hob can become very hot. Allow the appliance to cool down before cleaning.
Electric Shock Hazard: Improper repairs are dangerous and should only be carried out by trained specialist staff using genuine spare parts. If the power cord or appliance power cable is damaged, it must be replaced by the manufacturer or Customer Service. Do not operate a damaged appliance. If the surface is cracked, switch off the appliance at the fuse box to prevent electric shock. Do not use steam or high-pressure cleaners.
Injury Hazard: Saucepans may jump due to liquid between the base and hotplate; always keep them dry. Avoid using icy-cold cookware from the freezer. Long, pointed metallic objects should not be stored in drawers directly underneath the hob, as they could contact the fan and cause electric shock.
Suffocation Hazard: Keep packaging materials and small parts away from children.
To prevent damage, monitor cooking processes, especially with high-sugar foods, and immediately remove spills with a glass scraper. Use suitable cookware in good condition; defective cookware or cookware with melted enamel, copper, or aluminum bases can cause stains or blisters. Only use cleaning agents suitable for glass ceramic and clean the hob when cold. Avoid dropping hard or pointed objects on the glass, and lift cookware when moving it to prevent scratches. Do not use the hob as a work or storage surface. Never use frozen or empty cookware on a hot cooking zone. Do not place greaseproof paper, aluminum foil, plastic containers, or hot pot lids on the hob. Avoid placing hot cookware on the control panel or frame.
When cooking in a bain marie, ensure the cooking container does not directly touch the bottom of the water-filled pot, and only use heat-resistant cookware.
The packaging materials are environmentally friendly and recyclable. To save energy, select a cooking zone that matches the size of your pan and center the cookware. Use cookware with a base diameter equal to the hotplate's diameter. Covering saucepans with suitable lids reduces energy consumption. Lift lids infrequently, and use glass lids to monitor cooking without lifting. Use pots and pans with flat bases. Match cookware size to food quantity, and use minimal water. Turn down the power level early to avoid wasting energy.
Induction-suitable cookware must have a ferromagnetic base that is attracted by a magnet. The base must also match the cooking zone size. If cookware isn't detected, try a smaller cooking zone. All cookware bases should be perfectly flat and smooth. A "Cookware test" function is available to check suitability.
Recommended cookware includes stainless steel in a sandwich design for even heat distribution and quick heating. Ferromagnetic cookware (enamelled steel, cast iron, special induction stainless steel) also works well. Cookware with a base that is not fully ferromagnetic will only heat the ferromagnetic area, leading to uneven heat distribution. Cookware bases containing aluminum reduce the ferromagnetic area, resulting in less power emission and potentially insufficient heating. Cookware made from thin steel, glass, clay, copper, or aluminum is not suitable. Do not use adapter plates or heat empty, thin-based cookware, as it can become very hot.
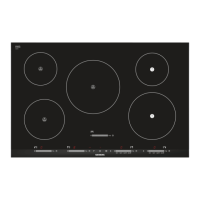
The control panel includes a main switch, cooking zone selectors, and a settings area. Keep the control panel clean and dry, and avoid placing cookware near displays or buttons to prevent overheating. Touch fields illuminate when the hob is switched on, indicating available functions such as powerBoost, timer functions, pause, childproof lock, favourite button, and connectivity. Indicators show switch-off timer, power levels, and childproof lock status.
For Home Connect functionality, buttons and displays become available once connected. The "▷" sensor allows accepting settings from another appliance.
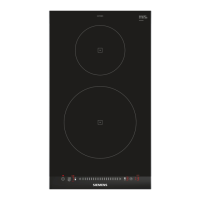
The hob features various cooking zones, with specified power measured using standard pots (IEC/EN 60335-2-6). Power may vary based on cookware size and material. A residual heat indicator (H for hot, h for warm) is present for each cooking zone; do not touch a zone if its indicator is lit.
Before first use, remove packaging and wipe the surface with a damp cloth. A list of recommended detergents is available on the Siemens website.
Induction technology offers benefits over conventional hobs, including time and energy savings, easier cleaning, and improved heat control due to direct heat generation in the cookware.
If the appliance is connected to Home Connect, some functions may be available via software updates, with more information on the Siemens website.
Switching on/off: Touch the main switch to turn on the hob. A signal sounds, and cooking zone symbols light up. The hob is ready when "0" appears in the cooking zone displays. If switched on within four seconds of being switched off, the hob restarts with previous settings. Touch the main switch again until displays go out to switch off. If all zones are off for over 59 seconds, the hob automatically switches off.
Setting Power Level: Each cooking zone has 17 power levels (1 to 5 with intermediate values). Select the desired cooking zone, then the power level in the settings area. If no cookware is present or suitable, the selected power level flashes, and the zone switches off after a period.
quickStart: If cookware is placed on a zone before switching on, the hob detects it and automatically selects the zone. Select the power level within 59 seconds, or the hob switches off.
Changing Power Level/Switching Off Zone: Select the cooking zone, then adjust the power level or set it to "0" to switch it off.
Cooking Tips: Stir puree, cream soups, or thick sauces occasionally. Preheat at power level 8-9. Reduce power when cooking with a lid once steam escapes. Place a lid on cookware after cooking. Follow pressure cooker instructions. Avoid overcooking to preserve nutrients; use the kitchen timer for optimal cooking times. Ensure oil does not smoke. Brown food in small portions. Use oven gloves for hot cookware. Refer to "Saving energy" for energy-efficient cooking.
Cooking recommendations tables provide suitable power levels and approximate cooking times for various foods, including poaching, simmering, boiling, steaming, braising, melting, heating/keeping warm, defrosting/heating, and braising/frying with a small amount of fat.
The favourite button (✩) allows quick access to two pre-assigned functions or cooking settings. To assign functions, use the Home Connect app. Briefly press ✩ for Function 1, or press and hold ✩ for Function 2. If no functions are assigned, ✩ switches off when the hob is turned on.
The hob offers a "Switch-off timer" and a "Timer." The "Switch-off timer" is default for the "00" button, but other functions can be assigned via Home Connect or basic settings.
Switch-off timer: Programs a cooking time for one or more zones, which automatically switch off when the time elapses. To activate, select a cooking zone and power level, press "00", set the time within 10 seconds, and confirm. To change or switch off, select the zone, press "00", and adjust the time or set to "0:00".
Timer: Activates a clock independently of cooking zones. It does not automatically switch off zones. To activate, assign the function to "00", press "00", and set the time. A signal sounds when the time elapses. To change or switch off, press "00" and adjust the time or set to "0:00".
The powerBoost function heats large quantities of water faster than power level 9. It's available for all cooking zones, provided no other zone on the same side is in use. If another zone is active, "b" and "9" flash, and power level 9 is set automatically.
Switching on/off: Select the cooking zone, touch "boost". The "boost" display lights up, and the function activates. To switch off, select the zone, touch "boost" again. The display goes out, and the zone returns to power level 9. The appliance may switch off this function to protect electronics.
The shortBoost function heats pans more quickly than power level 9. It should not be used with frying pans as it may damage the coating. It can be activated via Home Connect or the favourite button. Like powerBoost, it's available if no other zone on the same side is in use; otherwise, "P" and "9" flash, and power level 9 is set automatically.
Recommended applications: Do not place a lid on the pan, never leave pans unattended, only use cold pans with completely flat bases, and avoid thin-based pans.
Switching on/off: Assign the function to ✩. Select the cooking zone, touch ✩. "P" lights up, and the function activates. To switch off, select the cooking zone, then select a power level. "P" goes out, and the function switches off. This function automatically switches off after 30 seconds to avoid high temperatures.
This function melts chocolate or butter and keeps meals warm. It can be activated via Home Connect or the favourite button.
Switching on/off: Assign the function to ✩. Select the cooking zone, touch ✩. "L" lights up, and the function activates. To switch off, select the cooking zone, then set to "0". "L" goes out, and the function switches off.
The childproof lock prevents accidental switching on of the hob.
Switching on: With the hob off, touch "①", then touch and hold "00" for 4 seconds. "00" lights up for 10 seconds, and the hob is locked.
Deactivating: With the hob on, touch "①", then touch and hold "00" for 4 seconds. The lock is released.
Automatic Childproof Lock: This can be activated in basic settings to automatically lock the hob every time it's switched off.
The pause function stops and resumes active cooking processes for up to 10 minutes without changing settings. It can be used to clean the control panel.
Activating: Press "00". "II" lights up in the cooking zone displays. All active processes stop, and settings are retained.
Deactivating: Touch "00". The function switches off, and cooking processes resume. The cooking zone automatically switches off after approximately 10 minutes.
This safety function activates if a cooking zone operates for an extended period without settings changes. The cooking zone displays "F8" and switches off. The time depends on the power level (e.g., 10 hours for 1.0-1.5, 1 hour for 8.0-9.0). Press any button to switch on the cooking zone.
The hob's basic settings can be configured to meet user needs. These include:
Accessing Basic Settings: With the hob off, switch on, then touch and hold "00" for 4 seconds within 10 seconds. Touch "00" to access settings. "00" and "F" light up. Touch "00" repeatedly to cycle through settings. Select the desired setting in the settings area. Touch and hold "00" for 4 seconds to save.
Discarding Changes: Touch "①" to discard changes without saving.
This function tests cookware quality, which significantly impacts cooking speed and results. Before testing, ensure the cookware base diameter matches the cooking zone.
Performing Test: Place cookware with approx. 200 ml water (at room temperature) on the center of the best-fitting cooking zone. Access basic settings and select "c 12". The display shows the result:
The hob is Home Connect-capable, allowing control via a mobile device. The Home Connect app adjusts basic settings and monitors operating status. Home Connect services are not available in every country.
Setting Up Home Connect: When first switched on, the appliance prompts to set up the home network. "▷" lights up. Touch "▷" to begin and follow app instructions. To end, switch off the hob. Settings can be adjusted later.
Wi-Fi Home Network:
Changing Settings via App: Select settings in the app and send to the hob. Confirm on the hob by pressing "▷". To discard, press any other touch field.
Automatic Presence Detection: If activated via the Home Connect app, parameters sent from a mobile device can be confirmed directly on the hob when the user is near. Requires hob, mobile device, and Bluetooth to be connected.
Software Update: The appliance's software can be updated via the app for optimization, troubleshooting, or security. Updates are downloaded and installed via the app. The appliance can be used during download but not during installation. Security updates are recommended as soon as possible.
Remote Diagnostics: Customer Service can access the appliance remotely if connected to the Home Connect server and if Remote Diagnostics is available in the country.
Data Protection: Initial registration transmits appliance identification, security certificate, software/hardware version, and previous factory reset status to the Home Connect server. This is only required for first-time use of Home Connect functions. Data protection information is available in the app.
If the hob and extractor hood are Home Connect-compatible, they can be connected via the Home Connect app. Controls on the extractor hood take priority.
Controlling the Extractor Hood via the Hob: In basic settings, adjust the extractor hood's behavior based on hob or individual cooking zone activity.
Connecting the Fan: Assign the hood function to the favourite button. Then choose between setting the fan, automatic mode, or hood lighting.
Setting the Fan: Press ✩, select the desired fan setting (HOO for off, HO1-HO3 for settings 1-3, HP1-HP2 for intensive modes, H-A for automatic mode). Press ✩ again to switch off.
Switching on Automatic Mode: Press ✩ to switch on automatic mode, and ✩ again to switch off.
Setting the Hood Lighting: Press ✩ to switch on lighting, and ✩ again to switch off.
Overview of Hood Control Settings: Basic settings allow adjusting fan behavior (automatic start-up, run-on after switching off) and lighting behavior (automatic on/off). These settings are displayed only when the appliance is connected to the extractor hood.
Regular cleaning and maintenance ensure efficient operation.
Cleaning Products: Obtain suitable cleaning products and glass scrapers from customer service or retailers. Avoid unsuitable or abrasive cleaning products, undiluted detergents, dishwasher detergents, oven sprays, stain removers, abrasive sponges, and high-pressure/steam cleaners. Do not clean while the hob is hot.
Cleaning the Hob: Clean after every use to prevent burnt-on residues. If sugar stains, rice starch, plastic, or aluminum foil are present, do not let the hob cool down. Remove heavy soiling with a glass scraper. Clean with a glass ceramic cleaning agent, following instructions on the packaging. A special sponge for glass ceramic can improve results. Keeping cookware bases clean helps maintain the hob surface.
Cleaning the Hob Surround: Clean the hob frame with hot soapy water and a soft cloth. Wash new sponge cloths thoroughly. Dry with a soft cloth. Do not use a glass scraper.
Minor faults can often be rectified by the user.
Warnings: Improper repairs are dangerous and should only be carried out by trained specialist staff using genuine spare parts. If the power cord or appliance power cable is damaged, it must be replaced by the manufacturer or Customer Service. If "E" or "F" appears, press and hold the sensor for the respective cooking zone and read the fault code. If a fault code is not listed, disconnect the hob from power, wait 30 seconds, then reconnect. If the display reappears, contact customer service.
Information on the Display Panel:
Normal Noises: Induction hobs may produce buzzing, crackling, hissing, fan, or rhythmic noises.
Disposing of Old Appliance: Valuable raw materials can be recycled. Unplug, cut the power cord, and dispose of the appliance environmentally. Information on disposal methods is available from specialist dealers or local authorities. The appliance is labeled according to European Directive 2012/19/EU (WEEE) for proper return and recycling.
Function-relevant genuine spare parts are available from Customer Service for at least 10 years from the market placement date in the European Economic Area. Warranty information is available from after-sales service, retailers, or the website. When contacting Customer Service, provide the product number (E-Nr.), production number (FD), and consecutive numbering (Z-Nr.), found on the rating plate (appliance certificate, lower section of hob, or glass ceramic) or in basic settings.
This product includes free and open source software components. License information is stored on the appliance and accessible via the Home Connect app ("Profile -> Legal information -> Licence Information") or the brand product website. Source code is available upon request from ossrequest@bshg.com.
BSH Hausgeräte GmbH declares that the appliance with Home Connect functionality conforms to Directive 2014/53/EU and relevant statutory requirements.
Recommended settings for test institutes using Siemens cookware sets.
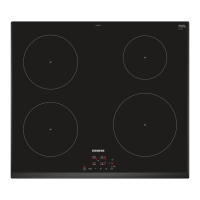
| Number of Cooking Zones | 4 |
|---|---|
| Control Type | Touch Control |
| Boost Function | Yes |
| Safety Features | Child Lock |
| Timer | Yes |