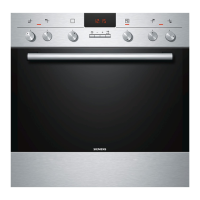
Before using for the first time en
9
Accessories Use
Wire rack ¡ Baking tins
¡ Ovenproof dishes
¡ Cookware
¡ Meat, e.g. roasting joints or steak
¡ Frozen meals
Universal pan ¡ Moist cakes
¡ Biscuits
¡ Bread
¡ Large roasts
¡ Frozen meals
¡ Catching dripping liquids, e.g. fat when
grilling food on the wire rack.
Baking tray ¡ Tray bakes
¡ Sponge cake, simple
Using the accessory
Always slide the accessory into the cooking compart-
ment correctly. This is the only way that you can re-
move the accessory halfway without it tipping.
1.
Insert the accessory between the two guide rods for
a shelf position.
Wire rack Insert the wire rack with the open
side facing the appliance door and
the curved lip facing downwards.
Tray
E.g. univer-
sal pan or
baking tray
Slide the tray in with the sloping edge
facing the appliance cover.
2.
To place the accessory at the shelf positions with
the pull-out rails, pull out the pull-out rails.
Wire rack
or baking
tray
Position the accessory so that its
edge is behind the lug on the pull-
out rail.
Note:The pull-out rails lock in place when they are
fully pulled out. Gently push the pull-out rails back
into the cooking compartment.
3.
Slide the accessory all the way in, making sure that
the accessory does not touch the appliance door.
Note:Take any accessories that you will not be using
out of the cooking compartment while the appliance is
in operation.
Other accessories
You can purchase other accessories from our after-
sales service, specialist retailers or online.
You will find a comprehensive range of products for
your appliance in our brochures and online:
siemens-home.bsh-group.com
Accessories vary from one appliance to another. When
purchasing accessories, always quote the exact
product number (E no.) of your appliance.
You can find out which accessories are available for
your appliance in our online shop or from our after-
sales service.
Before using for the first time
5 Before using for the first time
Configure the settings for initial start-up. Clean the ap-
pliance and accessories.
5.1 Initial configuration
You have to implement settings for the initial configura-
tion before you can use your appliance.
Setting the time
Once the appliance has been connected to the mains
or after a power cut, the time flashes in the display. The
time starts at "12:00". Set the current time.
Requirement:The function selector must be set to the
off position.
1.
Use or to set the time.
2.
Press .
a The time that is set appears in the display.
 Loading...