EasyManua.ls Logo

Siemens iQ300 SN23EW04MG - User Manual

Siemens iQ300 SN23EW04MG
2 pages
Print Icon
To Next Page IconTo Next Page
Loading...
9001925368 (040226) SN23EW04MG
*9001925368*
Quick reference guide  Dishwasher
en
Before using for the first time, read the instruction manual and the safety information it contains.
Setting up Home Connect
Tip:Connect your appliance to a mobile device. You can con-
veniently change all settings using the HomeConnect app.
1.
Install the HomeConnect app on your mobile device and fol-
low the instructions.
2.
Scan the QR code with the HomeConnect
app.
Overview of water hardness settings
You can find an overview of the
water hardness values that can
be selected here.
A table of country-specific units
can be found in the instruction
manual.
Hardness
range
mmol/l Setting
value
Soft 0 - 1.1 H00
Soft 1.2 - 1.4 H01
Medium 1.5 - 1.8 H02
Medium 1.9 - 2.1 H03
Medium 2.2 - 2.9 H04
Hard 3.0 - 3.7 H05
Hard 3.8 - 5.4 H06
Hard 5.5 - 8.9 H07
Setting the water softening sys-
tem
1.
Press ⁠.
2.
To open the basic settings, press
for 3 seconds.
a The display shows Hxx.
a The display shows ⁠.
3.
Press repeatedly until the right
water hardness has been set.
4.
To save the settings, press
for 3 seconds.
Adding special salt
To avoid damage to the appliance, only add special
salt to the dispenser for special salt just before the
programme starts.
1.
Unscrew the lid of the dispenser for special salt
and remove.
2.
On initial start-up: Fill the dispenser right up with
water.
3.
Add the special salt to the
dispenser. The water in the
dispenser is displaced and
forced out. Never add de-
tergent.
4.
Place the lid back on the dispenser and turn to
close.
Adding rinse aid
1.
Press the catch on the lid
of the dispenser for rinse
aid and lift ⁠.
1
2
2.
Add rinse aid up to the
max mark.
max
3.
Close the lid of the dispenser for rinse aid.
a The lid clicks into position.
How to use your appliance
1.
Load the tableware.
Only clean tableware that is suitable for dish-
washers. Remove large remnants of food from
the tableware. Check that the spray arms can ro-
tate freely.
2.
Add detergent.
3.
Switch on the appliance ⁠.
4.
Select the programme.
5.
Start the programme ⁠.
6.
Remove the tableware at the end of the pro-
gramme.
7.
To cancel the programme, press for
approx. 4seconds.
The programme is cancelled and ends after ap-
prox. 1minute.
Programmes
The programme data has been meas-
ured in the laboratory according to
European standard EN60436.
The consumption figures depend on
the programme and additional func-
tion selected.
The running time will change if the
rinse aid system is switched off or
rinse aid needs to be added.
Programme 1) Duration [h:min]
2) Energy consump-
tion [kWh]
3) Water [l]
Intensive 70°
1) 2:05 -2:15
2) 1.300 -1.400
3) 11.5 -13.5
Auto 45-65°
1) 1:40-2:45
2) 0.900-1.500
3) 7.0-15.5
Eco 50°
1) 3:35
2) 0.645
3) 9.0
Speed 65°
1) 1:00
2) 1.300
3) 10.5
Speed 45°
1) 0:29
1
2) 0.800
3) 10.5
Machine Care
1) 2:10
2) 1.350
3) 15.2
Favourite
1) 0:15-0:15
2) 0.050-0.050
3) 4.0-4.0
1
half standard load
Adding detergent
1.
Add the detergent to the
dry detergent dispenser.
15 ml
25 ml
50 ml
2.
Close the lid of the deter-
gent dispenser.
a The lid clicks into position.
Question and Answer IconNeed help?

Do you have a question about the Siemens iQ300 SN23EW04MG and is the answer not in the manual?

Summary

Setting up Home Connect and Appliance Configuration

Water Hardness Settings Overview

Provides an overview of water hardness values that can be selected for the appliance.

Setting the Water Softening System

Guides users on how to adjust the water softening system according to water hardness.

Appliance Programmes

Details programme data including duration, energy, and water consumption.

Adding Detergent, Salt, and Rinse Aid

Adding Special Salt

Instructions for adding special salt to the dispenser to prevent appliance damage.

Adding Rinse Aid

Procedure for filling the rinse aid dispenser up to the maximum mark.

Adding Detergent

Guidance on adding detergent to the dry detergent dispenser.

How to Use Your Appliance

Cleaning and Maintenance

Cleaning Filters

Steps for checking and cleaning the filter system after each wash.

Cleaning Spray Arms

Instructions for removing, cleaning, and reassembling spray arms.

Cleaning Wastewater Pump

Procedure for cleaning the wastewater pump and impeller area.

Troubleshooting Appliance Faults

Water Supply Issues

Diagnoses and resolves faults related to the water supply hose and tap.

Wastewater or Blockage Faults

Troubleshoots issues with the wastewater pump, filters, and spray arm rotation.

Dishware and Programme Faults

Addresses faults like streaks, rust spots, and programme interruptions.

Overview

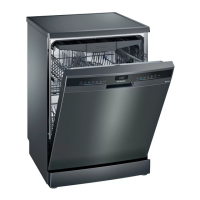
This document provides a comprehensive guide for operating and maintaining a dishwasher, covering its functions, usage, and troubleshooting.

Function Description

The dishwasher is designed to efficiently clean tableware using various programmes and settings. It features a water softening system to adapt to different water hardness levels, ensuring optimal cleaning performance and preventing limescale buildup. The appliance includes dispensers for special salt and rinse aid, which are crucial for effective washing and drying. Spray arms distribute water and detergent throughout the wash cabinet, while a filter system captures food remnants to prevent clogging. The Home Connect feature allows for remote control and monitoring via a mobile device, enhancing convenience and offering additional functionalities.

Usage Features

Setting up Home Connect: To begin using the smart features, users need to install the Home Connect app on their mobile device and follow the in-app instructions. A QR code is provided in the manual to facilitate easy connection. This feature enables convenient control and adjustment of settings from a smartphone or tablet.

Water Softening System: The dishwasher offers a water softening system with multiple settings (H00 to H07) to accommodate different water hardness levels, ranging from soft to hard. Users can consult a table of country-specific units in the instruction manual to determine the appropriate setting. To adjust this:

  1. Press the designated button.
  2. Press "Setup 3 sec." for 3 seconds to access basic settings. The display will show "Hxx" and then "set."
  3. Repeatedly press "Start" until the desired water hardness setting is displayed.
  4. Press "Setup 3 sec." for 3 seconds to save the setting.

Adding Special Salt: Special salt is essential for the water softening system. To add salt:

  1. Unscrew and remove the lid of the special salt dispenser.
  2. For initial start-up, fill the dispenser with water.
  3. Add special salt until the dispenser is full. The water will be displaced. Never add detergent to this dispenser.
  4. Replace the lid and turn to close. This should be done just before a programme starts to prevent damage to the appliance.

Adding Rinse Aid: Rinse aid helps with drying and prevents water spots. To add rinse aid:

  1. Press the catch on the lid of the rinse aid dispenser and lift it open.
  2. Add rinse aid up to the "max" mark.
  3. Close the lid until it clicks into position.

Adding Detergent: Detergent is crucial for cleaning. To add detergent:

  1. Add the appropriate amount of dry detergent to the dispenser.
  2. Close the lid until it clicks into position.

Programmes: The dishwasher offers a variety of programmes tailored for different cleaning needs:

  • Intensive 70°: For heavily soiled items.
  • Auto 45-65°: Automatically adjusts settings based on soil level.
  • Eco 50°: An energy-efficient programme.
  • Speed 65° / Speed 45°: Faster programmes for lightly soiled items.
  • Machine Care: A dedicated programme for cleaning the dishwasher itself.
  • Favourite: Allows users to save a preferred programme or combination of settings.

Programme data, including duration, energy consumption, and water usage, are measured according to European standard EN 60436. These figures may vary depending on selected additional functions and if the rinse aid system is off or needs refilling.

Operating the Appliance:

  1. Load tableware: Ensure only dishwasher-safe items are loaded. Remove large food remnants and check that spray arms can rotate freely.
  2. Add detergent.
  3. Switch on the appliance.
  4. Select the programme.
  5. Start the programme.
  6. Remove tableware once the programme finishes.
  7. To cancel a programme: Press "Reset 4 sec." for approximately 4 seconds. The programme will cancel and end after about 1 minute.

Maintenance Features

Cleaning Filters: Regular filter cleaning is essential for optimal performance.

  1. After each wash, check filters for residue.
  2. Turn the coarse filter anti-clockwise and remove the filter system.
  3. Pull down to remove the micro filter.
  4. Press the locking catches together and lift out the coarse filter.
  5. Clean all filter elements under running water.
  6. Re-assemble the filter system, ensuring the arrow markings match up, and turn the coarse filter clockwise to secure it.

Cleaning Spray Arms: Blocked spray arm nozzles can impair cleaning.

  1. Unscrew the upper spray arm and pull it down to remove.
  2. Pull up the lower spray arm to remove.
  3. Check outlet nozzles for blockages and remove any foreign bodies under running water.
  4. Insert the lower spray arm until it clicks into position.
  5. Insert the upper spray arm and screw it firmly in place.

Cleaning Wastewater Pump: If the wastewater pump is blocked, the appliance may not drain properly.

  1. Disconnect the appliance from the power supply.
  2. Remove the filter system.
  3. Scoop out any water.
  4. Prise off the pump cover using a spoon and grip it by the crosspiece.
  5. Lift the pump cover inwards at an angle and remove.
  6. Remove any food remnants or foreign bodies from the impeller area.
  7. Insert the pump cover and press it down until it clicks into position.
  8. Install the filter system.

Troubleshooting

The manual provides solutions for common faults:

  • E:32-00 or water supply indicator lights up:
    • Cause: Kinked supply hose, water tap turned off, jammed/furred water tap, or blocked filters in the water connection.
    • Solution: Straighten hose, turn on tap, check flow rate (at least 10 l/min), clean filters in the supply hose connection.
  • E:61-02 lights up:
    • Cause: Blocked wastewater pump or loose pump cover.
    • Solution: Clean the wastewater pump, secure the pump cover.
  • E:92-40 lights up or remnants of food on tableware:
    • Cause: Soiled/blocked filters, tableware placed too close together, blocked spray arm rotation/nozzles, incorrect filter insertion, or weak washing programme.
    • Solution: Clean filters, arrange tableware with sufficient space, clean spray arms, insert filters properly, select a more intensive washing programme.
  • Removable streaks on glasses/cutlery or metallic appearance:
    • Cause: Too much rinse aid dispensed or no rinse aid added.
    • Solution: Set rinse aid system to a lower setting, add rinse aid.
  • Rust spots on cutlery:
    • Cause: Cutlery not sufficiently rust-resistant or washed with rusting items.
    • Solution: Use rust-resistant tableware, avoid washing with rusting items.
  • Detergent residue in dispenser/tablet tray:
    • Cause: Spray arms blocked by tableware.
    • Solution: Check spray arms for free rotation.
  • All LEDs light up/flash or programme doesn't continue:
    • Cause: Electronics fault.
    • Solution: Press main switch button for approx. 4 seconds to reset and restart the appliance.

Siemens iQ300 SN23EW04MG Specifications

General IconGeneral
TypeFreestanding
Energy Efficiency ClassE
Noise Level44 dB
Number of Place Settings13
Water Consumption per Cycle9.5 l
Energy Consumption per 100 cycles94 kWh
Number of Washing Programs6
Drying SystemHeat exchanger
AquaStop FunctionYes
Delayed Start TimerYes
Delayed Start (max)24 hours
Remaining Time IndicationYes
Salt IndicatorYes
Rinse Aid IndicatorYes
Adjustable FeetYes
Height Adjustment FeetYes
Control Panel ColourWhite
Drying ClassA
Half Load OptionYes
Dimensions (HxWxD)845 x 600 x 600 mm

Related product manuals